> ## Documentation Index
> Fetch the complete documentation index at: https://docs.flowx.ai/llms.txt
> Use this file to discover all available pages before exploring further.
# Generating documents
> Generate new documents from custom templates that can be pre-filled with data from the current process instance.
export const release_0 = "5.10"
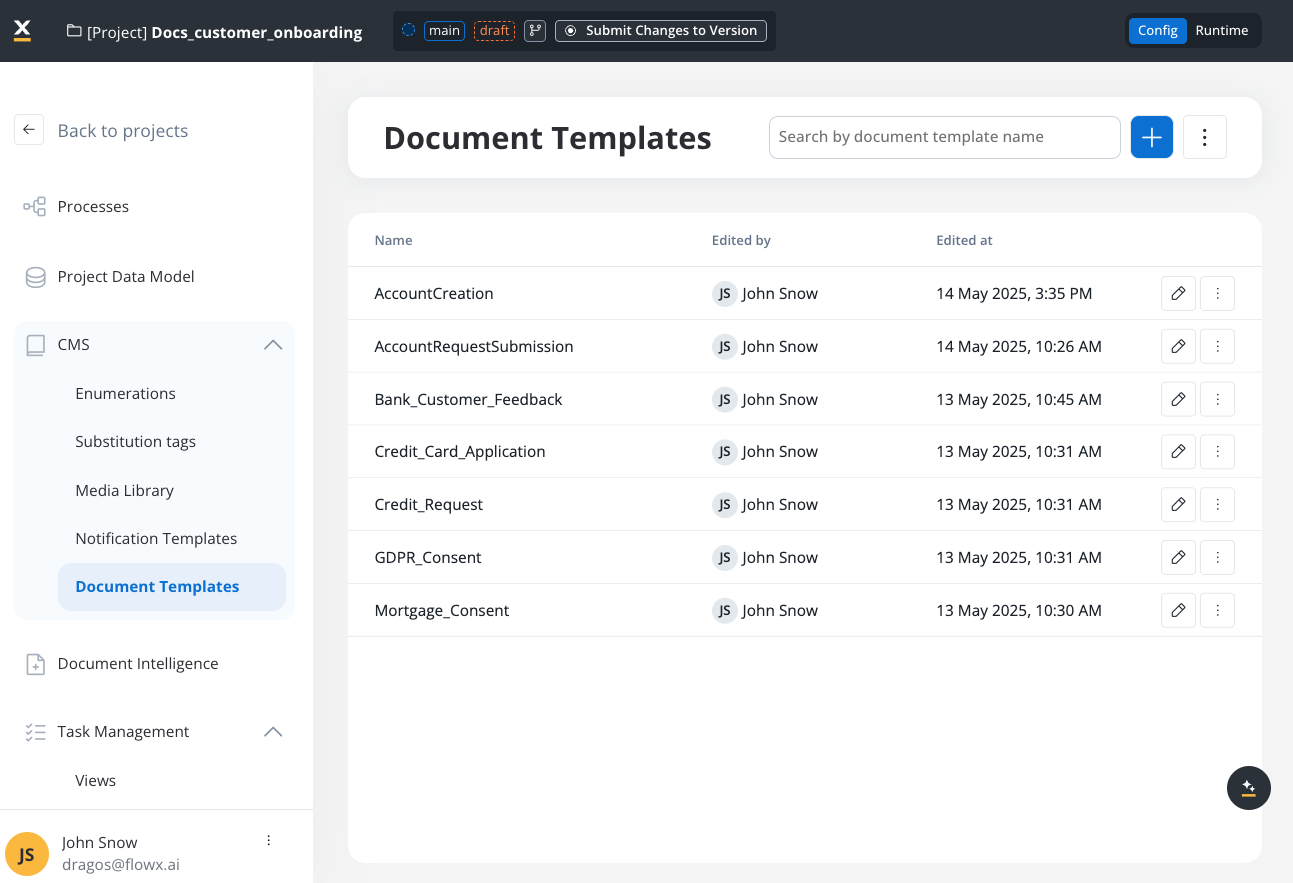
Configure document templates using the [**WYSIWYG editor**](../../../plugins/wysiwyg). Access and manage your templates through the **Document Templates** section in your Project in [**FlowX Designer**](../../../../flowx-designer/overview).
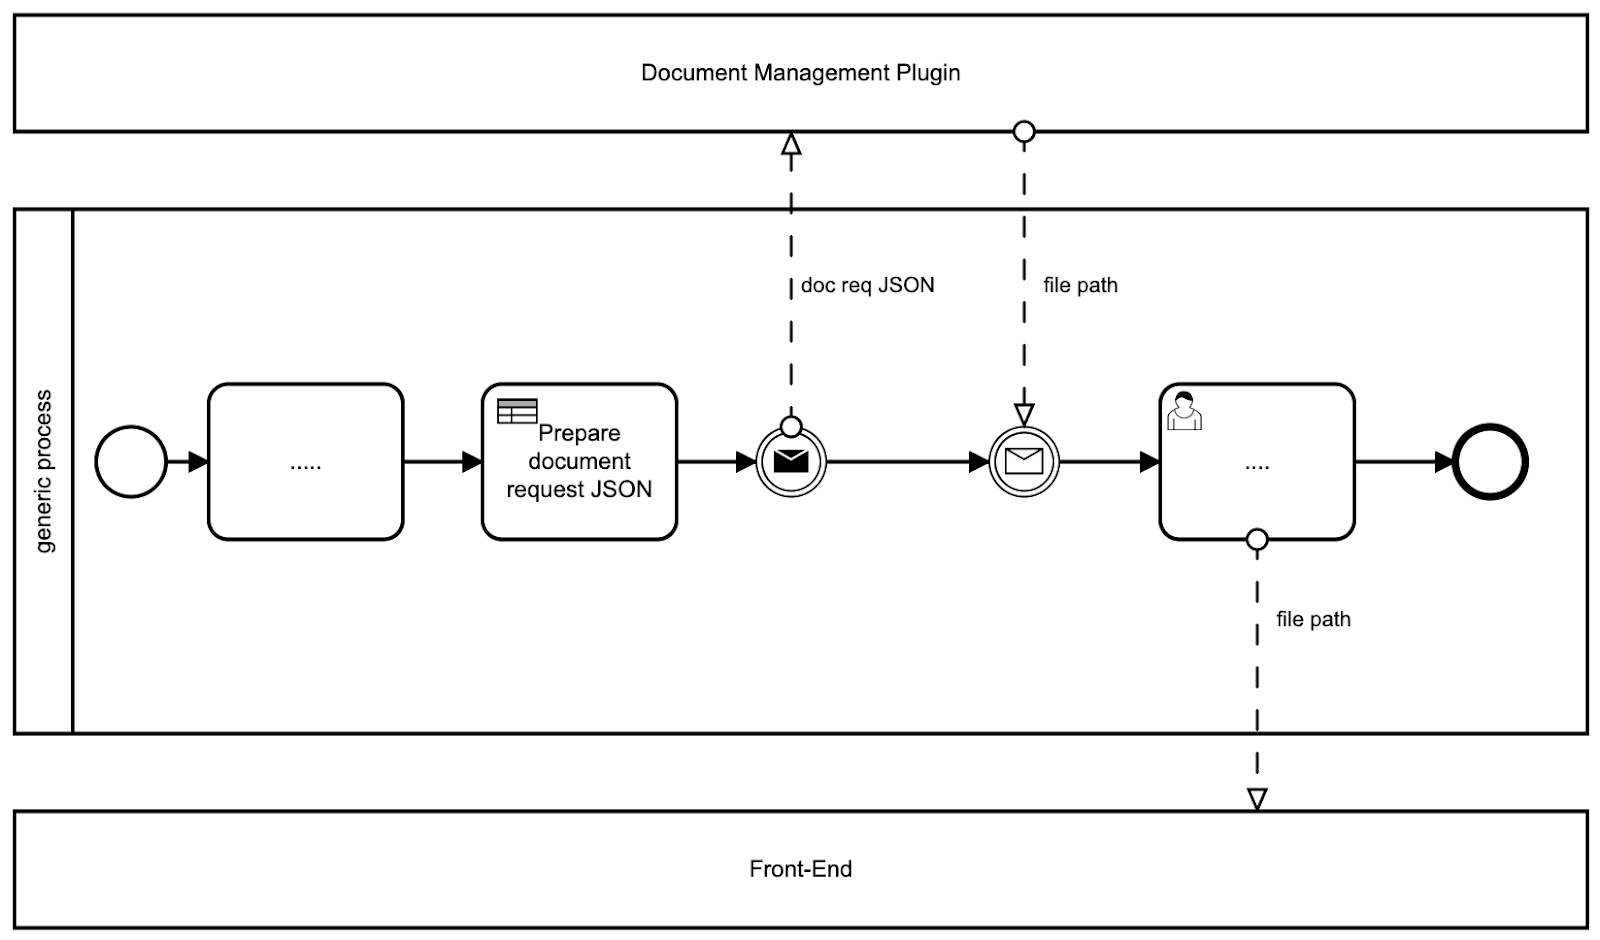
## Generating documents from HTML templates
The Documents plugin generates documents from predefined templates. This guide focuses on generating documents using HTML templates.
## Before you begin
1. **Verify access permissions**: Ensure you have the necessary [permissions to manage document templates](../../../../../setup-guides/access-management/workspaces-access-rights).
2. **Check Kafka configuration**: Confirm that Kafka is properly configured and accessible:
* The document plugin relies on Kafka for communication between nodes
* Familiarize yourself with the required Kafka topics (detailed later in this guide)
## Creating an HTML template
1. Access the [**WYSIWYG editor**](../../../plugins/wysiwyg) through **FlowX Designer → Plugins → Document templates**
2. Create or import your HTML template
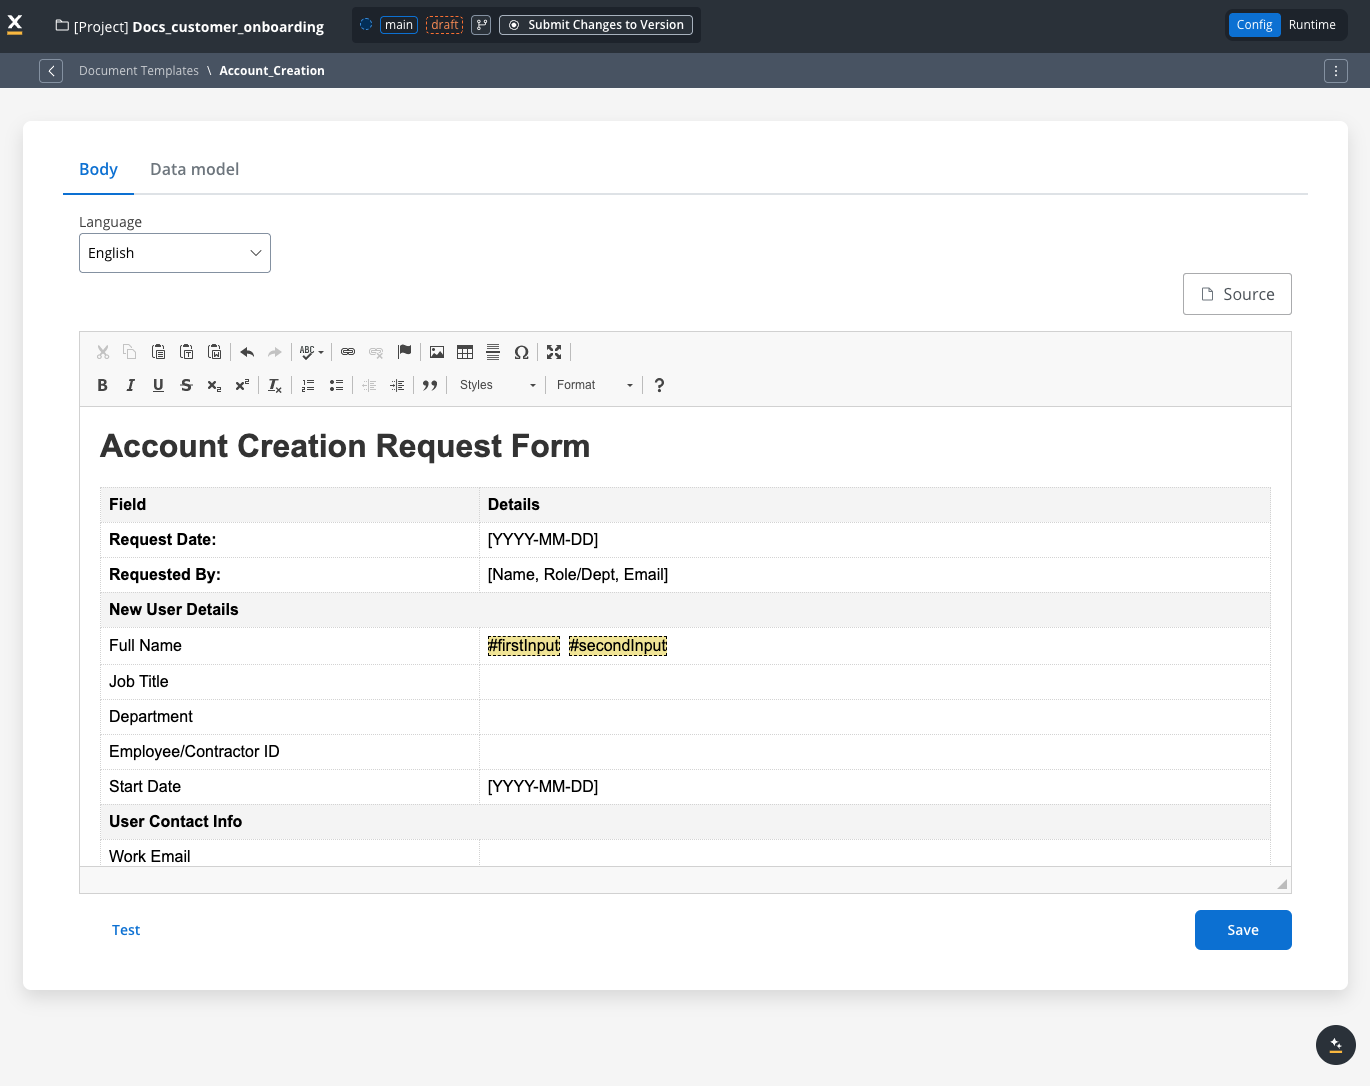
For detailed template management instructions:
For comprehensive guidance, take the FlowX.AI Academy course: [**Creating a Document Template in Designer**](https://academy.flowx.ai/module/create-document-templates-flowxai-designer).
## Implementing document generation in a process
Let's build a document generation flow that creates personalized documents based on user input:
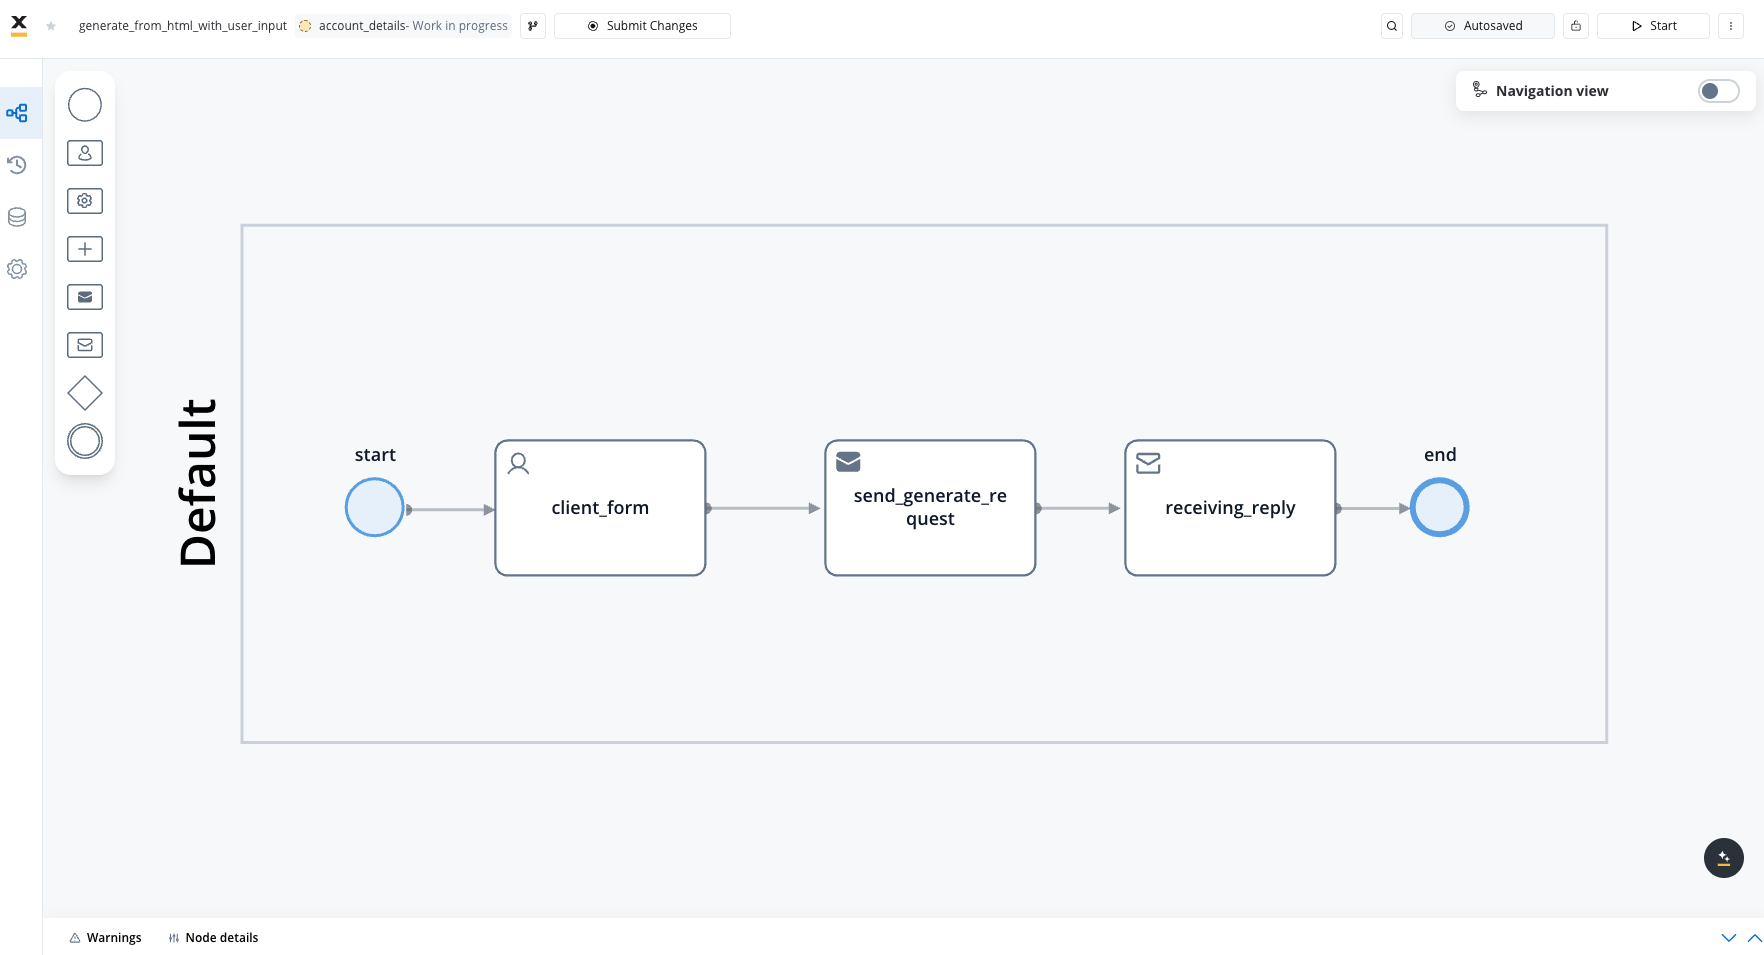
### Step 1: Create a user input form
1. Add a **User Task** node to your process
2. Configure UI elements to collect the information needed for your document:
* Input fields (text, numbers, dates, etc.)
* Make sure to set appropriate keys for each field that match your template variables
### Step 2: Configure the document generation request
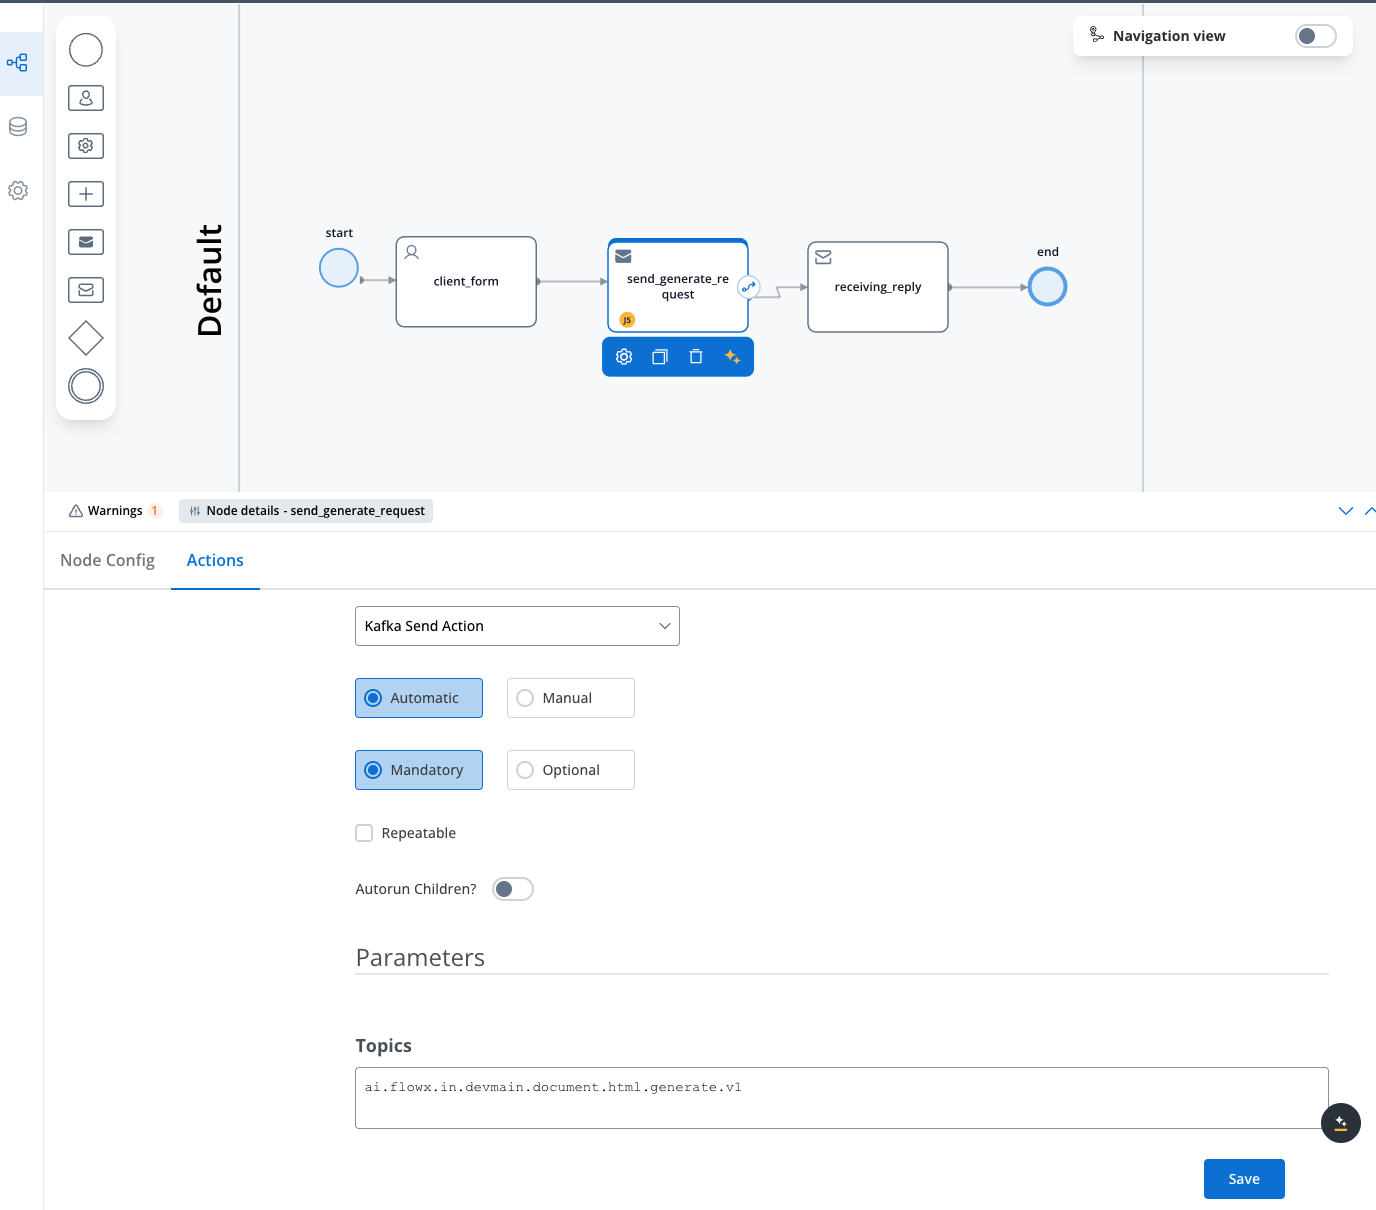
1. Add a **Send Message Task (Kafka)** node
2. Configure the Kafka send action with the appropriate topic:
* For HTML template generation, use `ai.flowx.plugin.document.trigger.generate.html.v1` (or your configured equivalent, set via `KAFKA_TOPIC_DOCUMENT_GENERATE_HTML_IN`)
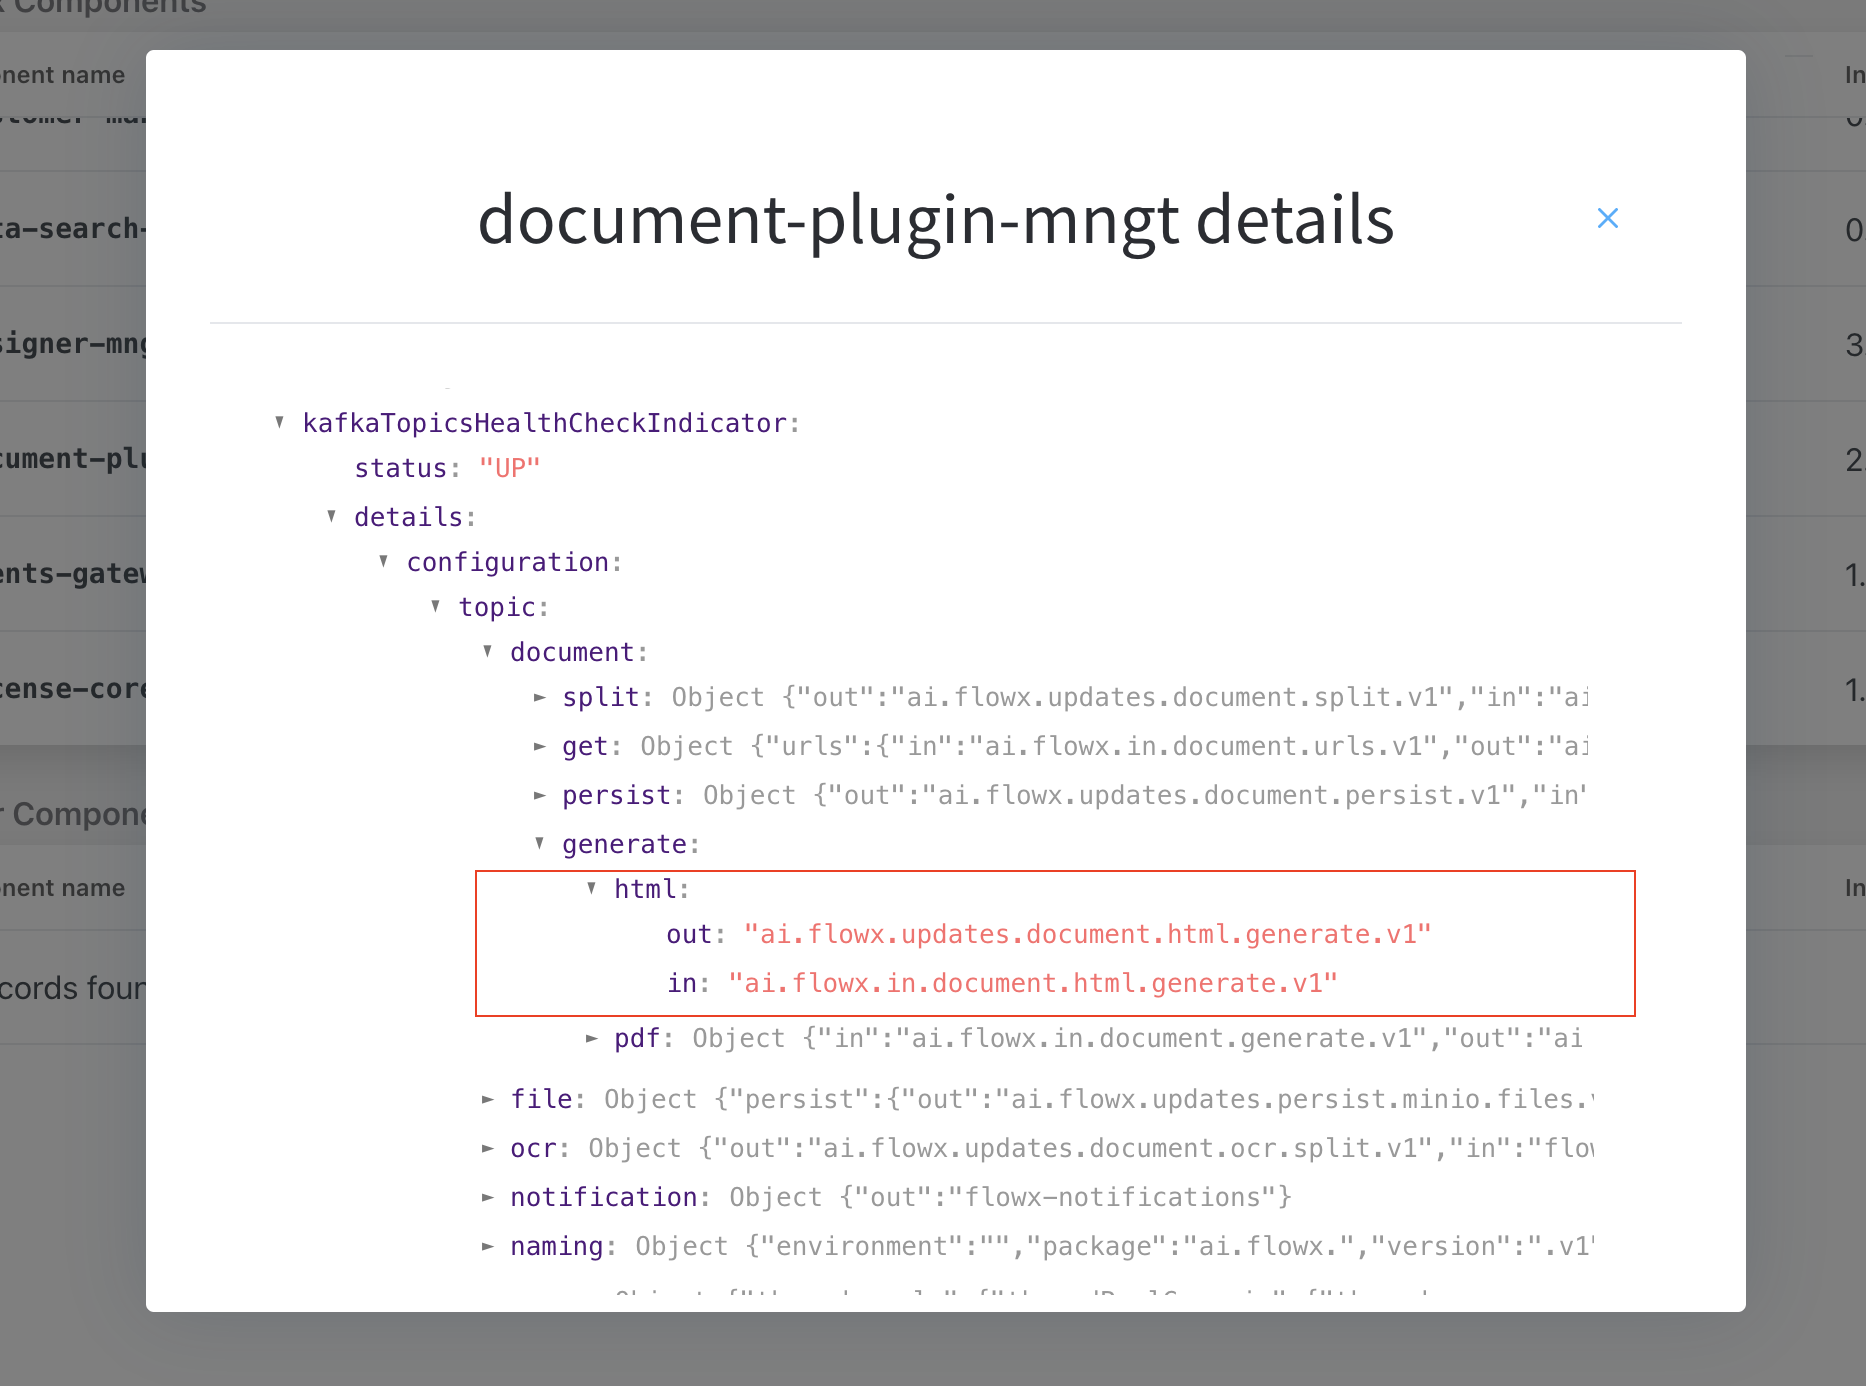
To find your environment's configured topics:
1. Navigate to **FlowX Designer → Platform Status**
2. Find the **document-plugin-mngt** component and click the eye icon
3. Expand `KafkaTopicsHealthCheckIndicator → details → configuration → topic → document → generate`
4. Look under HTML and PDF sections for your in/out topics
3. Create the request payload with the following structure:
```json theme={"dark"}
{
"documentList": [
{
"customId": "ClientsFolder",
"templateName": "AccountCreation",
"language": "en",
"data": {
"firstInput": "${application.client.firstName}",
"secondInput": "${application.client.lastName}",
"thirdInput": "${application.client.accountType}"
},
"includeBarcode": false
}
]
}
```
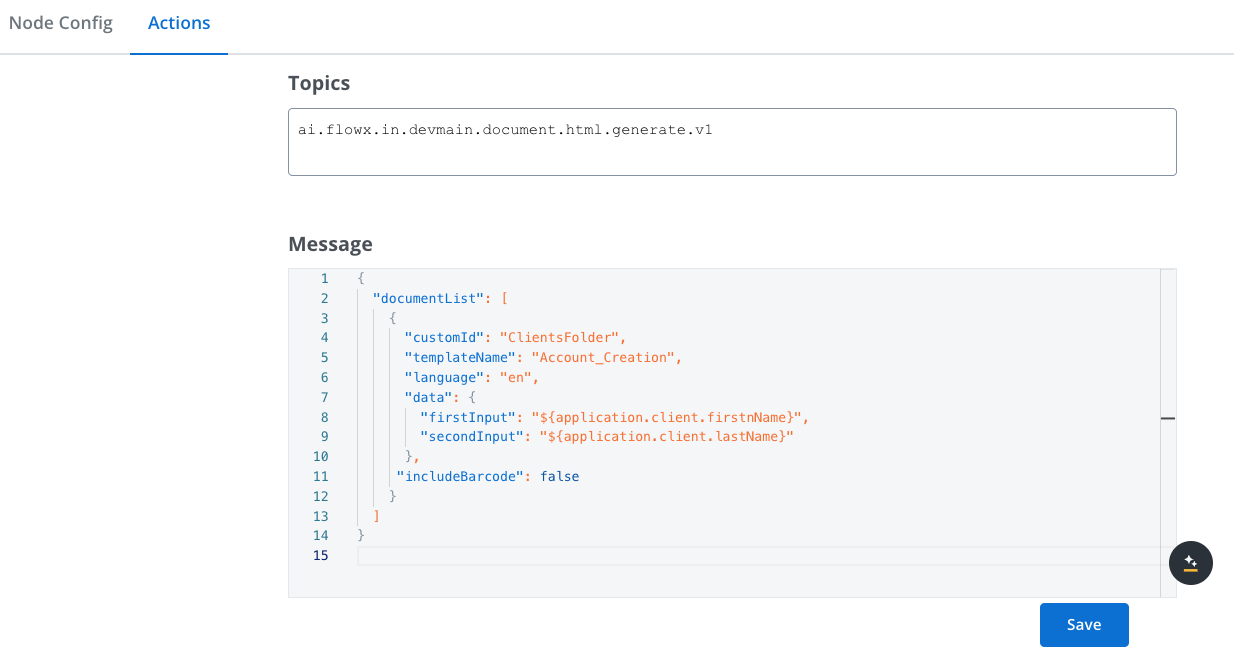
Key parameters:
* **customId**: Folder name where the file will be saved
* **templateName**: Name of the template defined in Document templates
* **language**: Must match the language configured on the template
* **data**: Key-value pairs mapping template variables to process data
* **includeBarcode**: Set to true if you need a barcode on the document
When using templates in a process, the system uses default values from the default project language. For example, if English is your default project language, the template will use values from the English version.
To check your default language: **FlowX Designer → Project Settings → Languages**
### Generating DOCX output
SaaS · {release_0}
**Available on SaaS with FlowX.AI {release_0}.** This feature is live on managed (SaaS) deployments now. Self-hosted deployments receive it with the next LTS release.
By default, generated documents are PDF files. To generate a DOCX file instead, add `outputFormat` to a document entry in the request payload:
```json theme={"dark"}
{
"documentList": [
{
"customId": "ClientsFolder",
"templateName": "AccountCreation",
"language": "en",
"outputFormat": "DOCX",
"data": {
"firstInput": "${application.client.firstName}"
}
}
]
}
```
* **outputFormat**: `PDF` or `DOCX`. When omitted, the document is generated as PDF.
* The generated DOCX preserves the template's styles, data, and images, and is stored and returned the same way as a PDF.
* **includeBarcode** applies to PDF output only; it is ignored when generating DOCX.
When testing a template in **FlowX Designer → Plugins → Document templates**, use the **Output format** dropdown in the test modal to download the test result as PDF or DOCX.
### Step 3: Receive the generated document
1. Add a **Receive Message Task (Kafka)** node
2. Configure it with:
* The response topic: `ai.flowx.engine.receive.plugin.document.generate.html.results.v1` (or your configured equivalent, set via `KAFKA_TOPIC_DOCUMENT_GENERATE_HTML_OUT`)
* Key for storing the response: `generatedDocuments`
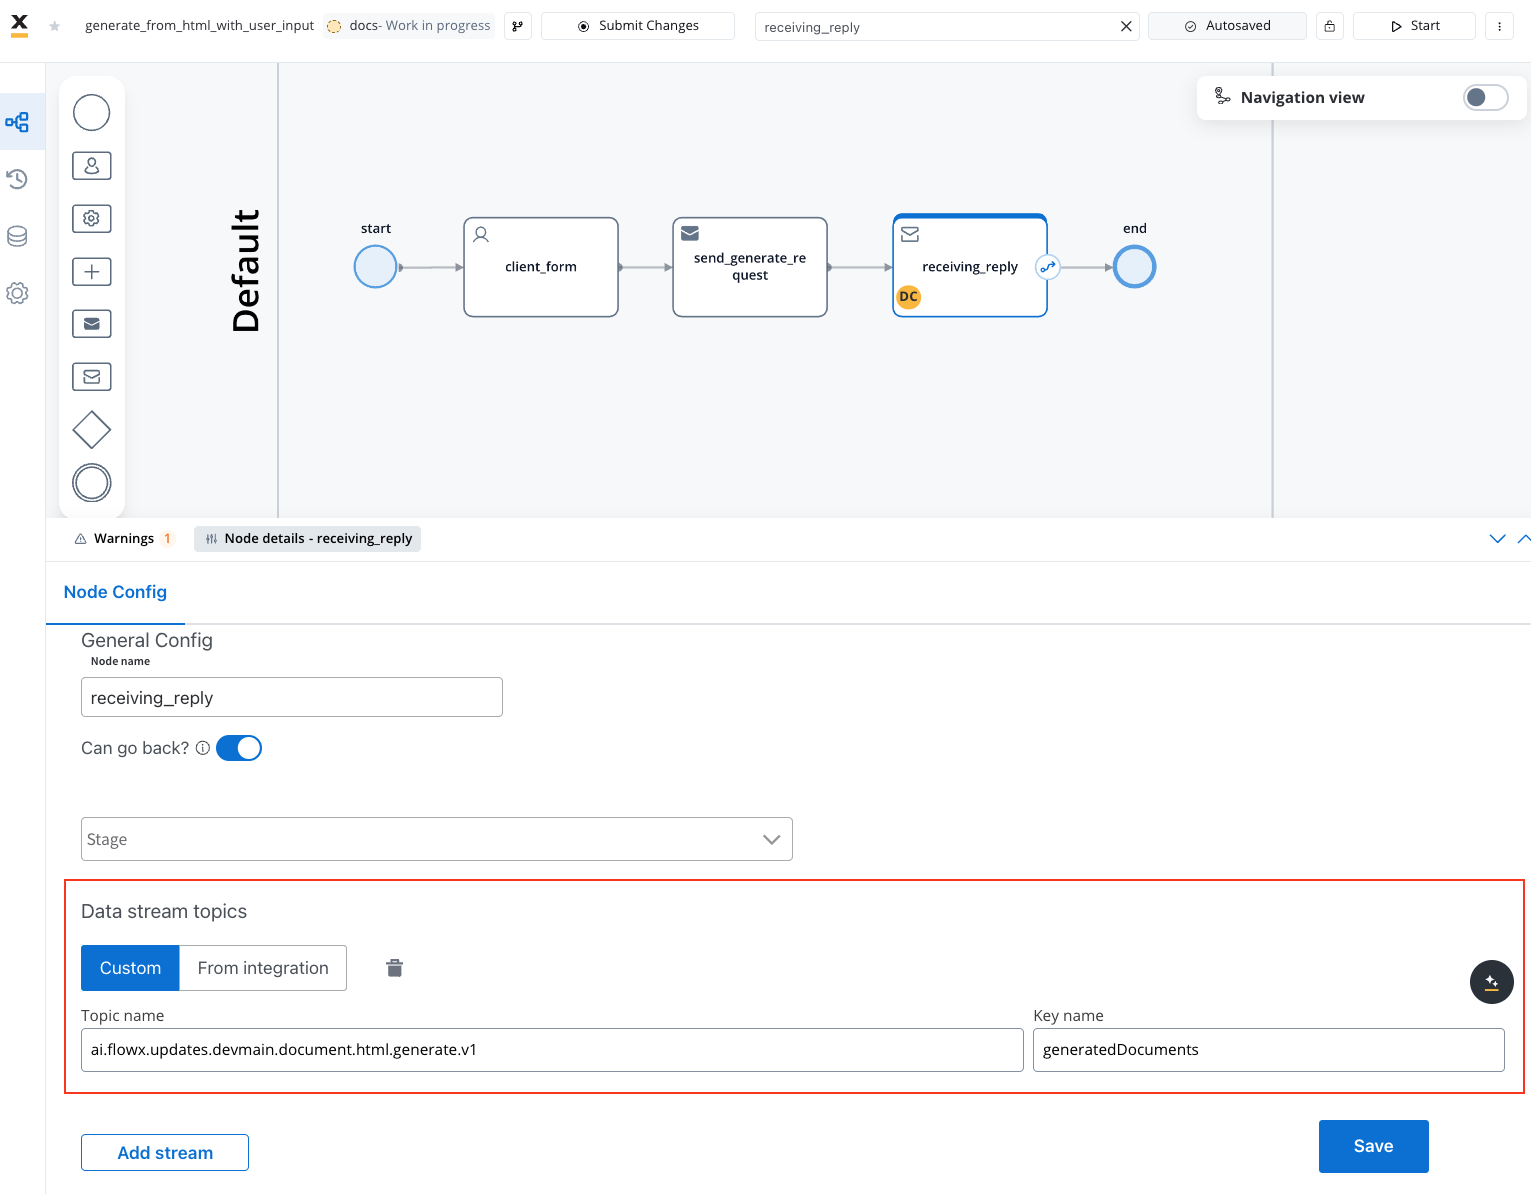
The response contains information about the generated documents:
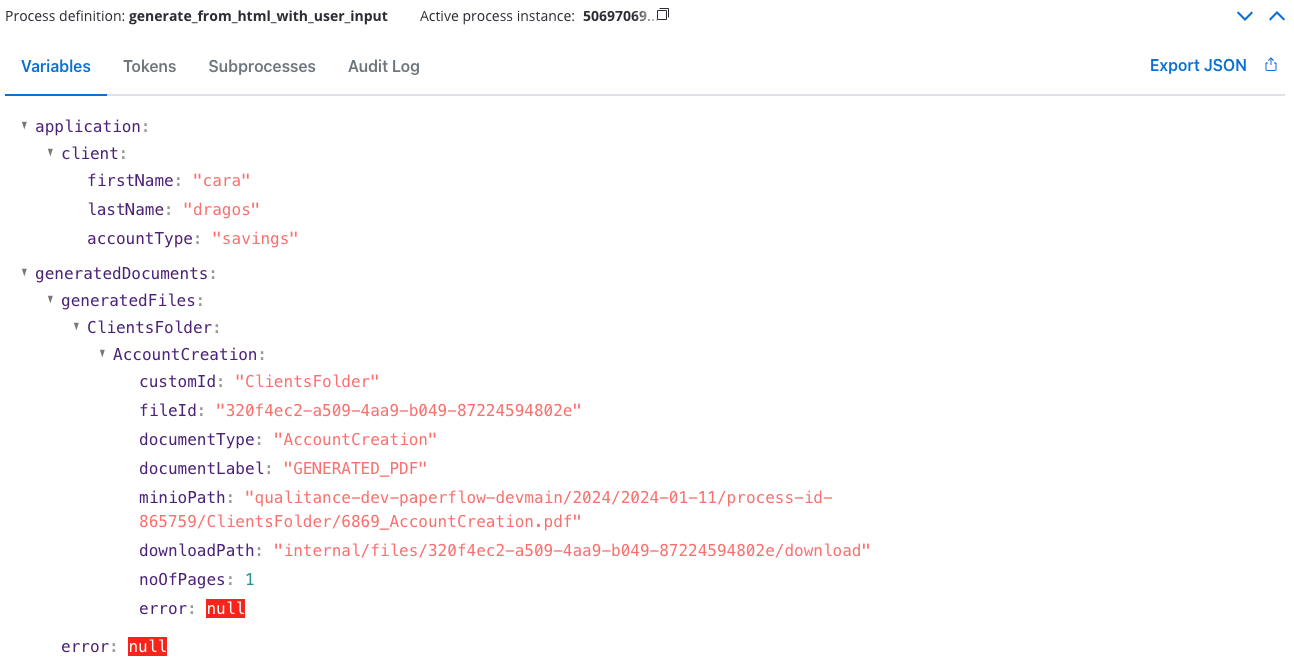
Sample response structure:
```json theme={"dark"}
{
"generatedFiles": {
"ClientsFolder": {
"AccountCreation": {
"customId": "ClientsFolder",
"fileId": "320f4ec2-a509-4aa9-b049-87224594802e",
"documentType": "AccountCreation",
"documentLabel": "GENERATED_PDF",
"minioPath": "{{your_bucket}}/2024/2024-01-15/process-id-865759/ClientsFolder/6869_AccountCreation.pdf",
"downloadPath": "internal/files/320f4ec2-a509-4aa9-b049-87224594802e/download",
"noOfPages": 1,
"error": null
}
}
},
"error": null
}
```
Response fields:
* **fileId**: Unique identifier for the generated file
* **documentType**: Template name used for generation
* **minioPath**: Storage location (MinIO or S3)
* **downloadPath**: URL path for downloading the file
* **noOfPages**: Document page count
* **error**: Error information (null if successful)
## Displaying the generated document
To display the generated document to the user:
1. Add a **Task Node** to extract the document path from the response
2. Add a **User Task** with the File Preview UI Element:
* Configure the element with the download path from the previous node
For detailed instructions on displaying documents, see:
## Related topics
- [Documents plugin setup](/5.9/setup-guides/documents-plugin-setup.md)
- [FlowX.AI CMS](/5.9/docs/platform-deep-dive/core-extensions/content-management/content-management.md)
- [FlowX.AI 5.10.0 Release Notes](/release-notes/v5.x/v5.10.0-july-2026/v5.10.0-july-2026.md)
- [Sending an email](/5.9/docs/platform-deep-dive/core-extensions/content-management/notifications-plugin/sending-an-email-with-attachments.md)
- [Customer onboarding with KYC](/5.9/ai-platform/tutorials/customer-onboarding.md)