> ## Documentation Index
> Fetch the complete documentation index at: https://docs.flowx.ai/llms.txt
> Use this file to discover all available pages before exploring further.
# Managing notification templates
> You can create and manage notification templates using FlowX.AI Designer by accessing the dedicated section.
export const release_0 = "5.11"
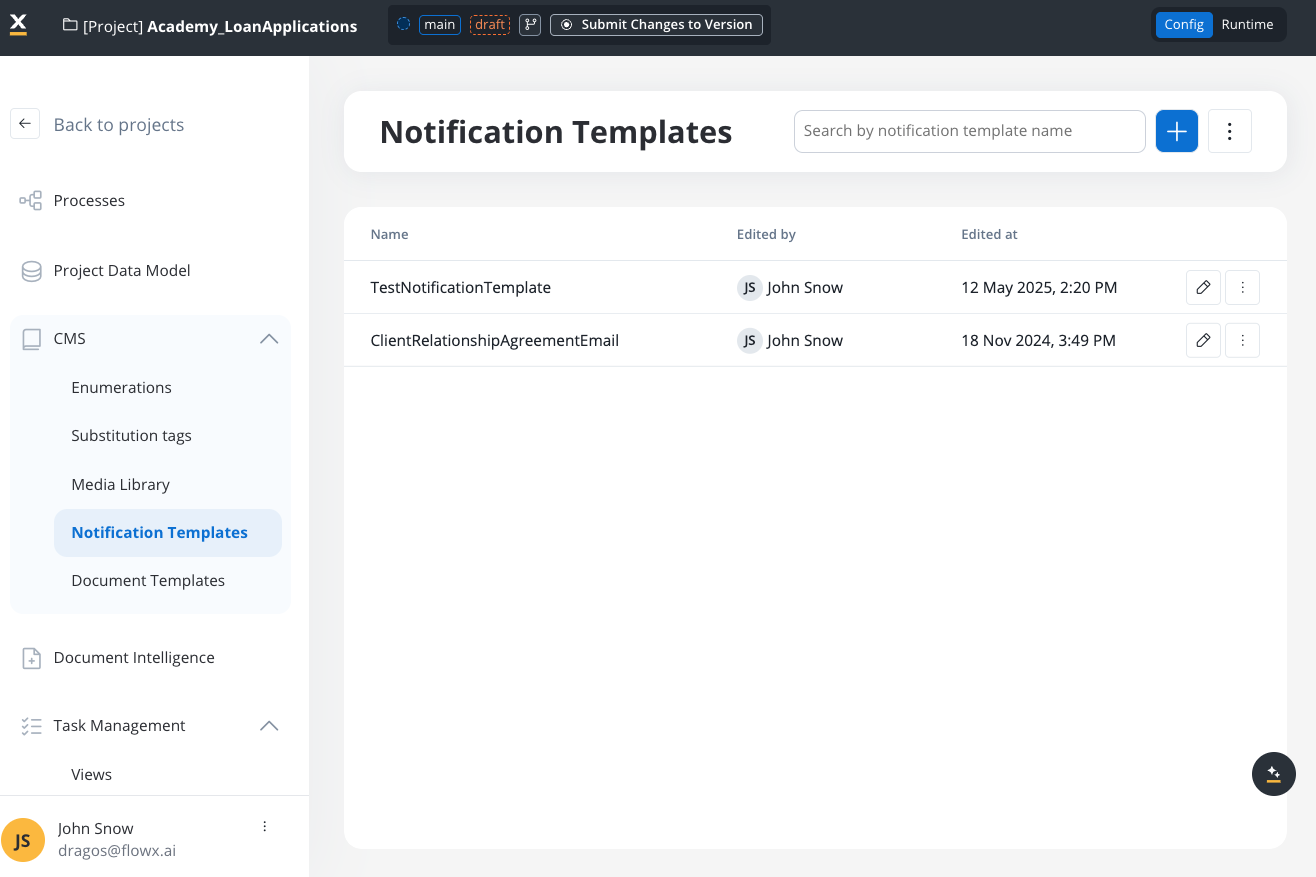
### Configuring a template
To configure a notification template, first, you need to select some information stored in the **Body**:
1. **Type** - could be either MAIL or SMS notifications
2. **Email Server** - select the email delivery method (available for MAIL type):
* **Predefined Email Connection** (default) - send emails directly through a configured SMTP server using the [Send Notification](../../../../building-blocks/actions/send-notification-action) action
* **Forward on Kafka** - forward the notification to Kafka for the Notifications Plugin or an [external adapter](./forwarding-notifications-to-an-external-system) to handle (this is mandatory for SMS notification templates)
3. **Email Sender** - displayed only when **Email Server** is set to **Predefined Email Connection**:
* **Default Server** (default) - uses the default SMTP connection configured at the environment level
* Or select a specific [Email Sender](../../../integrations/email-sender) data source configured in Integration Designer
4. **Language** - choose the language for your notification template
5. **Subject** - enter a subject
You can edit the content for each language you have defined in the project.
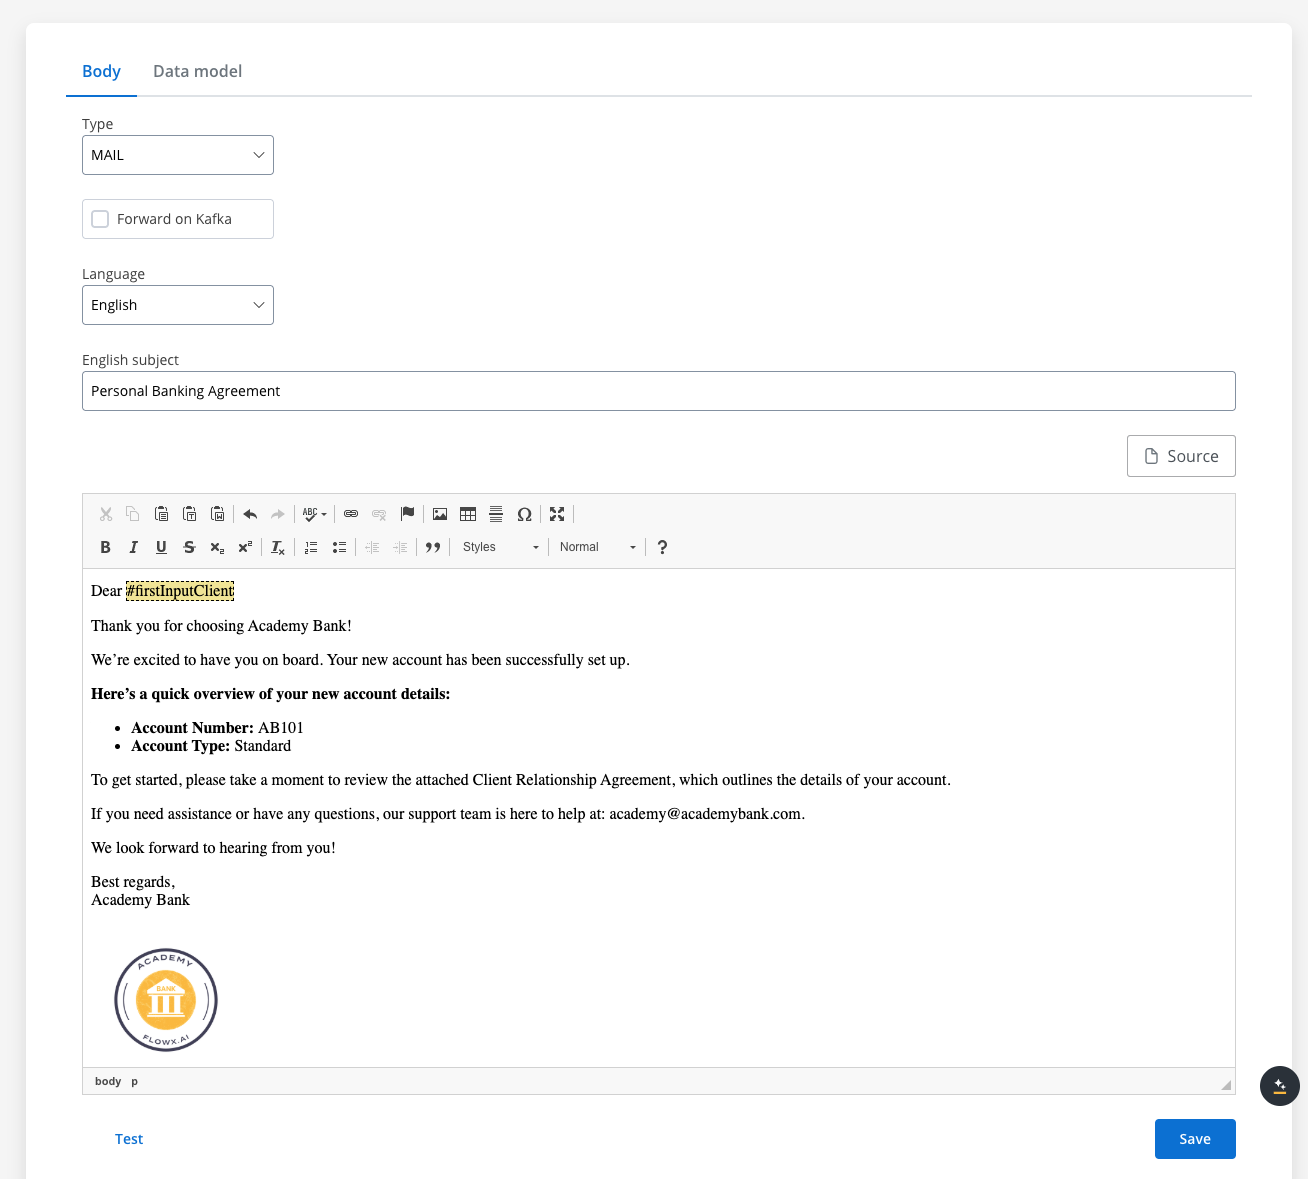
#### Editing the content
You can edit the content of a notification template by using the [WYSIWYG](../../../plugins/wysiwyg) editor embedded in the body of the notification templates body.
### Configuring the data model
SaaS · {release_0}
**Available on SaaS with FlowX.AI {release_0}.** This feature is live on managed (SaaS) deployments now. Self-hosted deployments will receive it with the next LTS release family.
In the upcoming structured data model, the notification template editor has two tabs. On the **Data Model** tab you build typed data types and attributes with the same builder used across FlowX, then use the **Input Parameters** tab to choose which attributes the template expects at send time.
On the **Data Model** tab you can:
* Add typed attributes. Supported types are **String**, **Number**, **Boolean**, **Enum**, **Date**, **Currency**, **New Data type** (a nested object you define inline), **Existing Data Type** (an object you reference), and **Array**.
* Add validations to an attribute (for example min, max, length, or pattern).
* Mark an attribute as **Sensitive data** or **Use in Reporting**.
* Reference data types from the **Project Data Model** or from a **Library**, instead of redefining them.
On the **Input Parameters** tab, select the Data Model attributes the template needs. These become the values you supply when the template is filled. The tab lists only attributes you have defined on the Data Model.
For the full data model builder reference (data types, attribute paths, referenced types, validations, and reporting or sensitive-data settings), see the [Project data model](/5.9/docs/building-blocks/project-data-model) documentation.
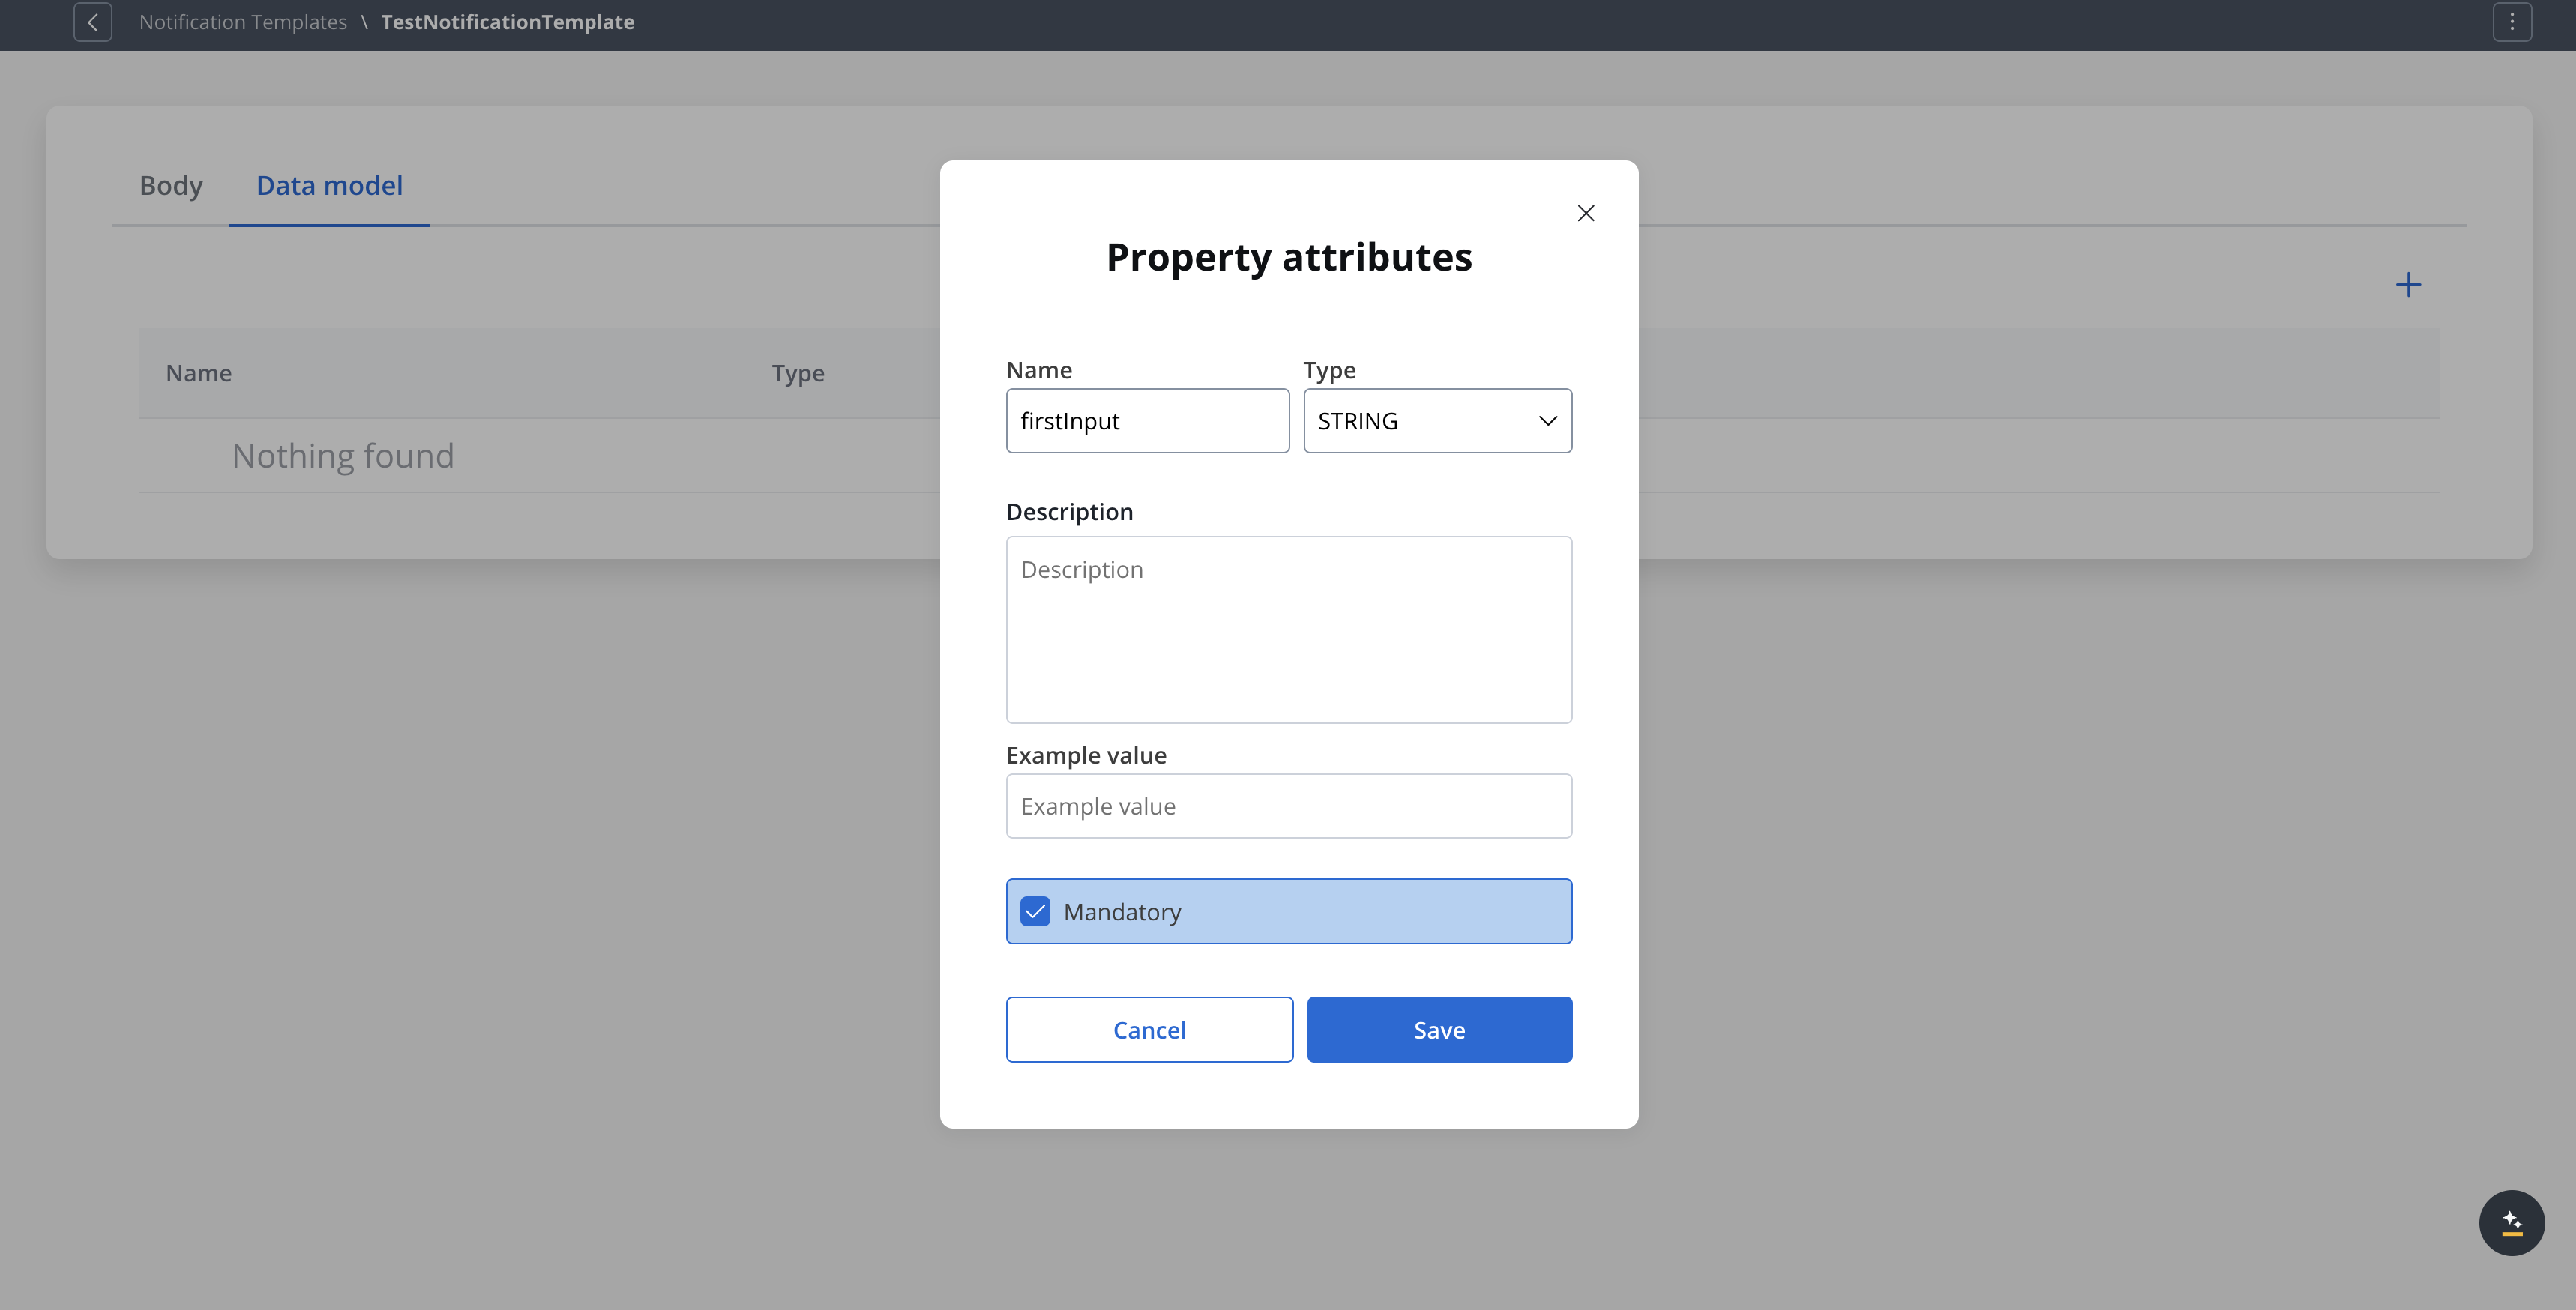
Using the **Data model** tab, you can define key pair values (parameters) that will be displayed and reused in the editor. Multiple parameters can be added:
* STRING
* NUMBER
* BOOLEAN
* OBJECT
* OBJECT\_REF
* ARRAY
* ARRAY\_REF
* ENUM
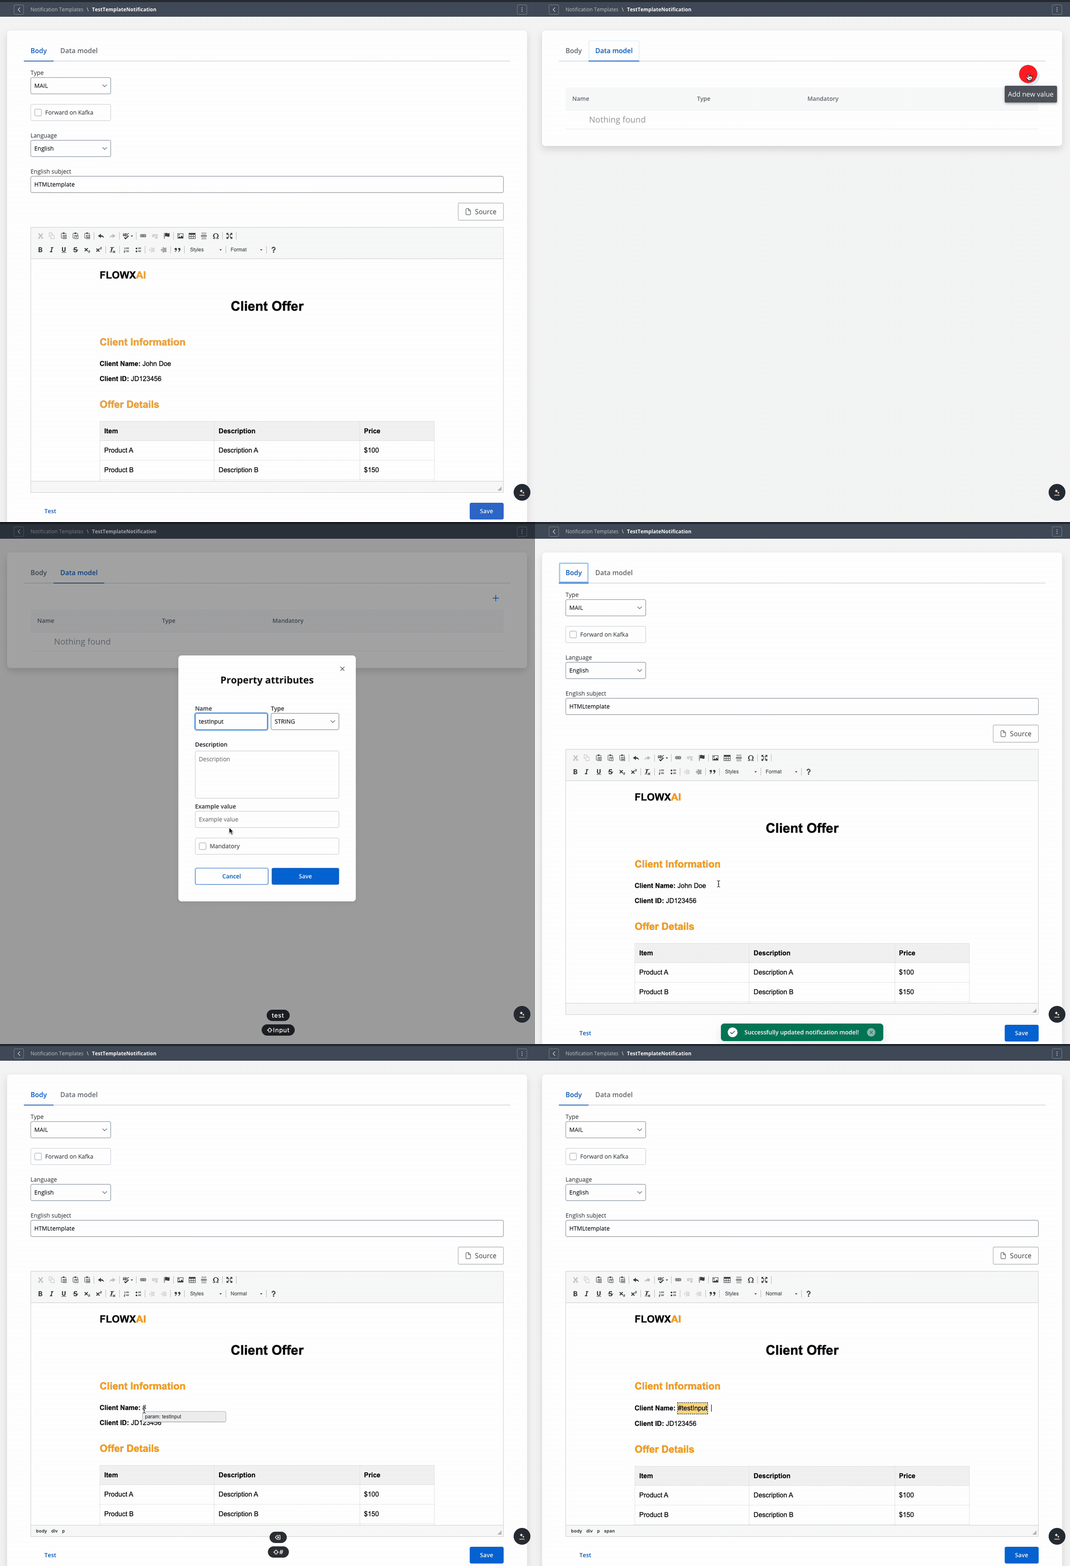
After you defined some parameters in the **Data Model** tab, you can type "**#**" in the editor to trigger a dropdown where you can choose which one you want to use/reuse.
### Testing the template
You can use the test function to ensure that your template configuration is working as it should before publishing it.
The test modal includes the following fields:
* **Receivers emails** — recipient email addresses for the test
* **Language** — select the template language to test
* **Attachments** — upload files to test attachment handling
* **Template data** — provide values for template variables
* **Advanced** (hidden section) — **Sender Name** and **Sender Email** overrides
If some keys (marked as mandatory) are not used in the template, the test will not go through.
### Other actions
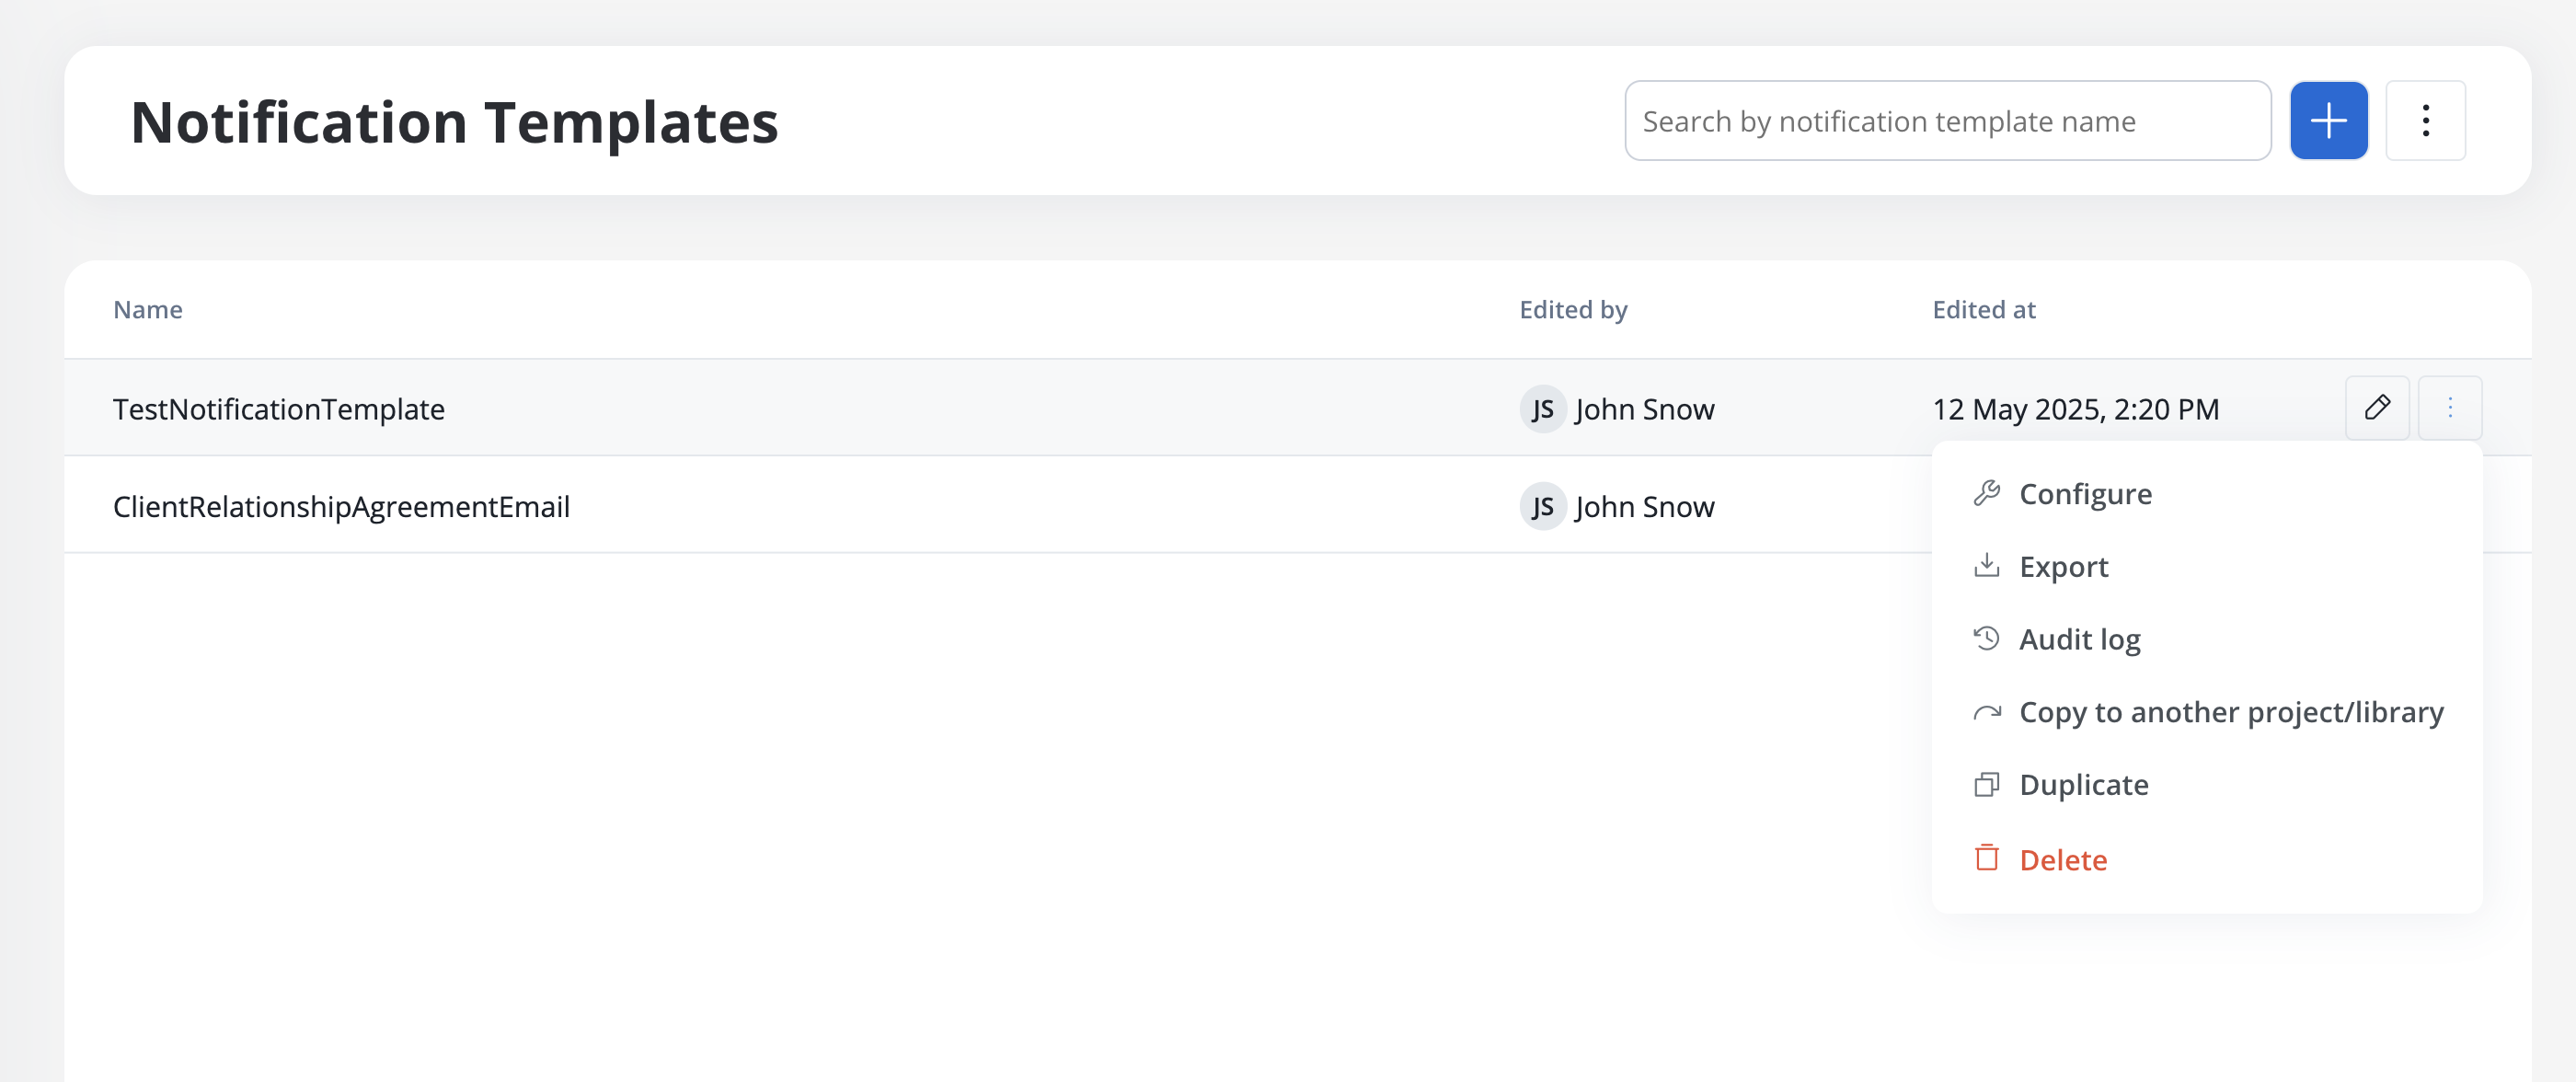
When opening the contextual menu (accessible by clicking on the breadcrumbs button), you have multiple actions to work with the notifications templates:
* **Configure** - edit the template
* **Export template** - export a template as a ZIP file
* **Audit log** - view the audit log
* **Copy to another project/library** - copy a template to another project/library
* **Duplicate** - duplicate a template
* **Delete** - delete a template
***
### Export and import
You can export and import notification templates to transfer them between projects or environments (for example, from development to UAT to production).
#### Exporting a template
To export a notification template:
1. Open the contextual menu (breadcrumbs button) for the template you want to export
2. Select **Export template**
3. The template is downloaded as a ZIP file
#### Importing templates
To import notification templates:
1. Navigate to the **Notification Templates** list
2. Open the context menu and select **Import from ZIP**
3. Select the ZIP file exported from another project or environment
4. If templates with the same identifiers already exist, a **Review Resource Identifiers Conflicts** modal appears
5. Choose a strategy for each conflicting template (or use **Apply to all**):
* **Keep both** - imports the template as a new copy alongside the existing one
* **Replace** - overwrites the existing template with the imported version
* **Skip this one** - keeps the existing template unchanged
6. Click **Continue** to complete the import
Importing is only available for work-in-progress (WIP) project versions. You cannot import into a committed version.
## Related topics
- [Notification Templates](/5.9/docs/platform-deep-dive/core-extensions/content-management/notifications-plugin/notifications-plugin-overview.md)
- [Sending a notification](/5.9/docs/platform-deep-dive/core-extensions/content-management/notifications-plugin/sending-a-notification.md)
- [FlowX.AI 5.6.0 Release Notes](/release-notes/v5.x/v5.6.0-march-2026/v5.6.0-march-2026.md)
- [Sending an email](/5.9/docs/platform-deep-dive/core-extensions/content-management/notifications-plugin/sending-an-email-with-attachments.md)
- [Email Sender](/5.9/docs/platform-deep-dive/integrations/email-sender.md)