

- Design a BPMN process with user tasks, service tasks, and gateways
- Build a form and wire its button to the process
- Set and read process data with business rules
- Branch on a value with an Exclusive Gateway
- Start a process instance and inspect it
- Access to FlowX Designer
- A workspace and project set up (create one here)
What you’ll build
A customer requests a new credit card through a bank app. The process:- Collects personal information
- Computes a credit score
- Assigns a card type based on the score
- Shows the result and asks the customer to confirm
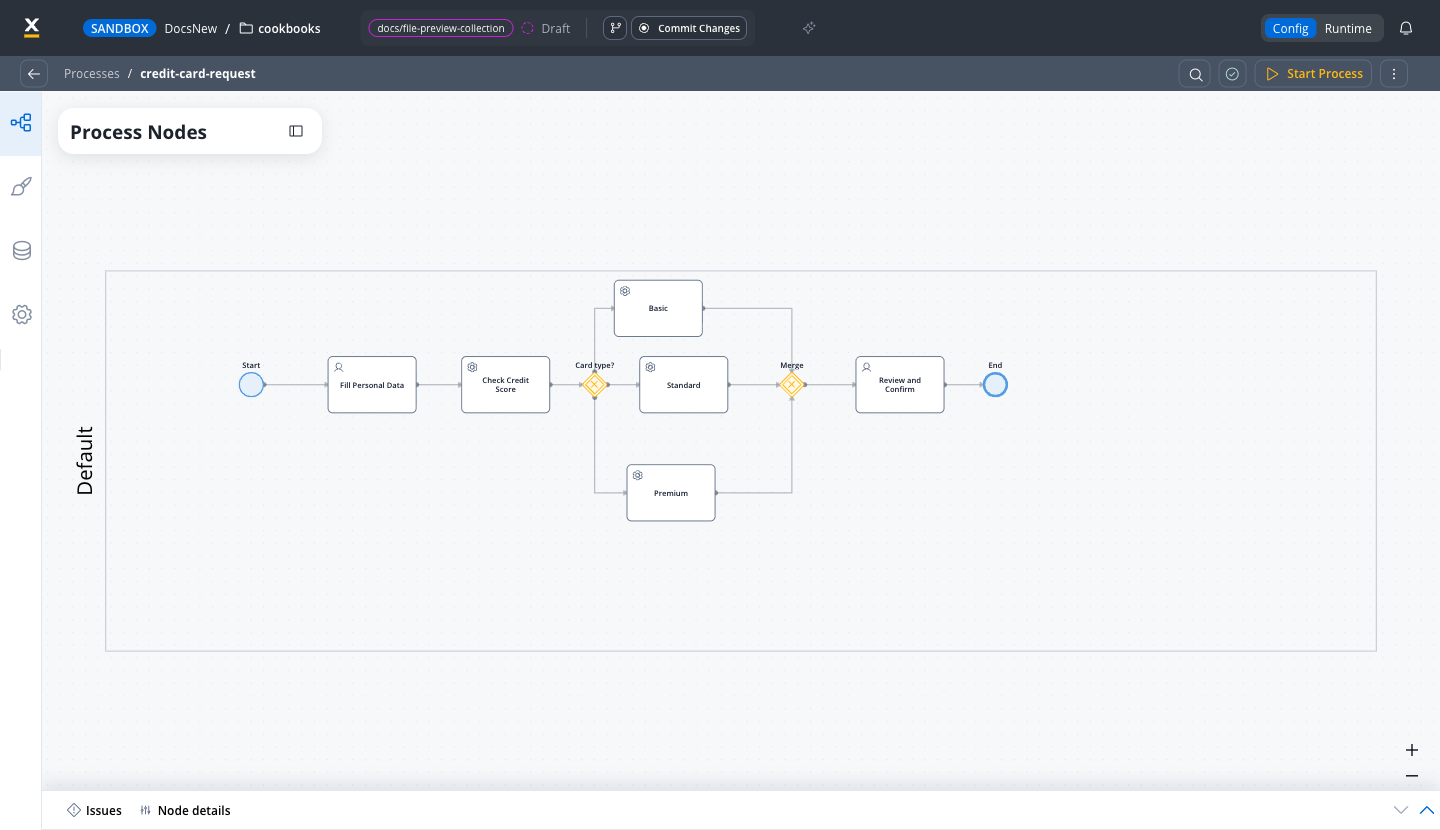
Step 1: Create the process
Open your project
Create a new process
credit-card-request, and click Create process. The Designer opens the empty canvas.Add a Start Event
Creating process definitions
Learn more about processes
Step 2: Collect user data (User Task)
The first step is collecting the customer’s personal information.Add a User Task
Fill Personal Data.Assign it to a navigation area
Application. Then drag Fill Personal Data from User Tasks (not allocated) into the page. The second user task gets its own page in Step 5.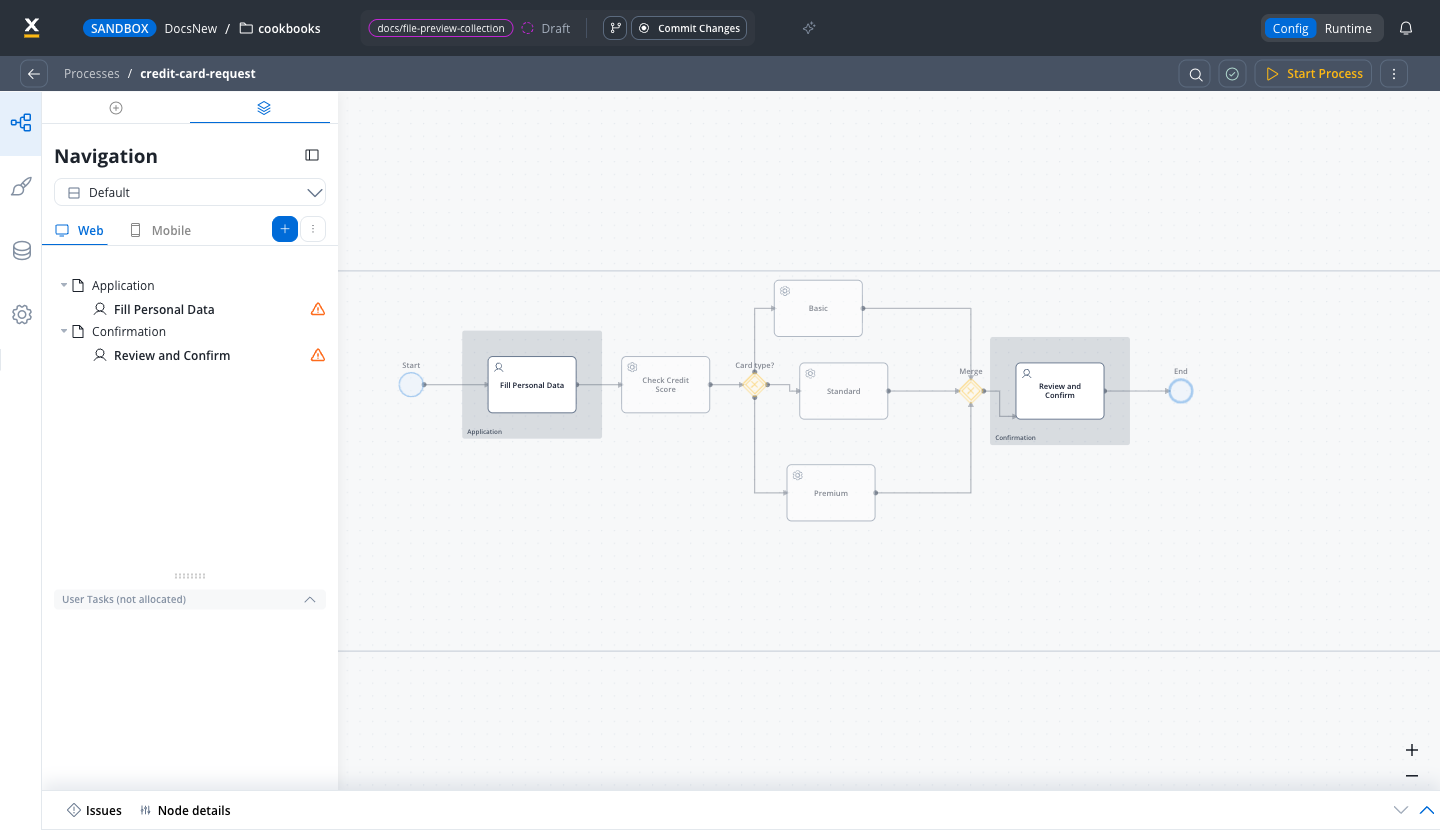
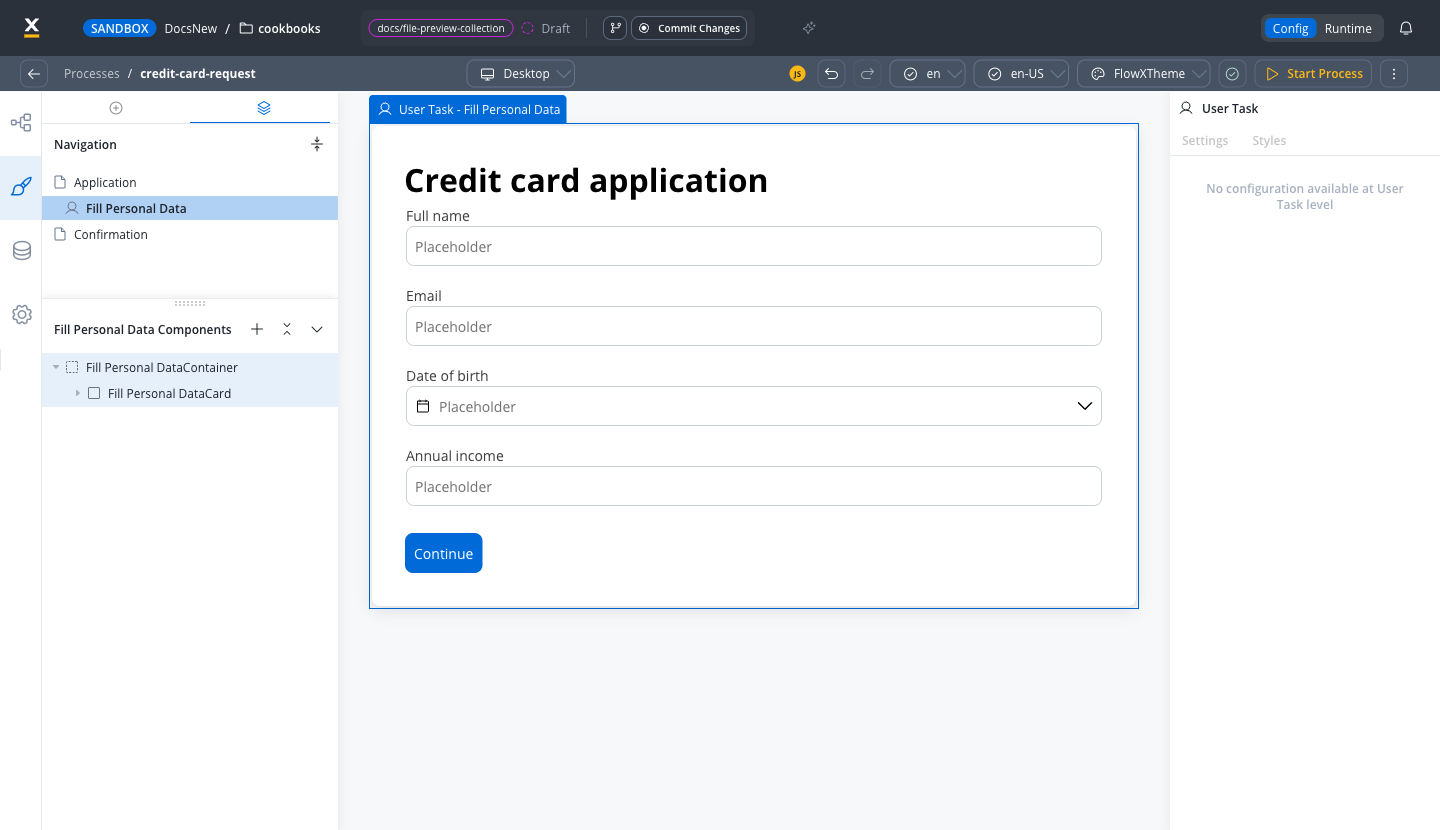
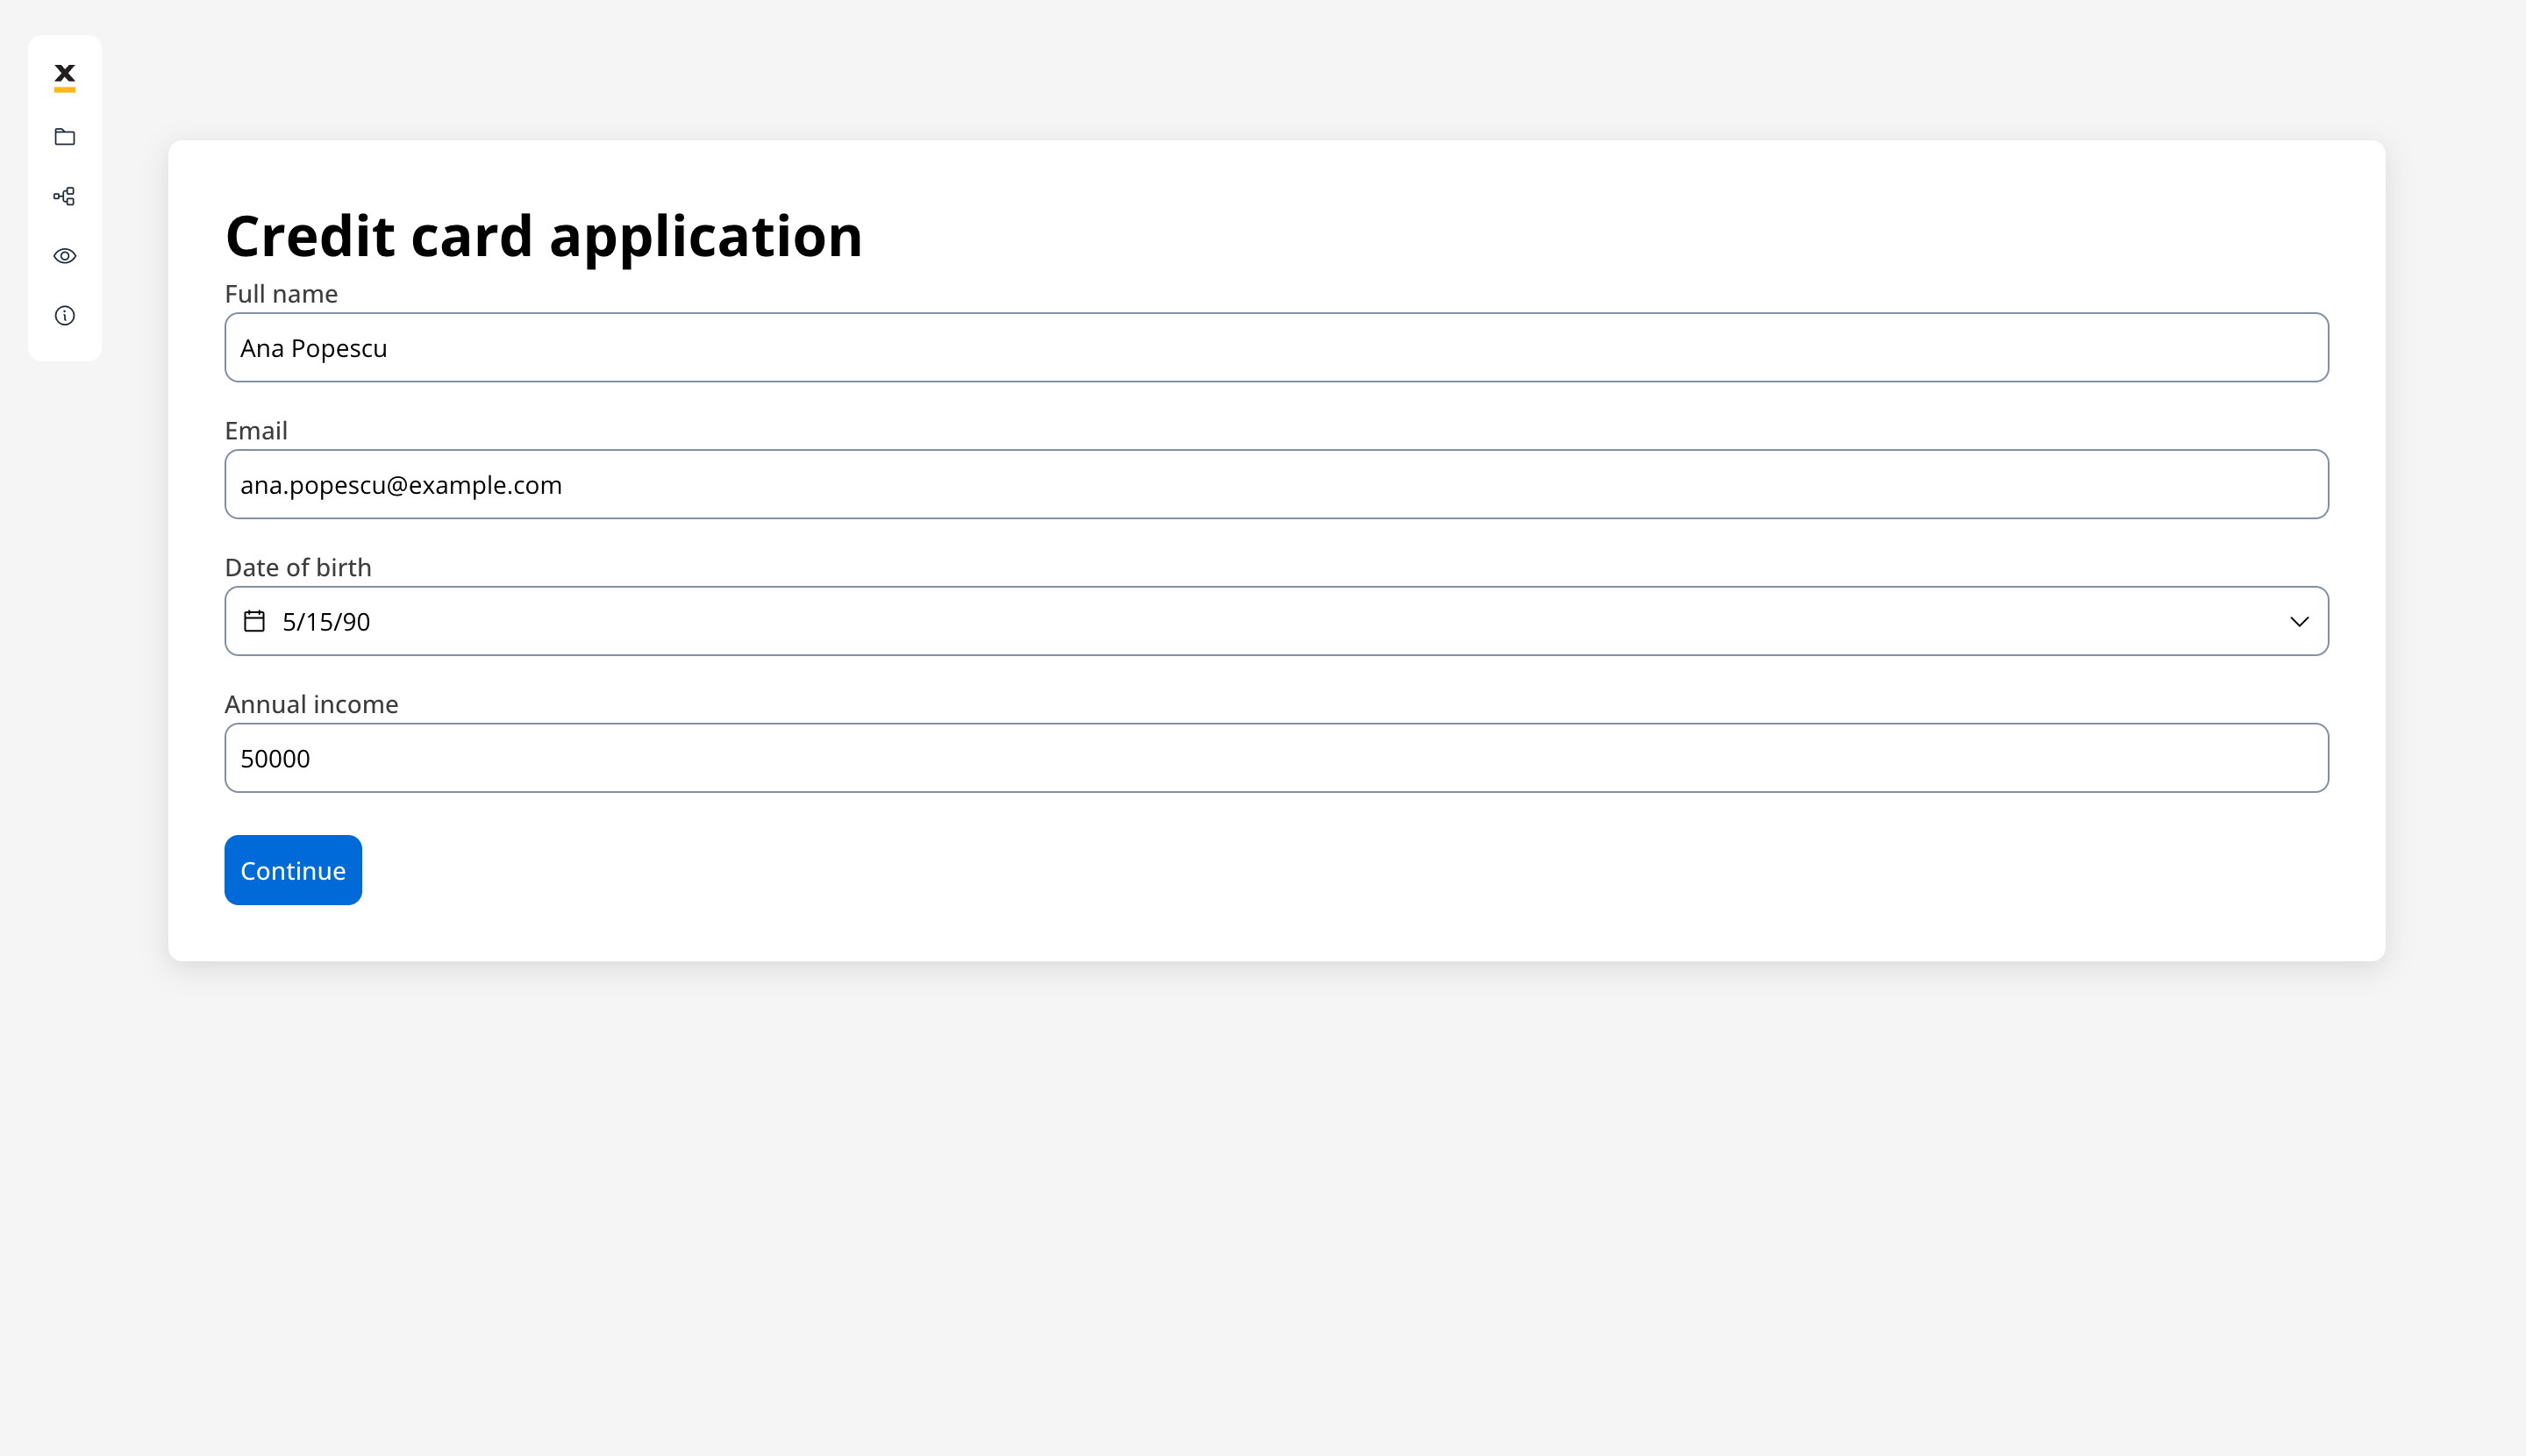
Design the form
- Full name: an Input of type Text
- Email: an Input of type Email, which validates the address format for you
- Date of birth: a Datepicker
- Annual income: an Input of type Number
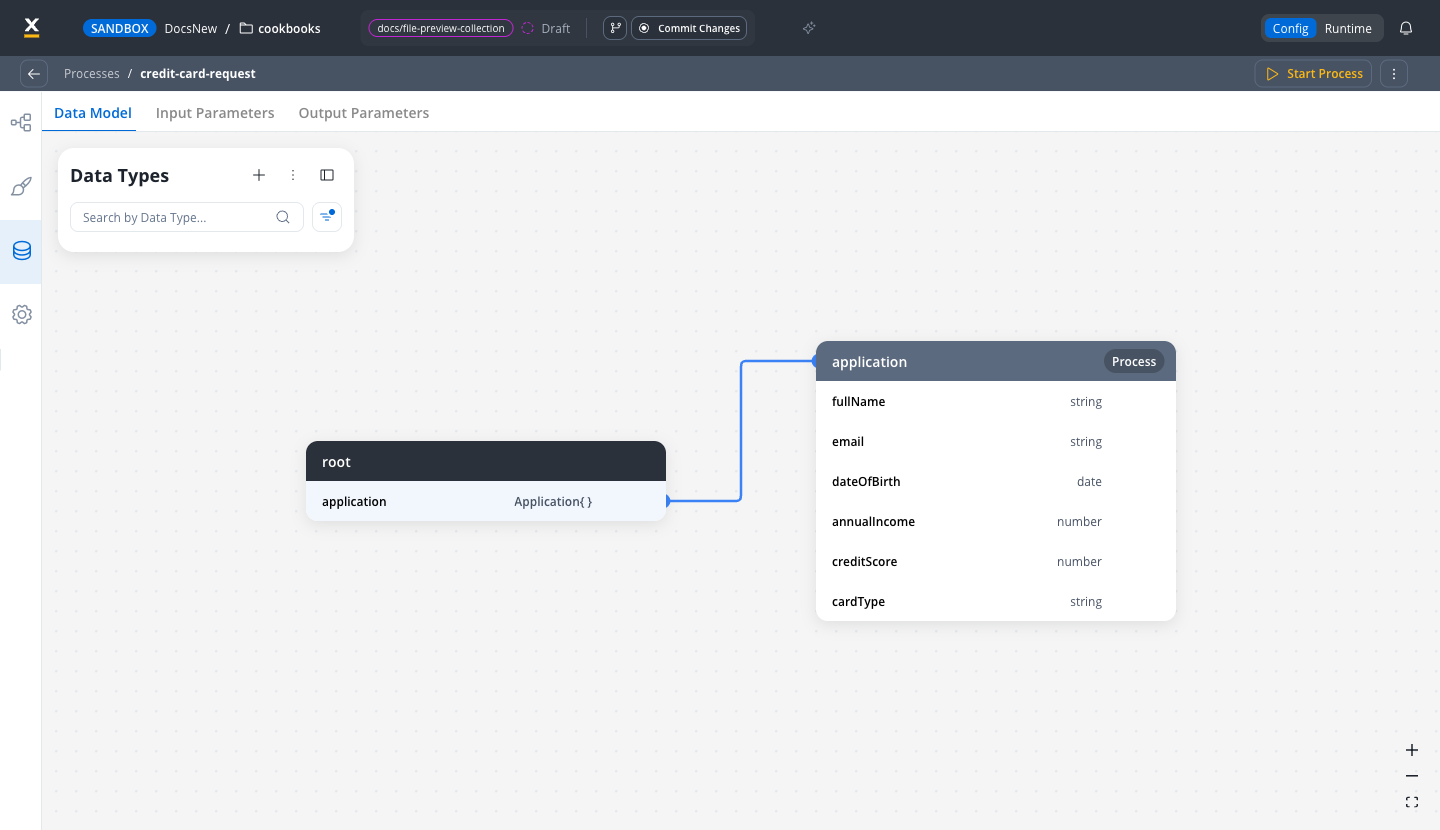
Configure the data model
application.fullNameapplication.emailapplication.dateOfBirthapplication.annualIncome
Add a Continue button and wire it
saveData, set to Manual so it waits for the user, so you do not have to create one.In the UI Designer, drag a Button onto the screen and label it Continue. In its Event Handlers section, click +, choose the On Click trigger, set Action Type to Node Action, and select saveData.Check Add forms to submit and select your form. This validates the visible fields and sends their values with the action.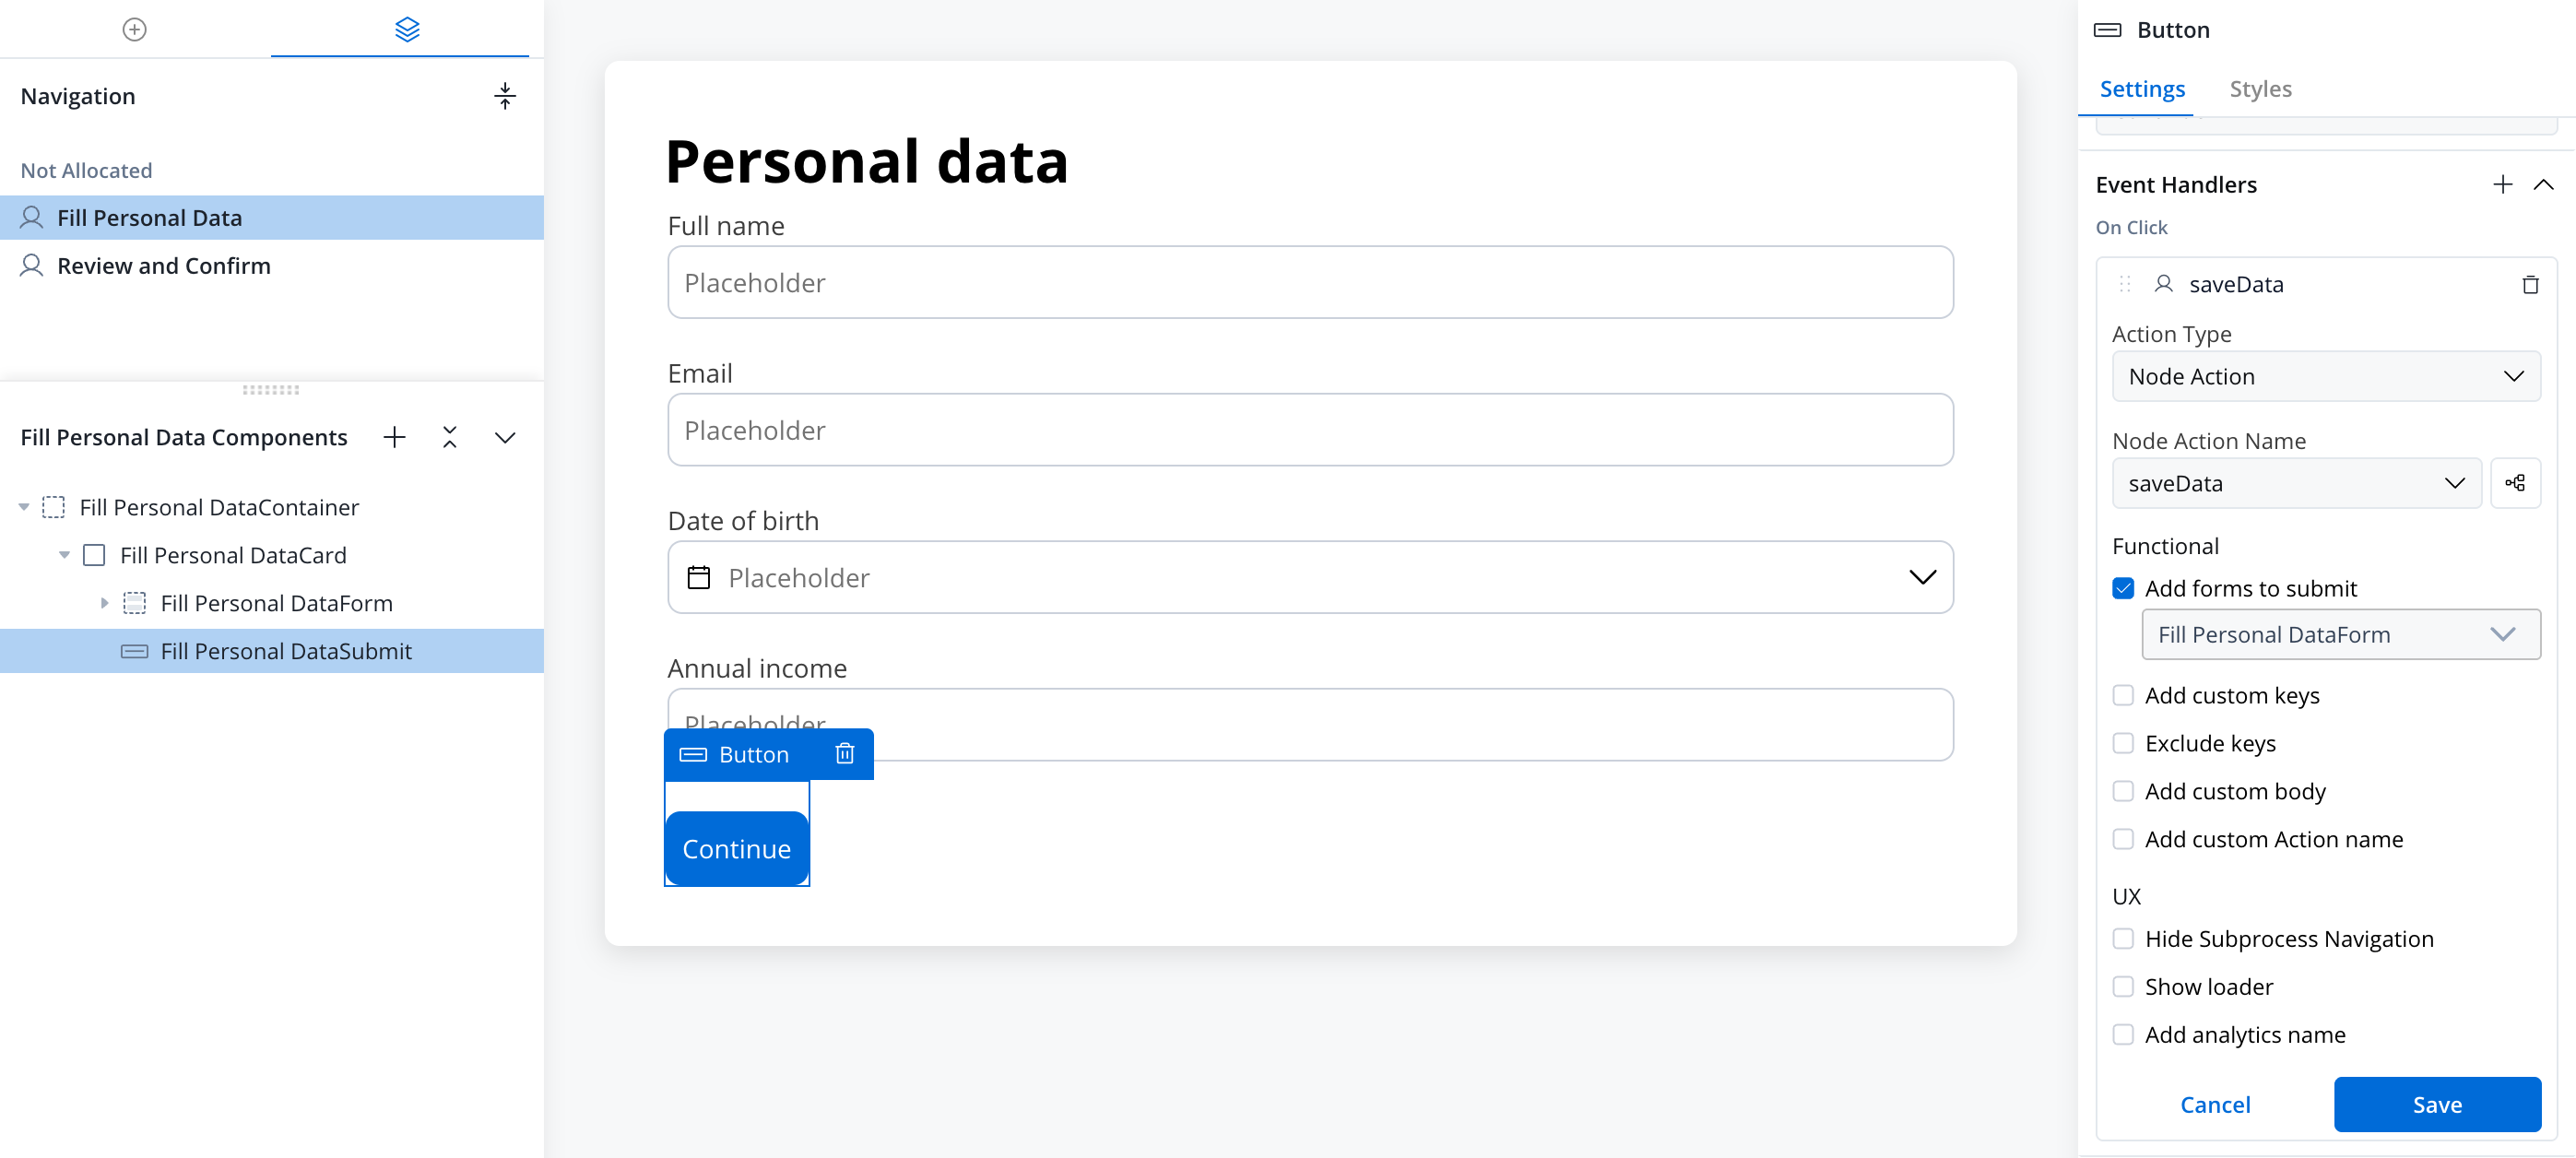
Learn more about User Tasks
Event Handlers
Navigation areas
Input fields and validators
Step 3: Check credit score (Service Task)
Compute a credit score automatically after the form is submitted. For this tutorial, a business rule derives the score from the annual income, so you can run the process without an external scoring service.Add a Service Task
Fill Personal Data, connect the two, and name it Check Credit Score.Add a Business Rule action
input holds the process data the form saved. output.put merges the new key into it, so the other application keys are kept.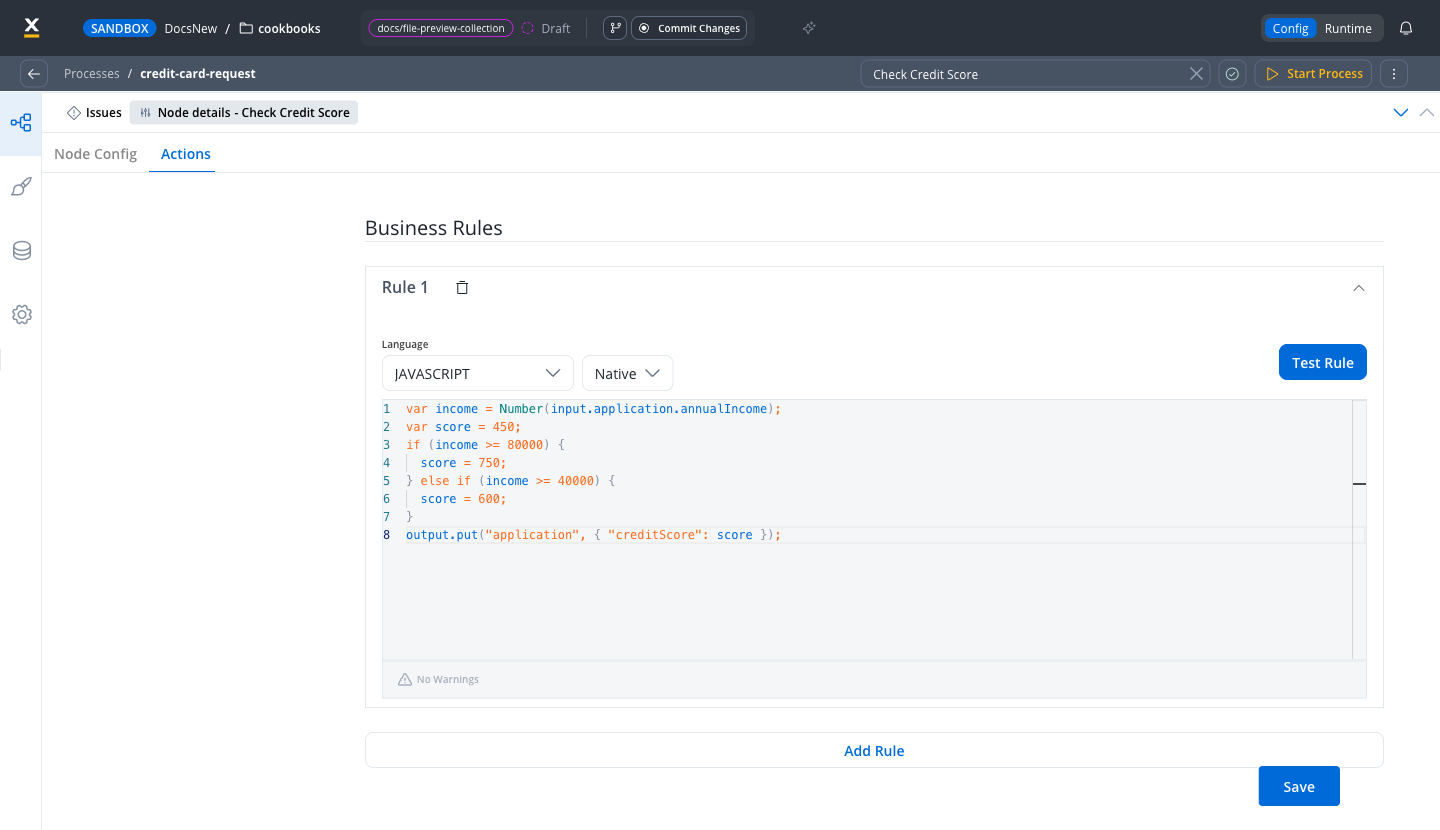
Using a real credit scoring service instead
Using a real credit scoring service instead
Create the credit-scoring workflow
Add a Send Message Task with a Start Integration Workflow action
${processInstanceData.application.annualIncome}) as workflow input.Add a Receive Message Task
application.creditScore. Alternatively, turn Legacy Mapping on and set Key Name to application.creditScore.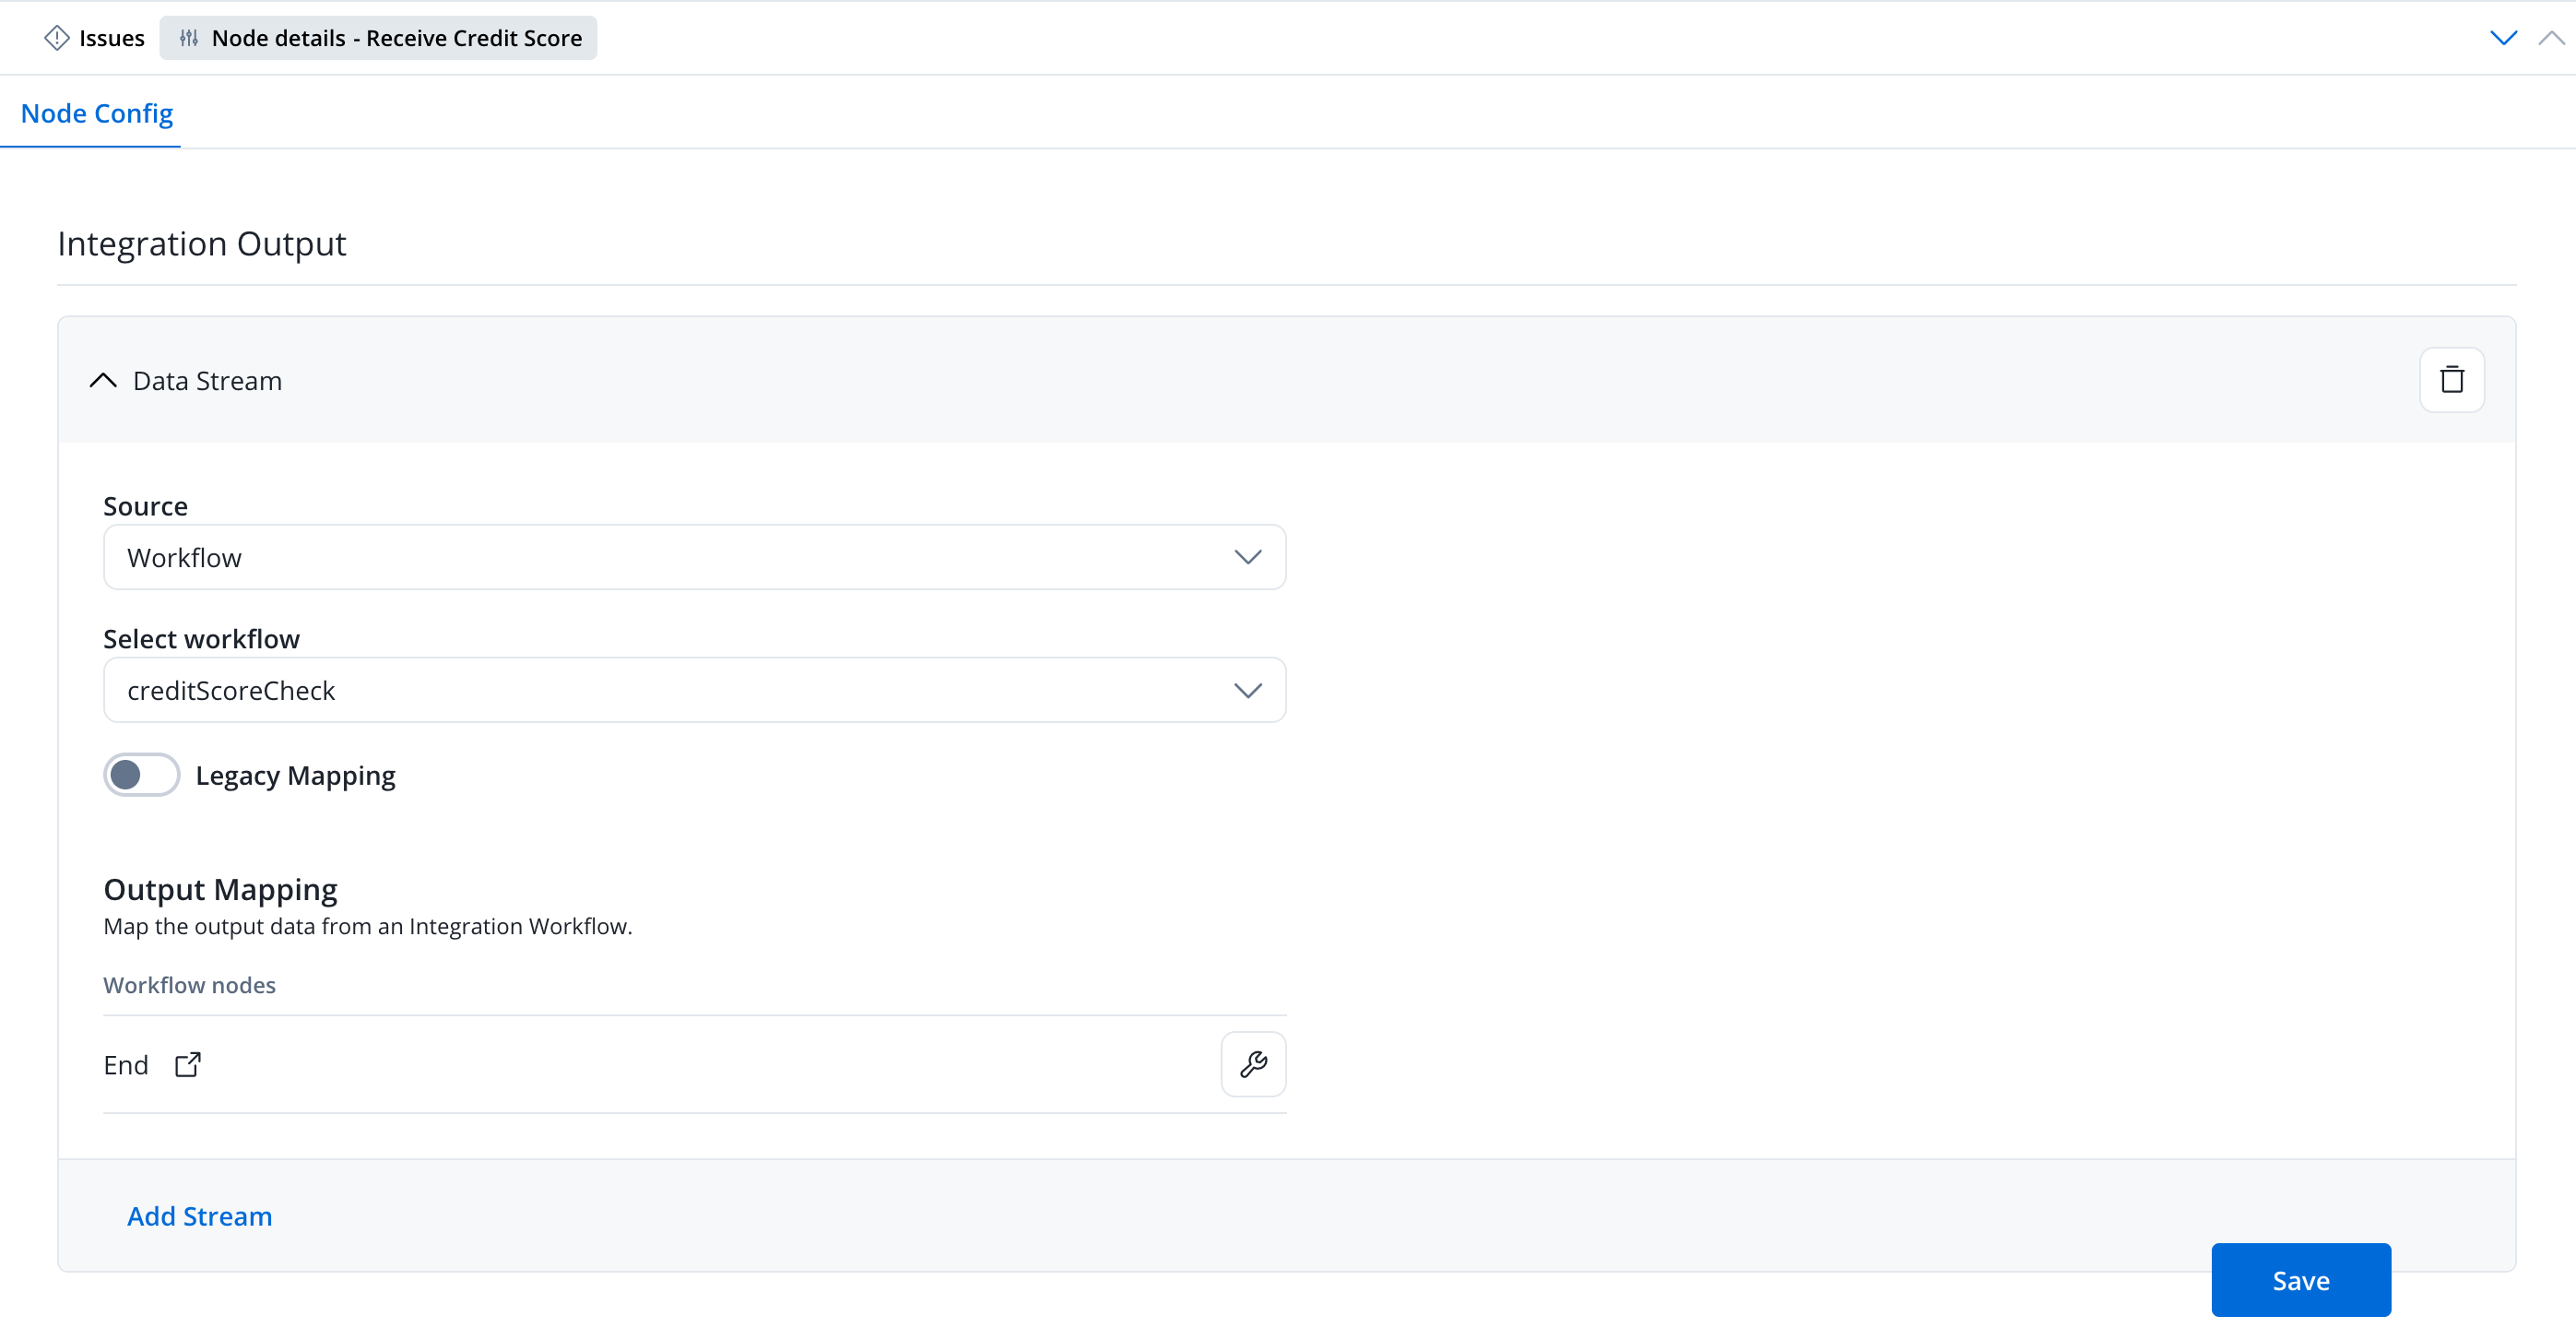
creditScore output to application.creditScore: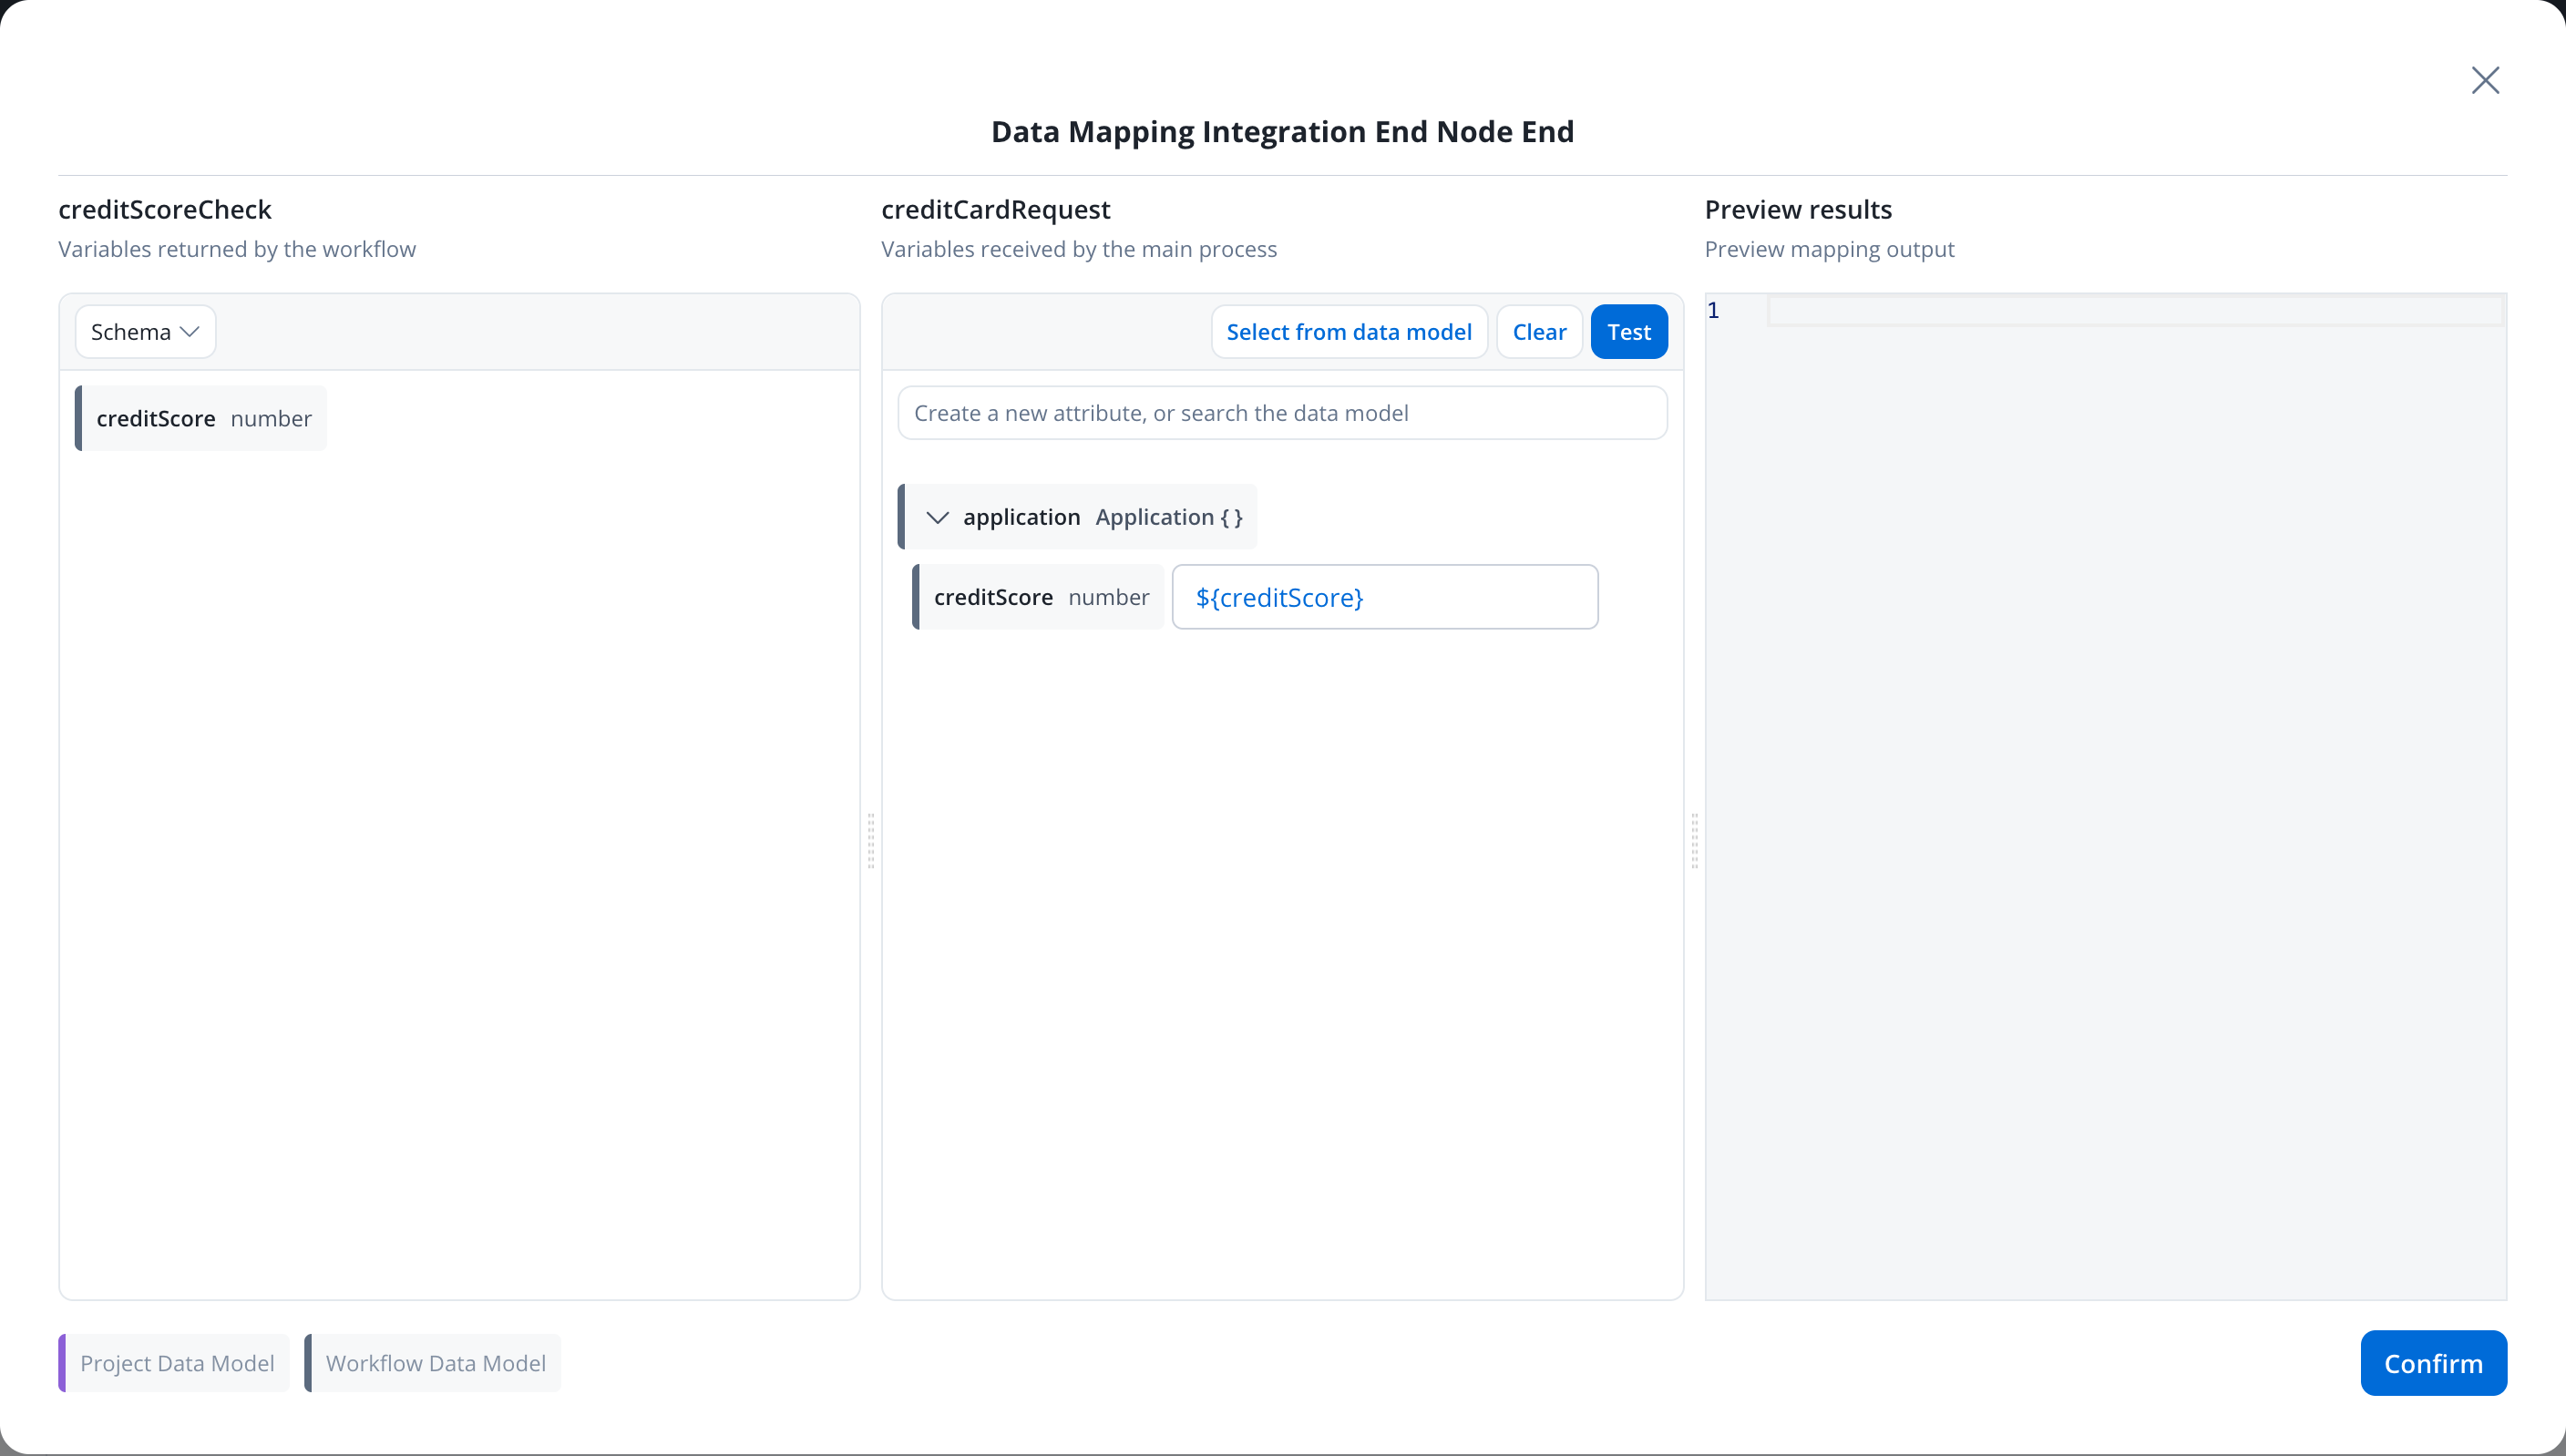
Learn more about the Start Integration Workflow action
Learn more about business rules
Step 4: Branch based on credit score (Exclusive Gateway)
Different credit scores qualify for different card types.Add an Exclusive Gateway
Check Credit Score and connect it. This creates a decision point based on the credit score.Add Service Tasks for each branch
STANDARD and BASIC on the other two. The output is merged into the process data, so the other application keys (name, income, credit score) are kept.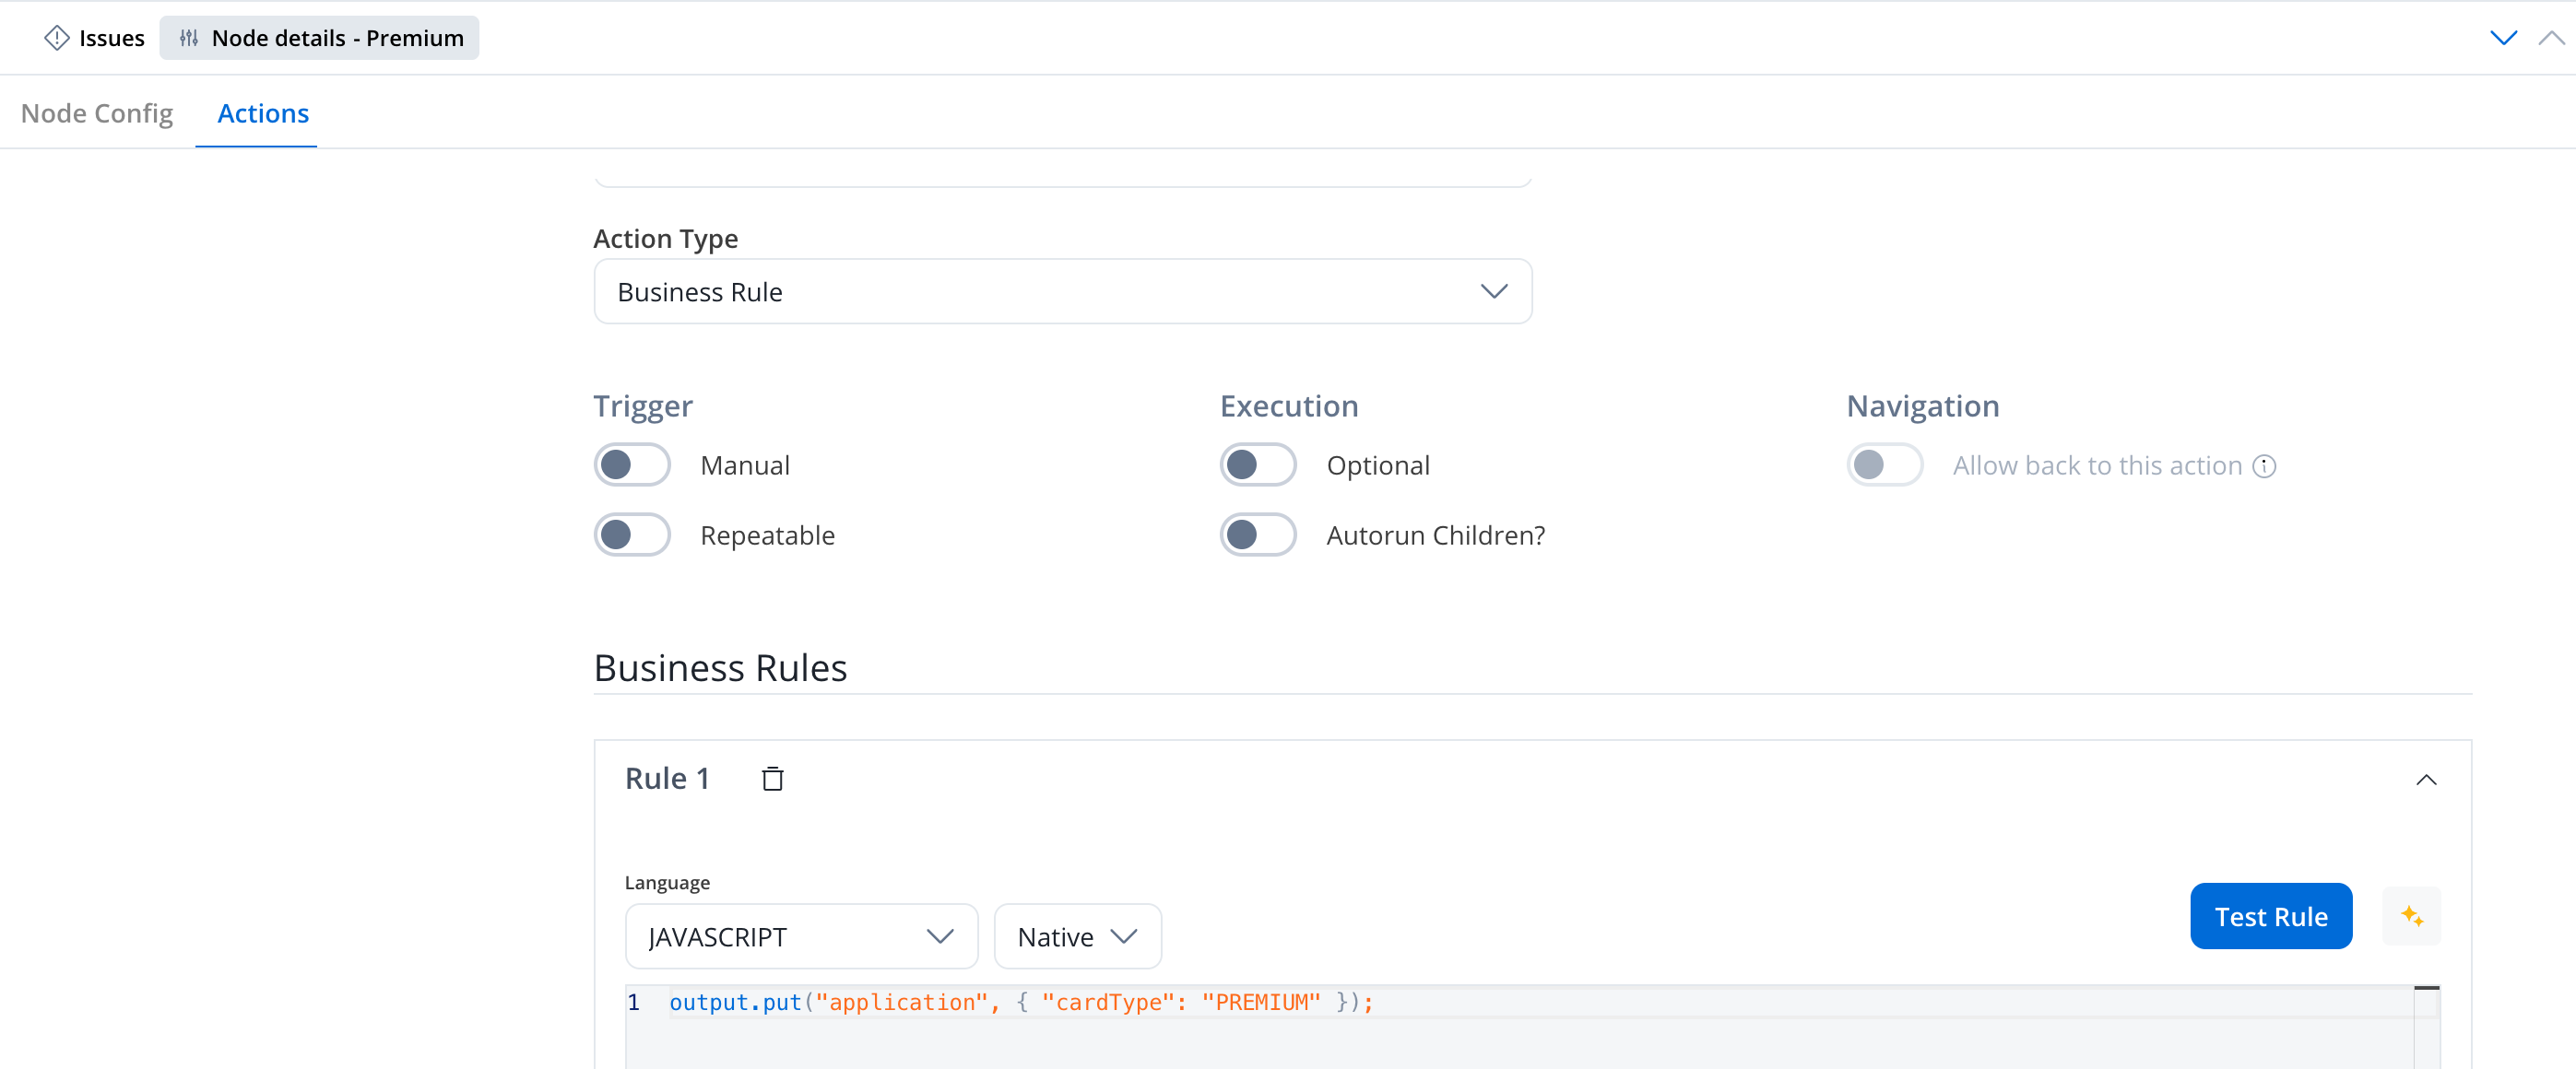
Configure branch conditions
input, so start each one with input.:- Branch 1:
input.application.creditScore >= 700→ Premium card - Branch 2:
input.application.creditScore >= 500→ Standard card - Branch 3: Else → Basic card
>= 700 rule above the >= 500 rule. A score of 750 satisfies both, and the order is what sends it to Premium. Click Test to try a sample input against your conditions before you save.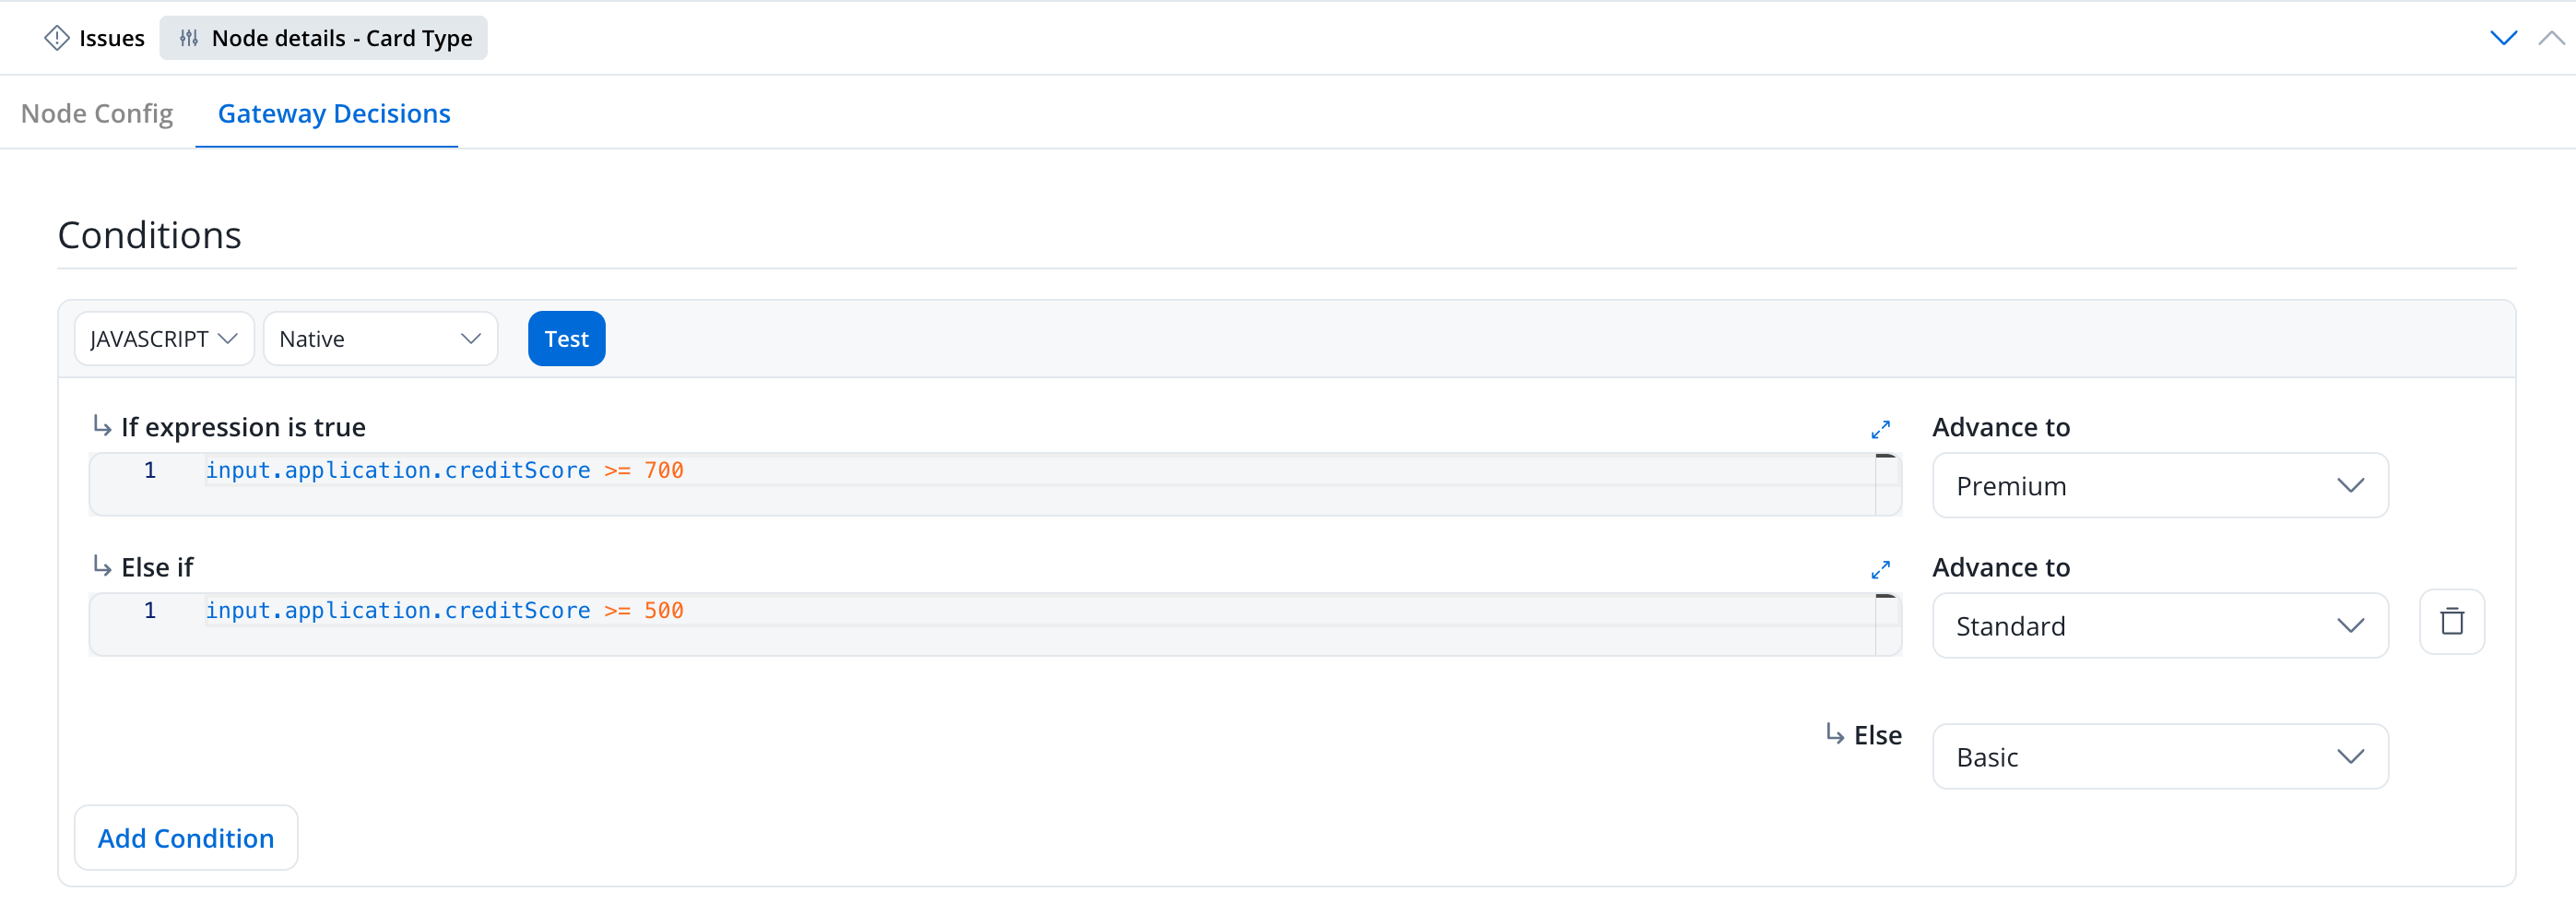
Add a closing Exclusive Gateway
Learn more about Gateways
Step 5: Show results and confirm (User Task)
Let the customer review their card type and confirm.Add a User Task
Review and Confirm. In the Navigation tab, add a second Page named Confirmation and drag the task into it. User tasks on the same page render together, so a sequential screen needs its own page.Design the confirmation screen
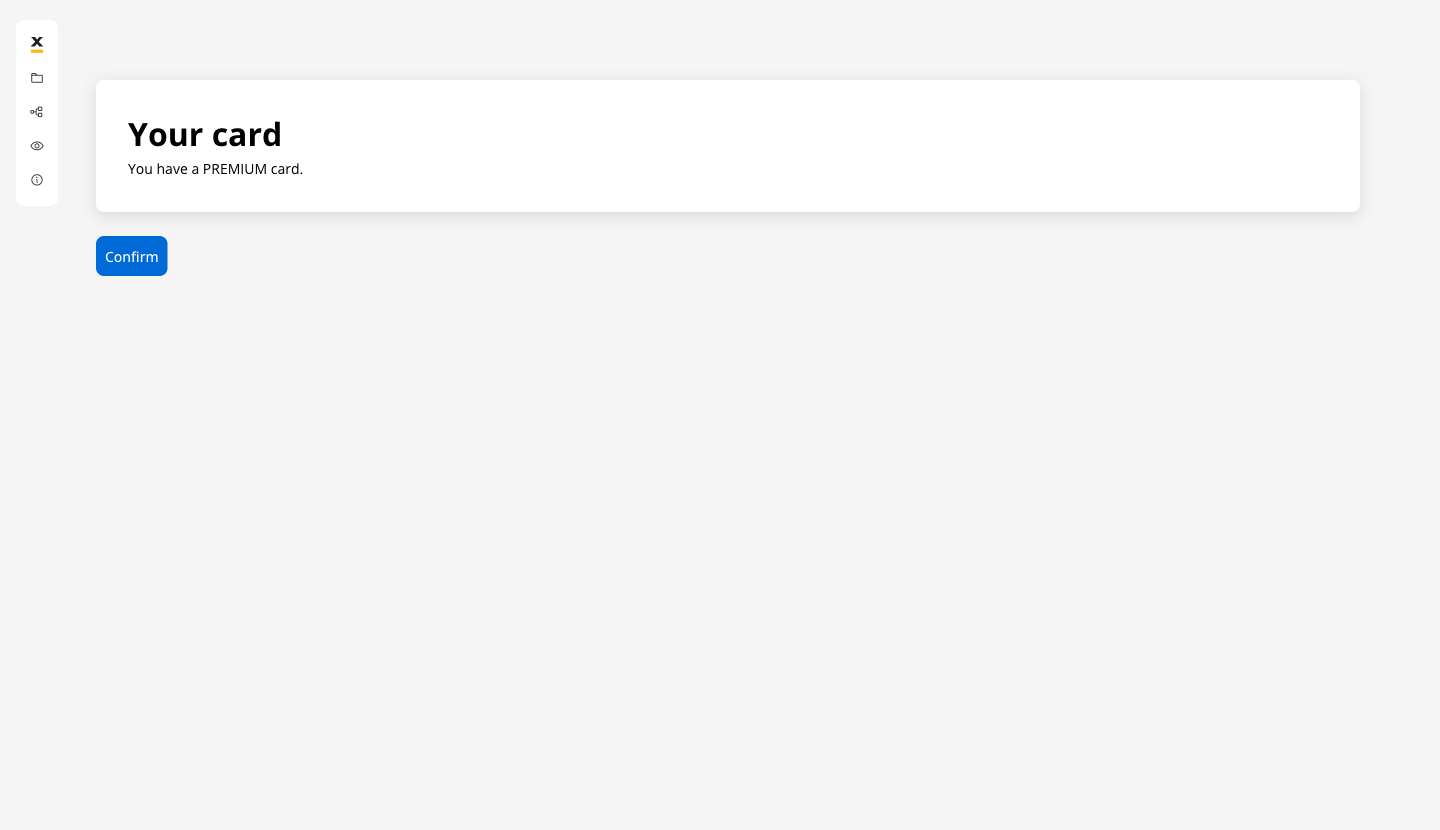
You have a ${application.cardType} card. The value is filled in from the process data when the screen shows.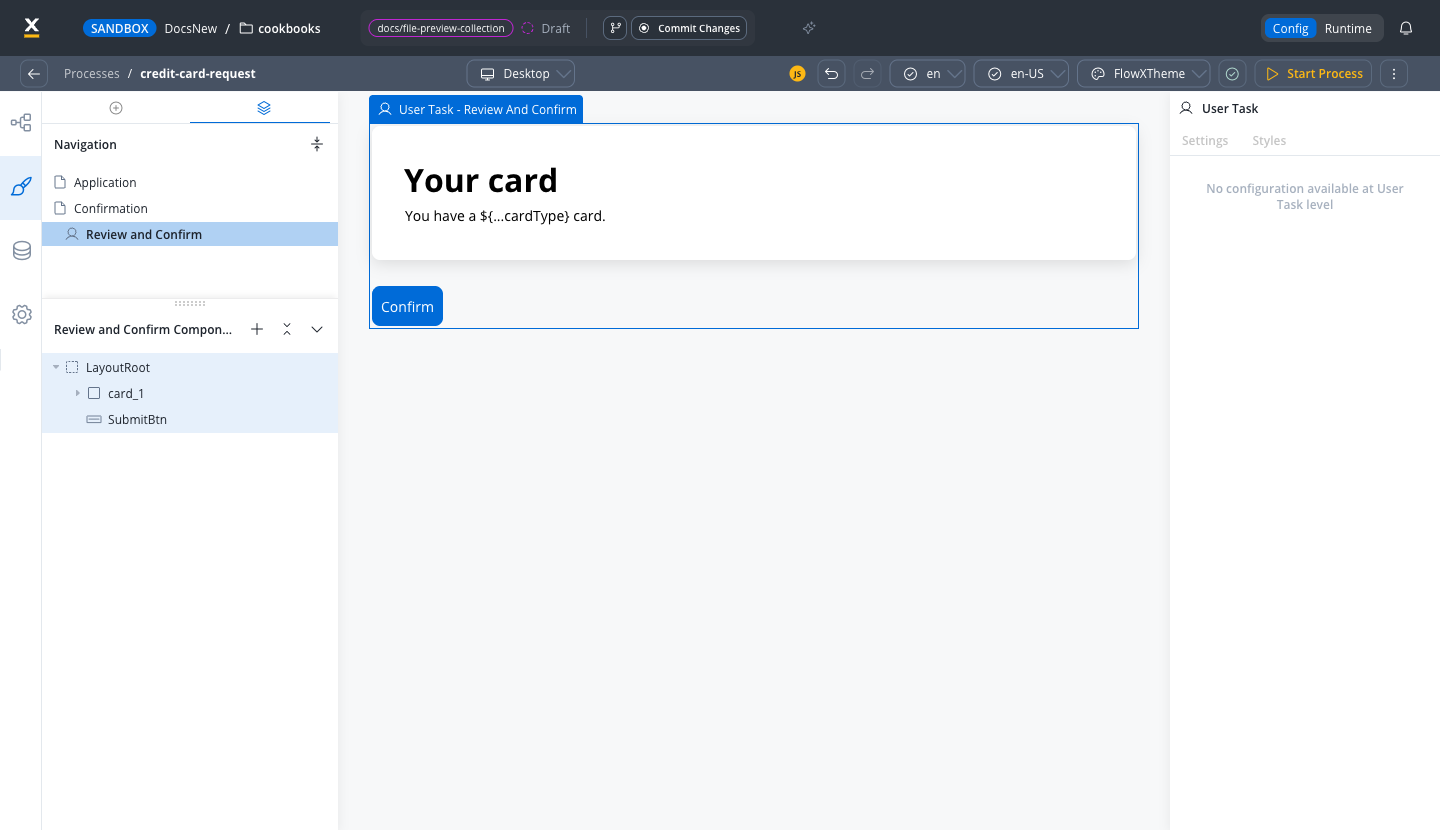
Add the Confirm button
Confirm in the UI Designer and give it an On Click event handler with Action Type set to Node Action, pointing at this node’s saveData action, exactly as you did in Step 2.Step 6: End the process
Drag an End Event afterReview and Confirm and connect it. When the customer clicks Confirm, the token reaches the End Event and the instance completes.
Test your process
Check for warnings
Start a process instance
{} and click Start Process. The form opens. Fill it in with an annual income of 90000 and click Continue. The score is computed, the gateway routes to Premium, and the confirmation screen shows You have a PREMIUM card. Click Confirm.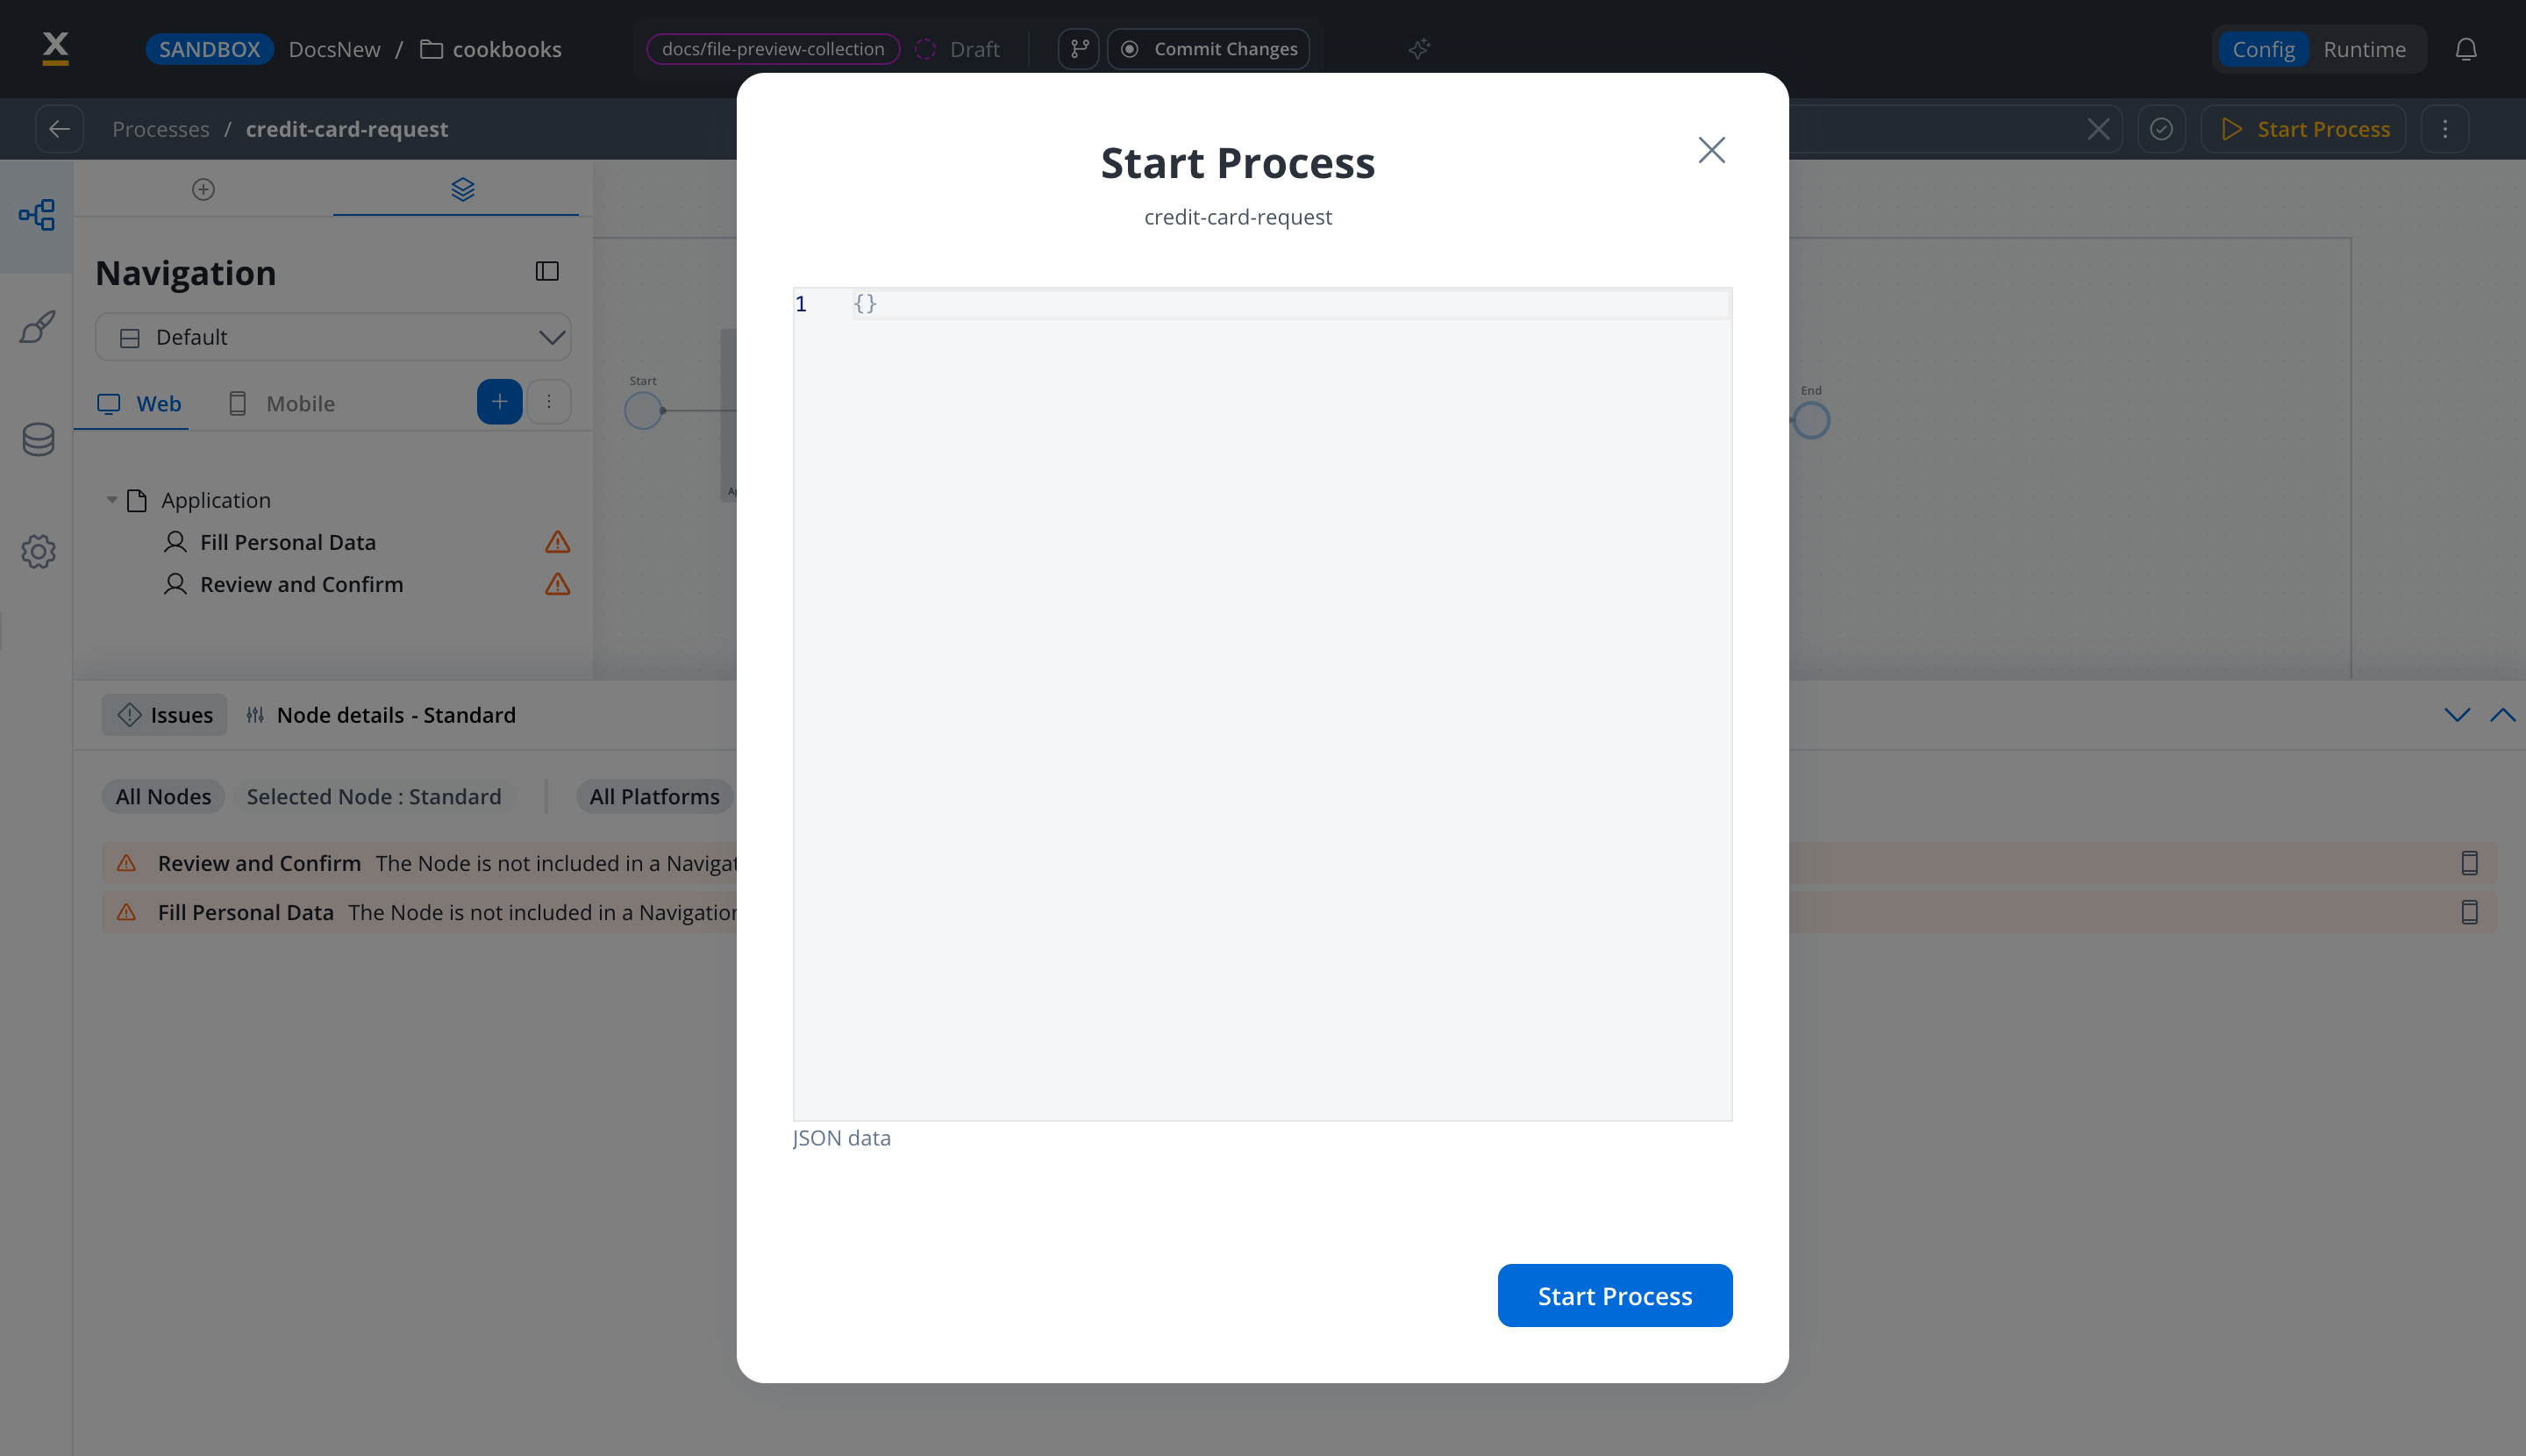
Inspect the instance
application.creditScore set to 750 and application.cardType set to PREMIUM.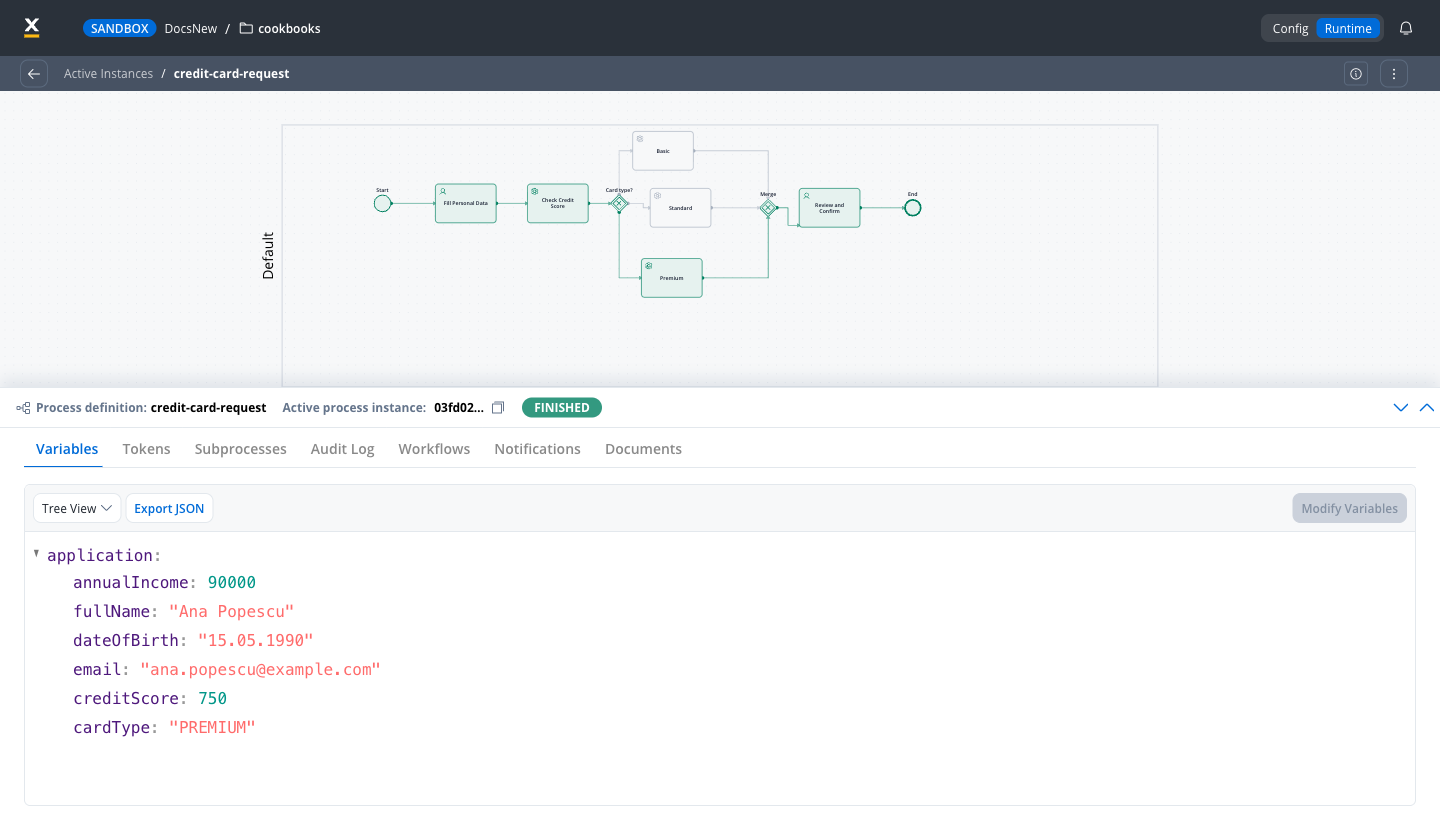
Starting a process
Troubleshooting
Continue fails with Previous mandatory actions were not completed
Continue fails with Previous mandatory actions were not completed
saveData added by mistake. Open the node’s Actions tab and remove the extra action, so the Continue button points at the only manual action left.The form and the confirmation screen show up together
The form and the confirmation screen show up together
Review and Confirm to its own Page in the Navigation tab, as in Step 5.A score of 750 ends up as a Standard card
A score of 750 ends up as a Standard card
>= 700 condition is above the >= 500 one, then click Save.What you learned
Extend the process
The full version of this scenario adds integrations. Each one needs a system outside FlowX, which is why they are not part of the guided steps:- Real credit scoring: replace the business rule with an integration workflow that calls your scoring service, as shown in Step 3.
- Confirmation email: after the customer confirms, add a Send Message Task that calls the notifications plugin with the customer’s name and card type.
- Register the card in the core banking system: run it in parallel with the email by wrapping both in a Parallel Gateway, each branch calling its own integration workflow.
- Pick a branch for card pickup: call a locations API from a workflow, then let the customer choose a branch in another user task.