


A process definition version can accommodate only one Timer Start Event, and a swimlane can hold only one start node of any kind (Start Event, Message Start Event, or Timer Start Event).
Configuration
The Timer Start Event supports two timer types:The Start Timer Event supports either ISO 8601 formats or Spring cron expressions for defining timer values. The Definition must be a static value: the dynamic value option (reading the definition from a process parameter) is not available on this node, because no process instance exists yet when the timer fires.
Starting a process via registered timers requires sending a process start message to Kafka, necessitating a service account and authentication. For detailed guidance, refer to:Service Accounts
Timer type details
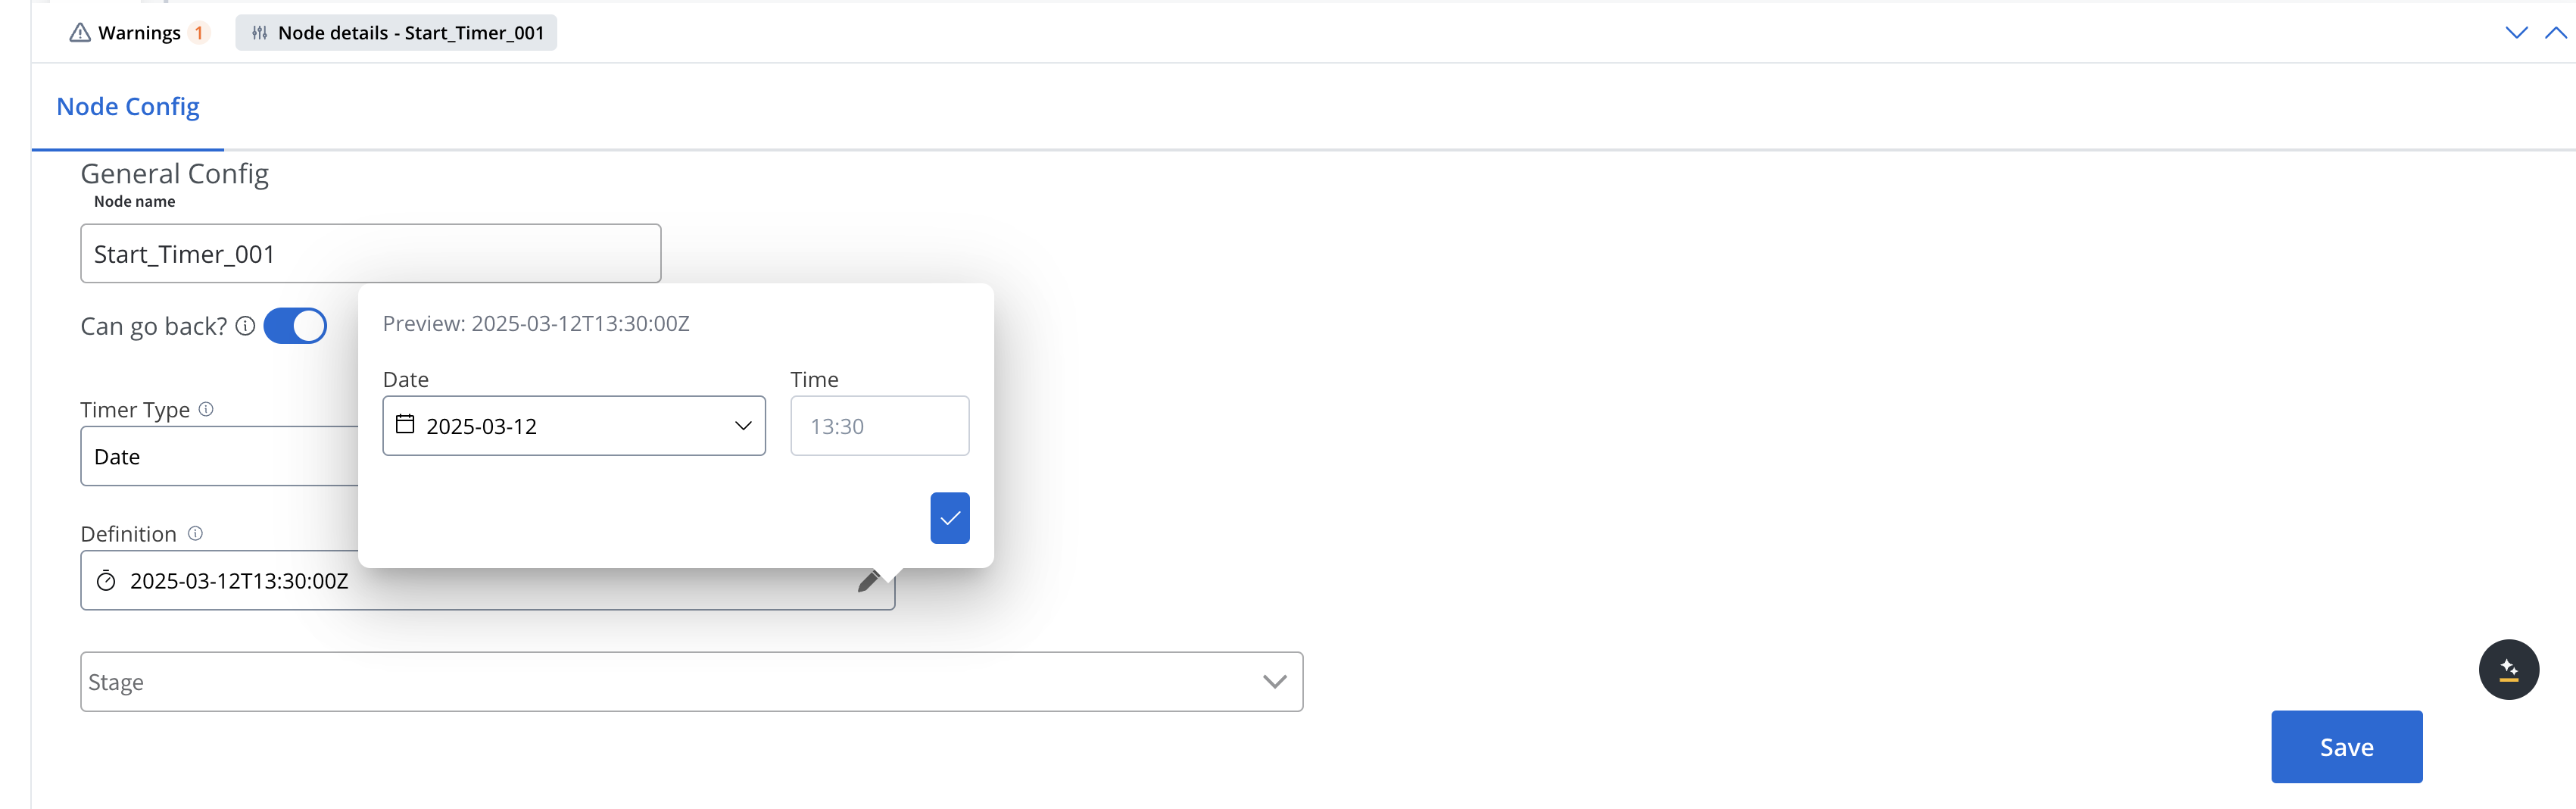
Date
Specifies an exact date and time for triggering the event. You can use ISO 8601 date format for accurate date-time representation. When configuring a Date timer with the definition editor (pencil icon), you can set:- Date: Select a specific date (format: yyyy-mm-dd) using the date picker
- Time: Set the specific time when the timer should trigger
2025-03-12T13:30:00Z). To schedule in another time zone, type the ISO value with an offset directly in the Definition field (for example 2025-03-12T15:30:00+02:00).
Cycle
Specifies a repeating interval for triggering the event. Select ISO or Cron next to the Definition label to choose the format. For the Cycle timer definition, you can use either:ISO 8601 repeating intervals
For standardized time intervals (e.g., “R5/PT10M” for repeating 5 times with 10 minutes between each)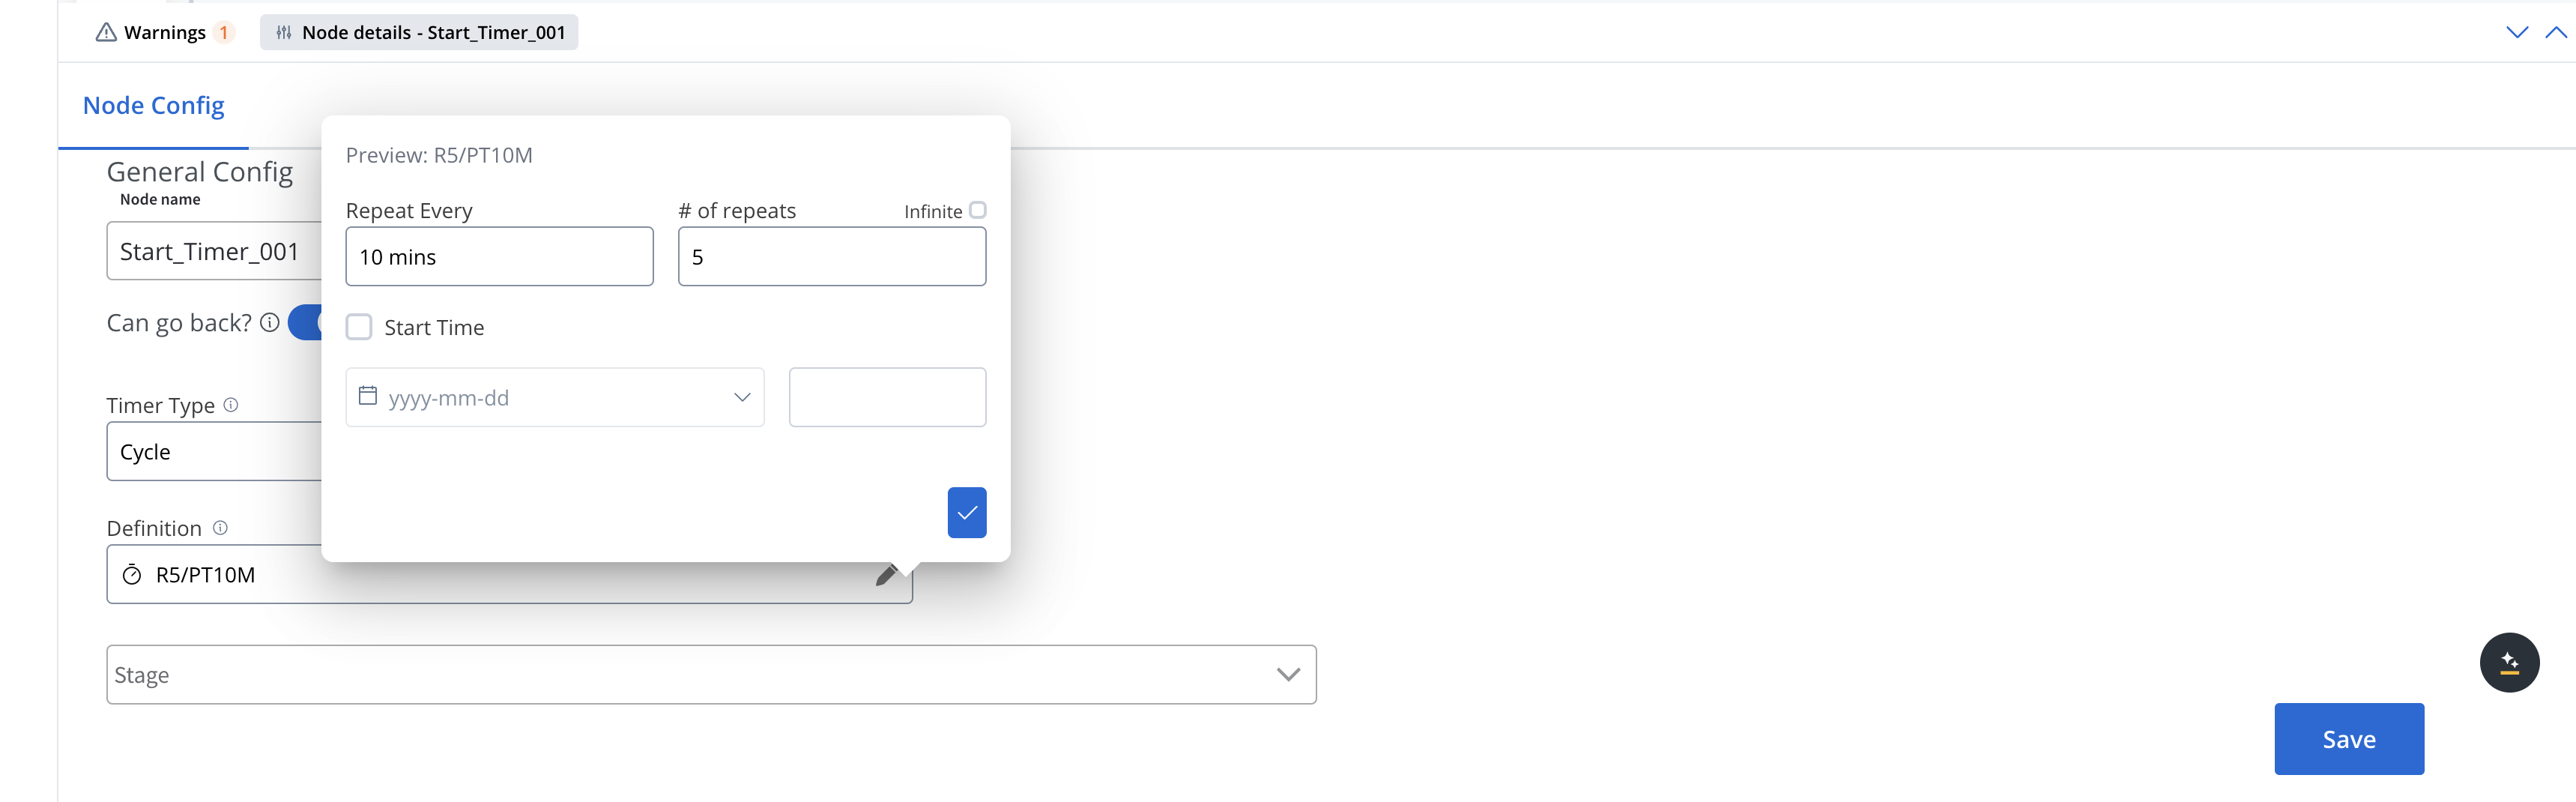
Cron expressions
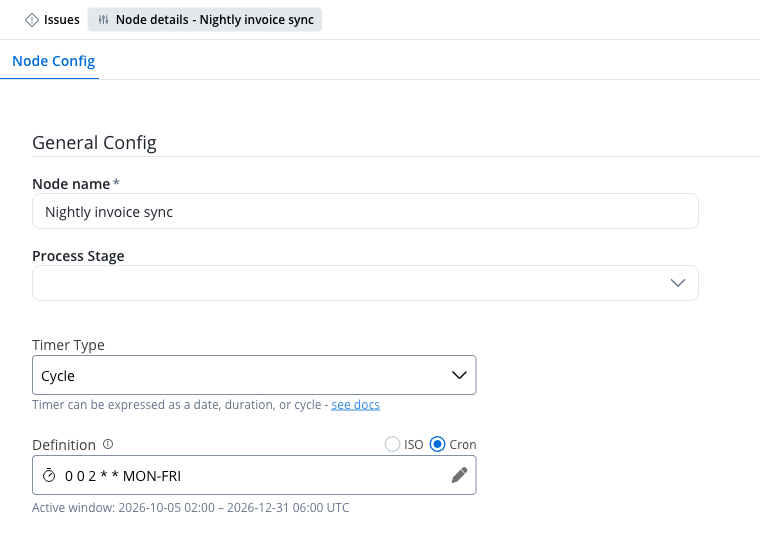
For more complex scheduling patterns (e.g., “0 0 12 * * MON-FRI” for 12pm every weekday). Type the Spring cron expression in the Definition field. The definition editor (pencil icon) lets you bound the schedule with a Start Date and Start Time and an End Date and End Time. The timer fires only inside this window. These bounds exist only on Timer Start Events.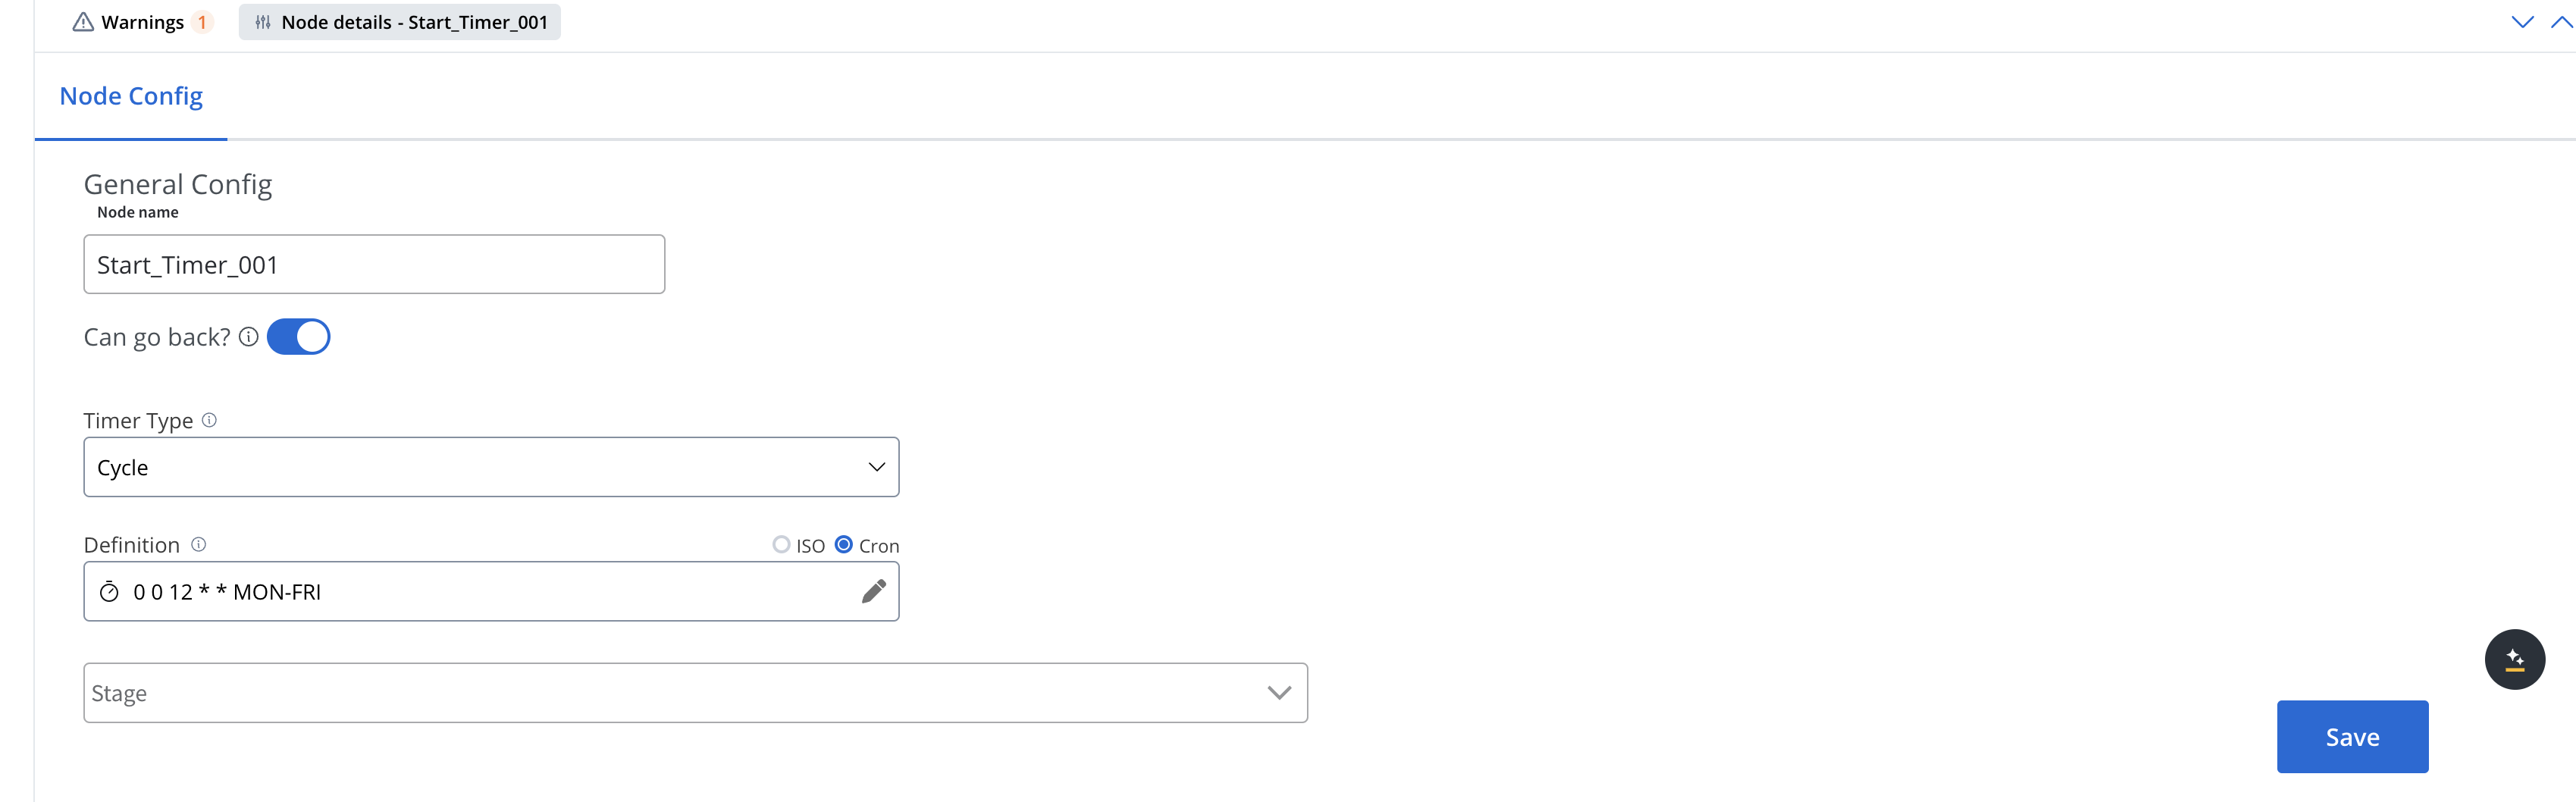
Cron editor with required schedule window
SaaS · 5.13Available on SaaS with FlowX.AI 5.13. This feature is live on managed (SaaS) deployments now. Self-hosted deployments will receive it with the next LTS release family.
0 */5 * * * ? for every five minutes. The start and end date and time are required for Timer Start Events. Once both are set, the panel shows the resulting window under the definition, for example Active window: 2026-10-01 09:00 – 2026-12-31 18:00 UTC.
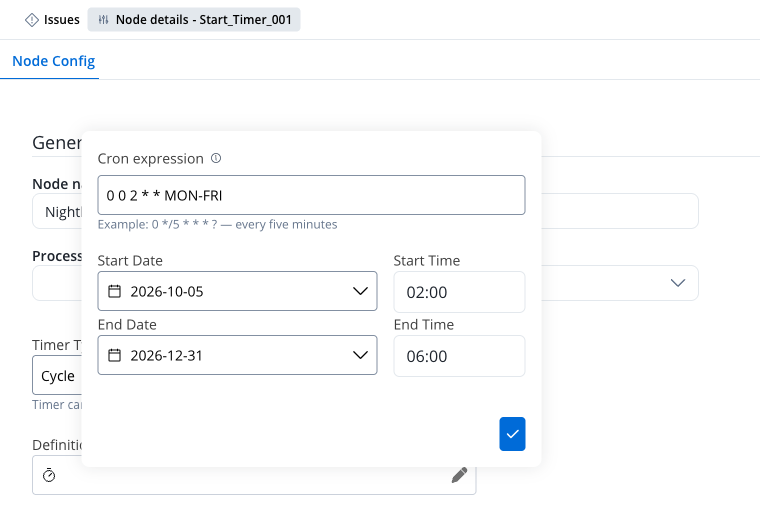
?, L, W, #, month and weekday names, and the @hourly, @daily, @midnight, @weekly, @monthly, @yearly, and @annually macros. A seventh field is rejected with Invalid cron expression.
Activate/deactivate start timer events
All timers can be activated/deactivated in the Runtime section under “Scheduled Processes”: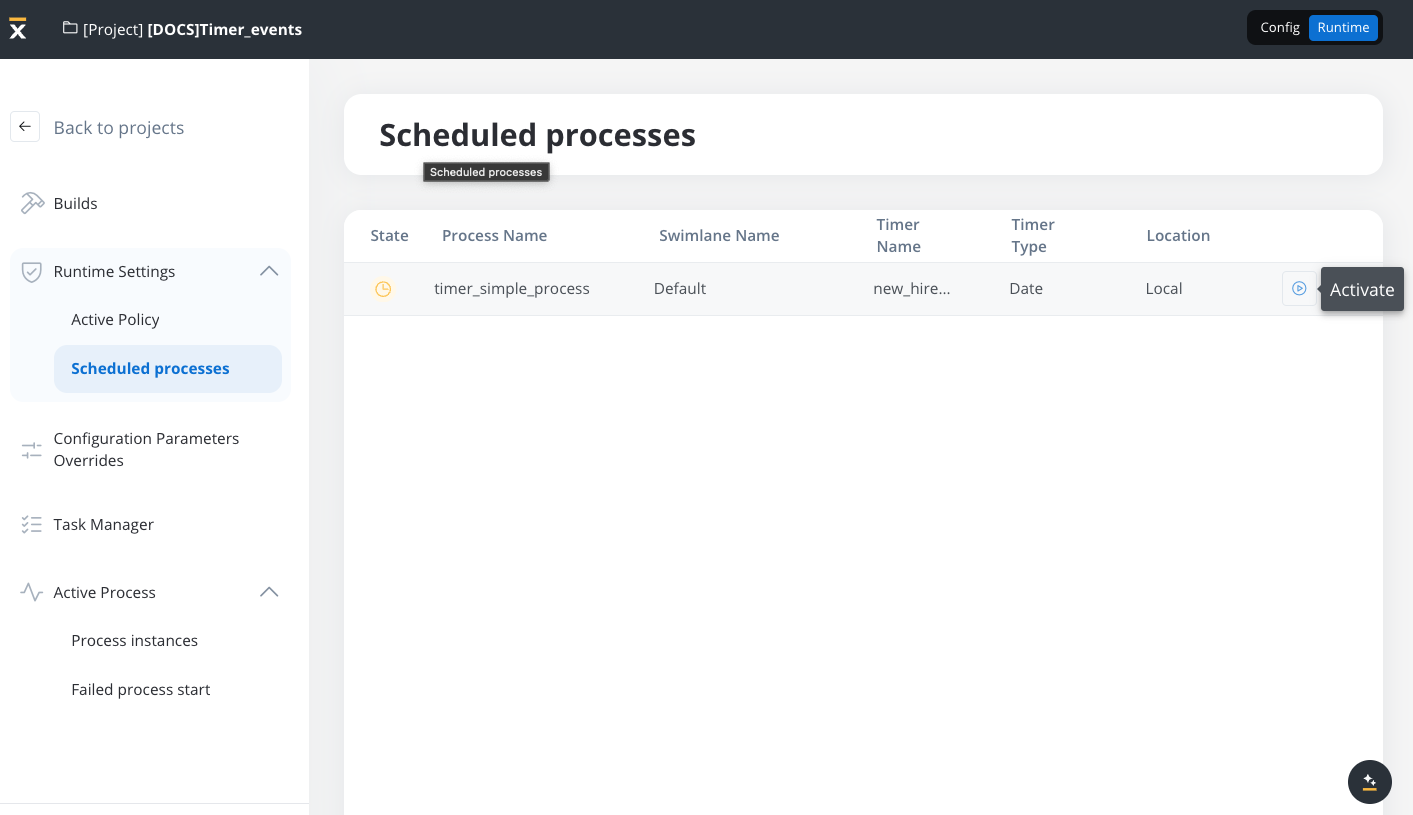
If a project contains multiple versions with Start Timer Event nodes, a scheduler will be generated only for the ones included in the version set in the active policy.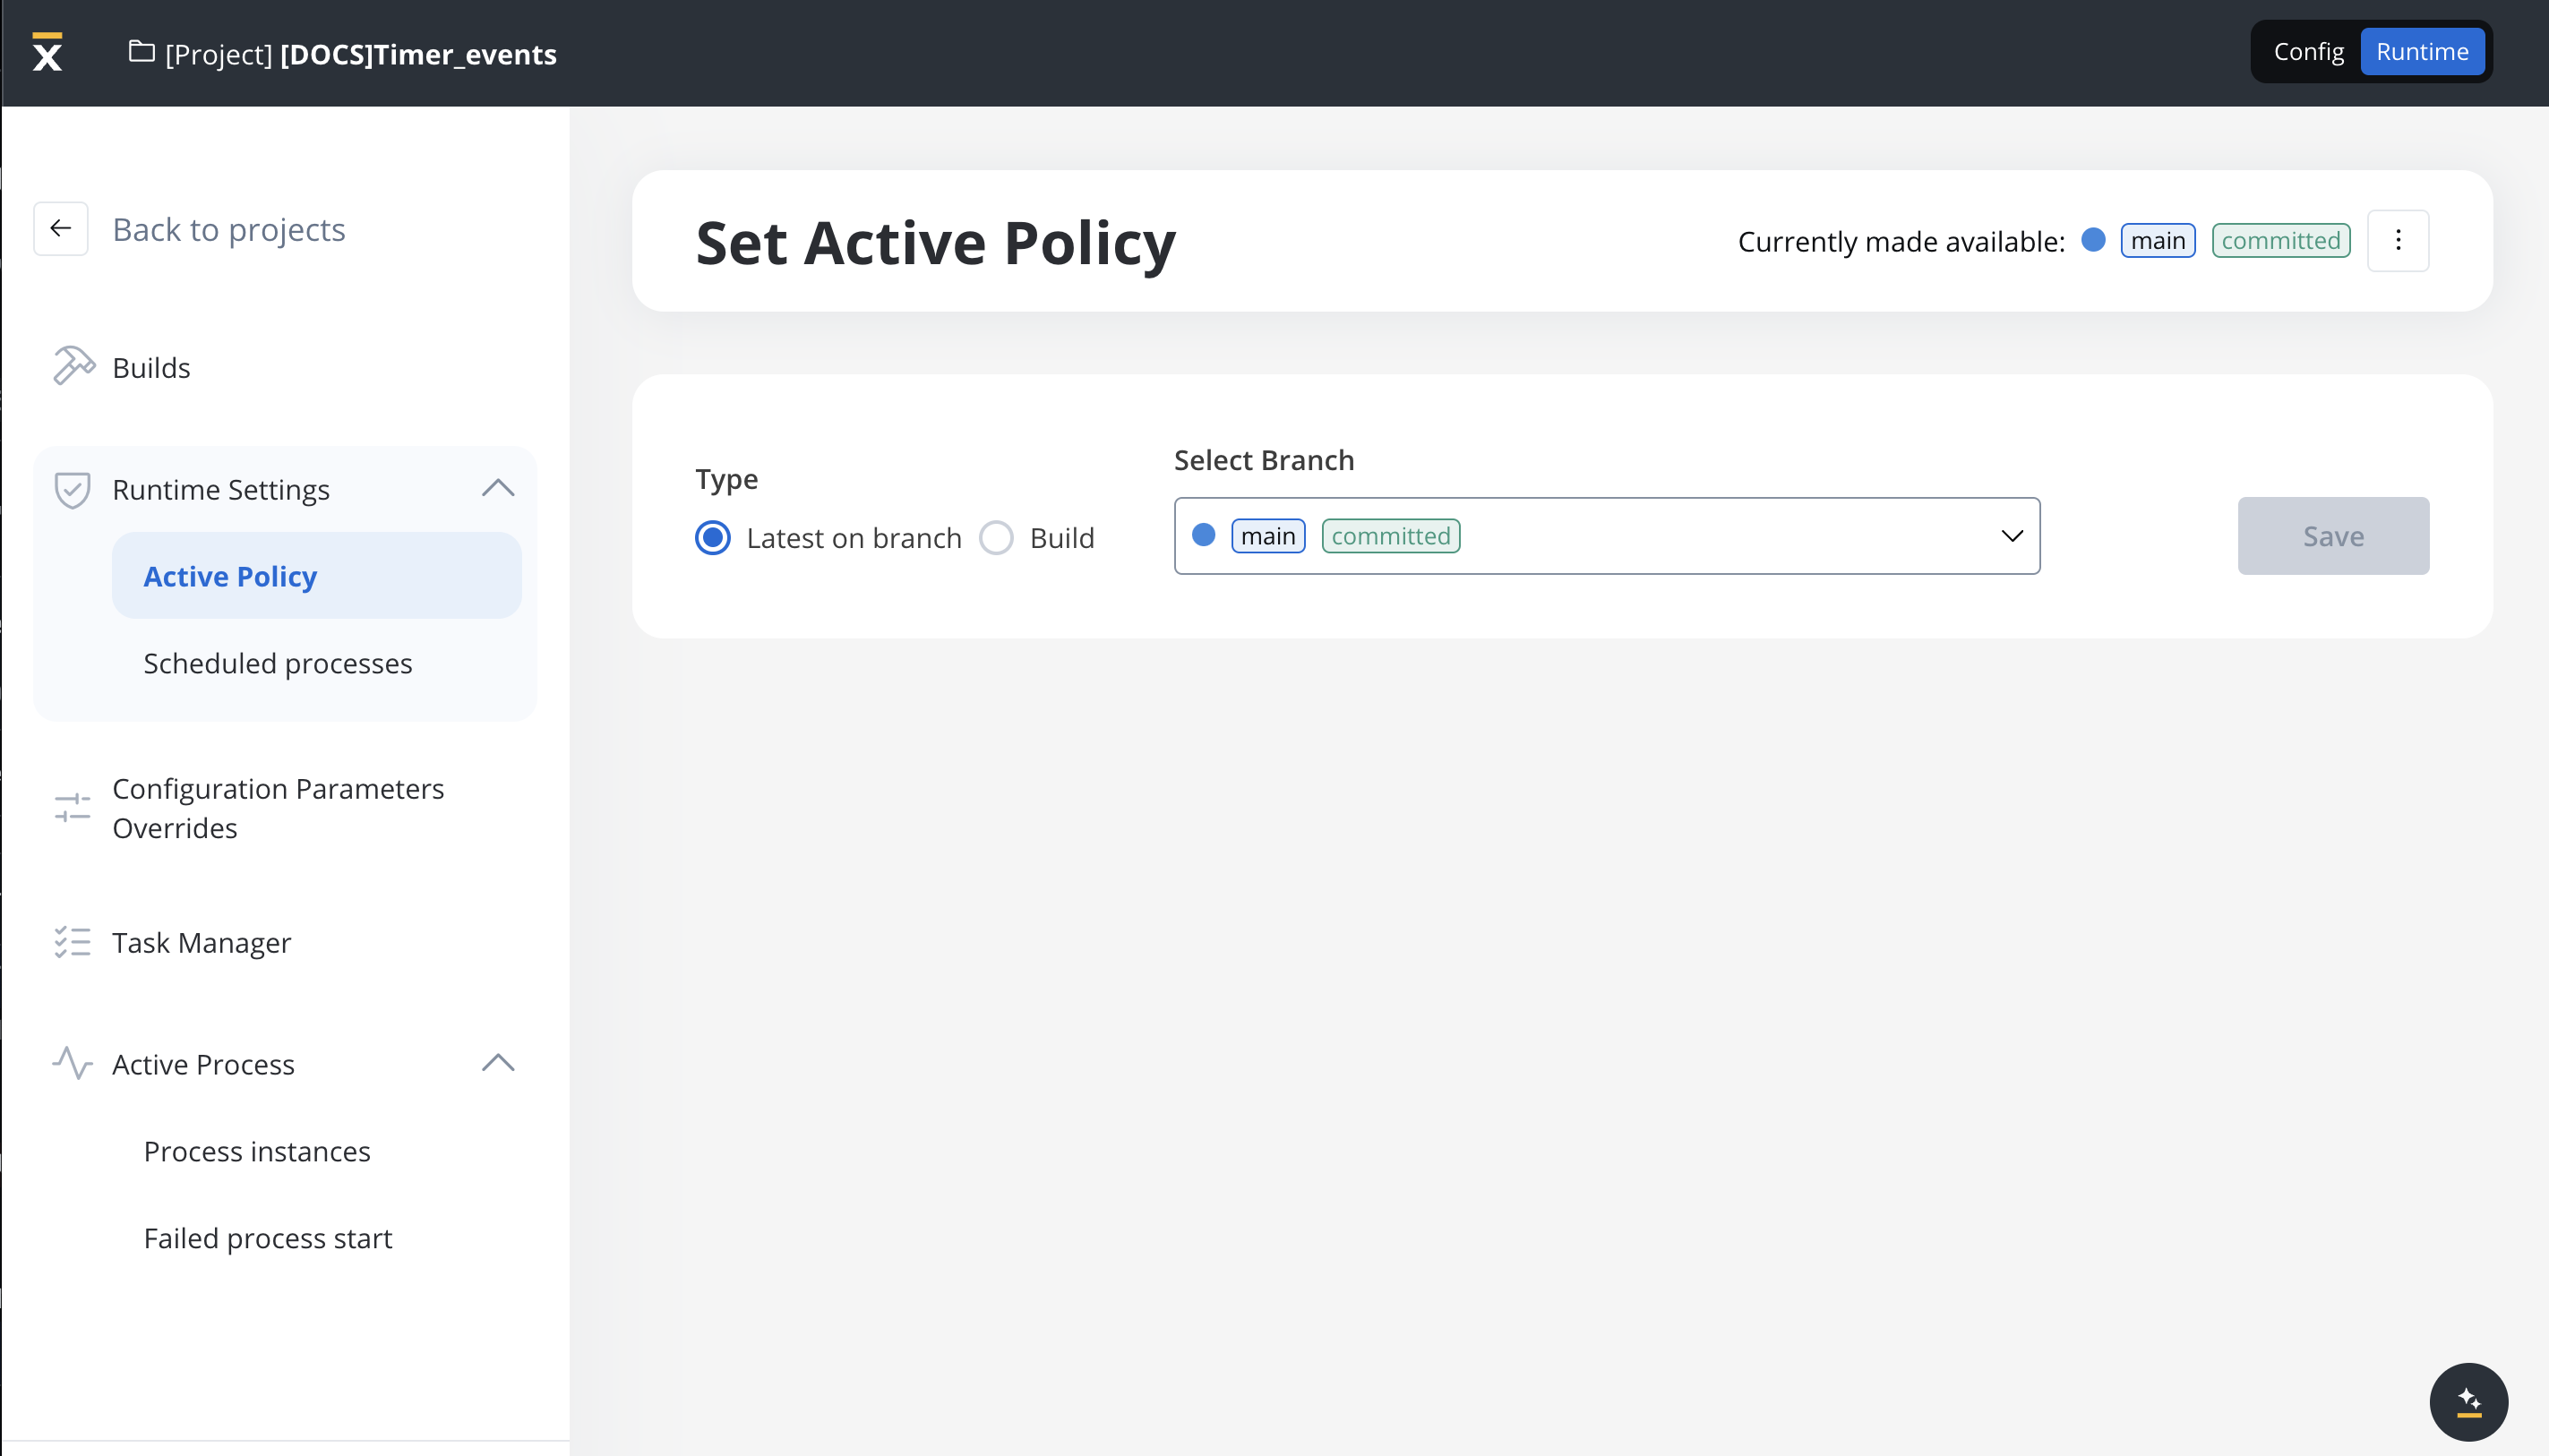
Usage examples
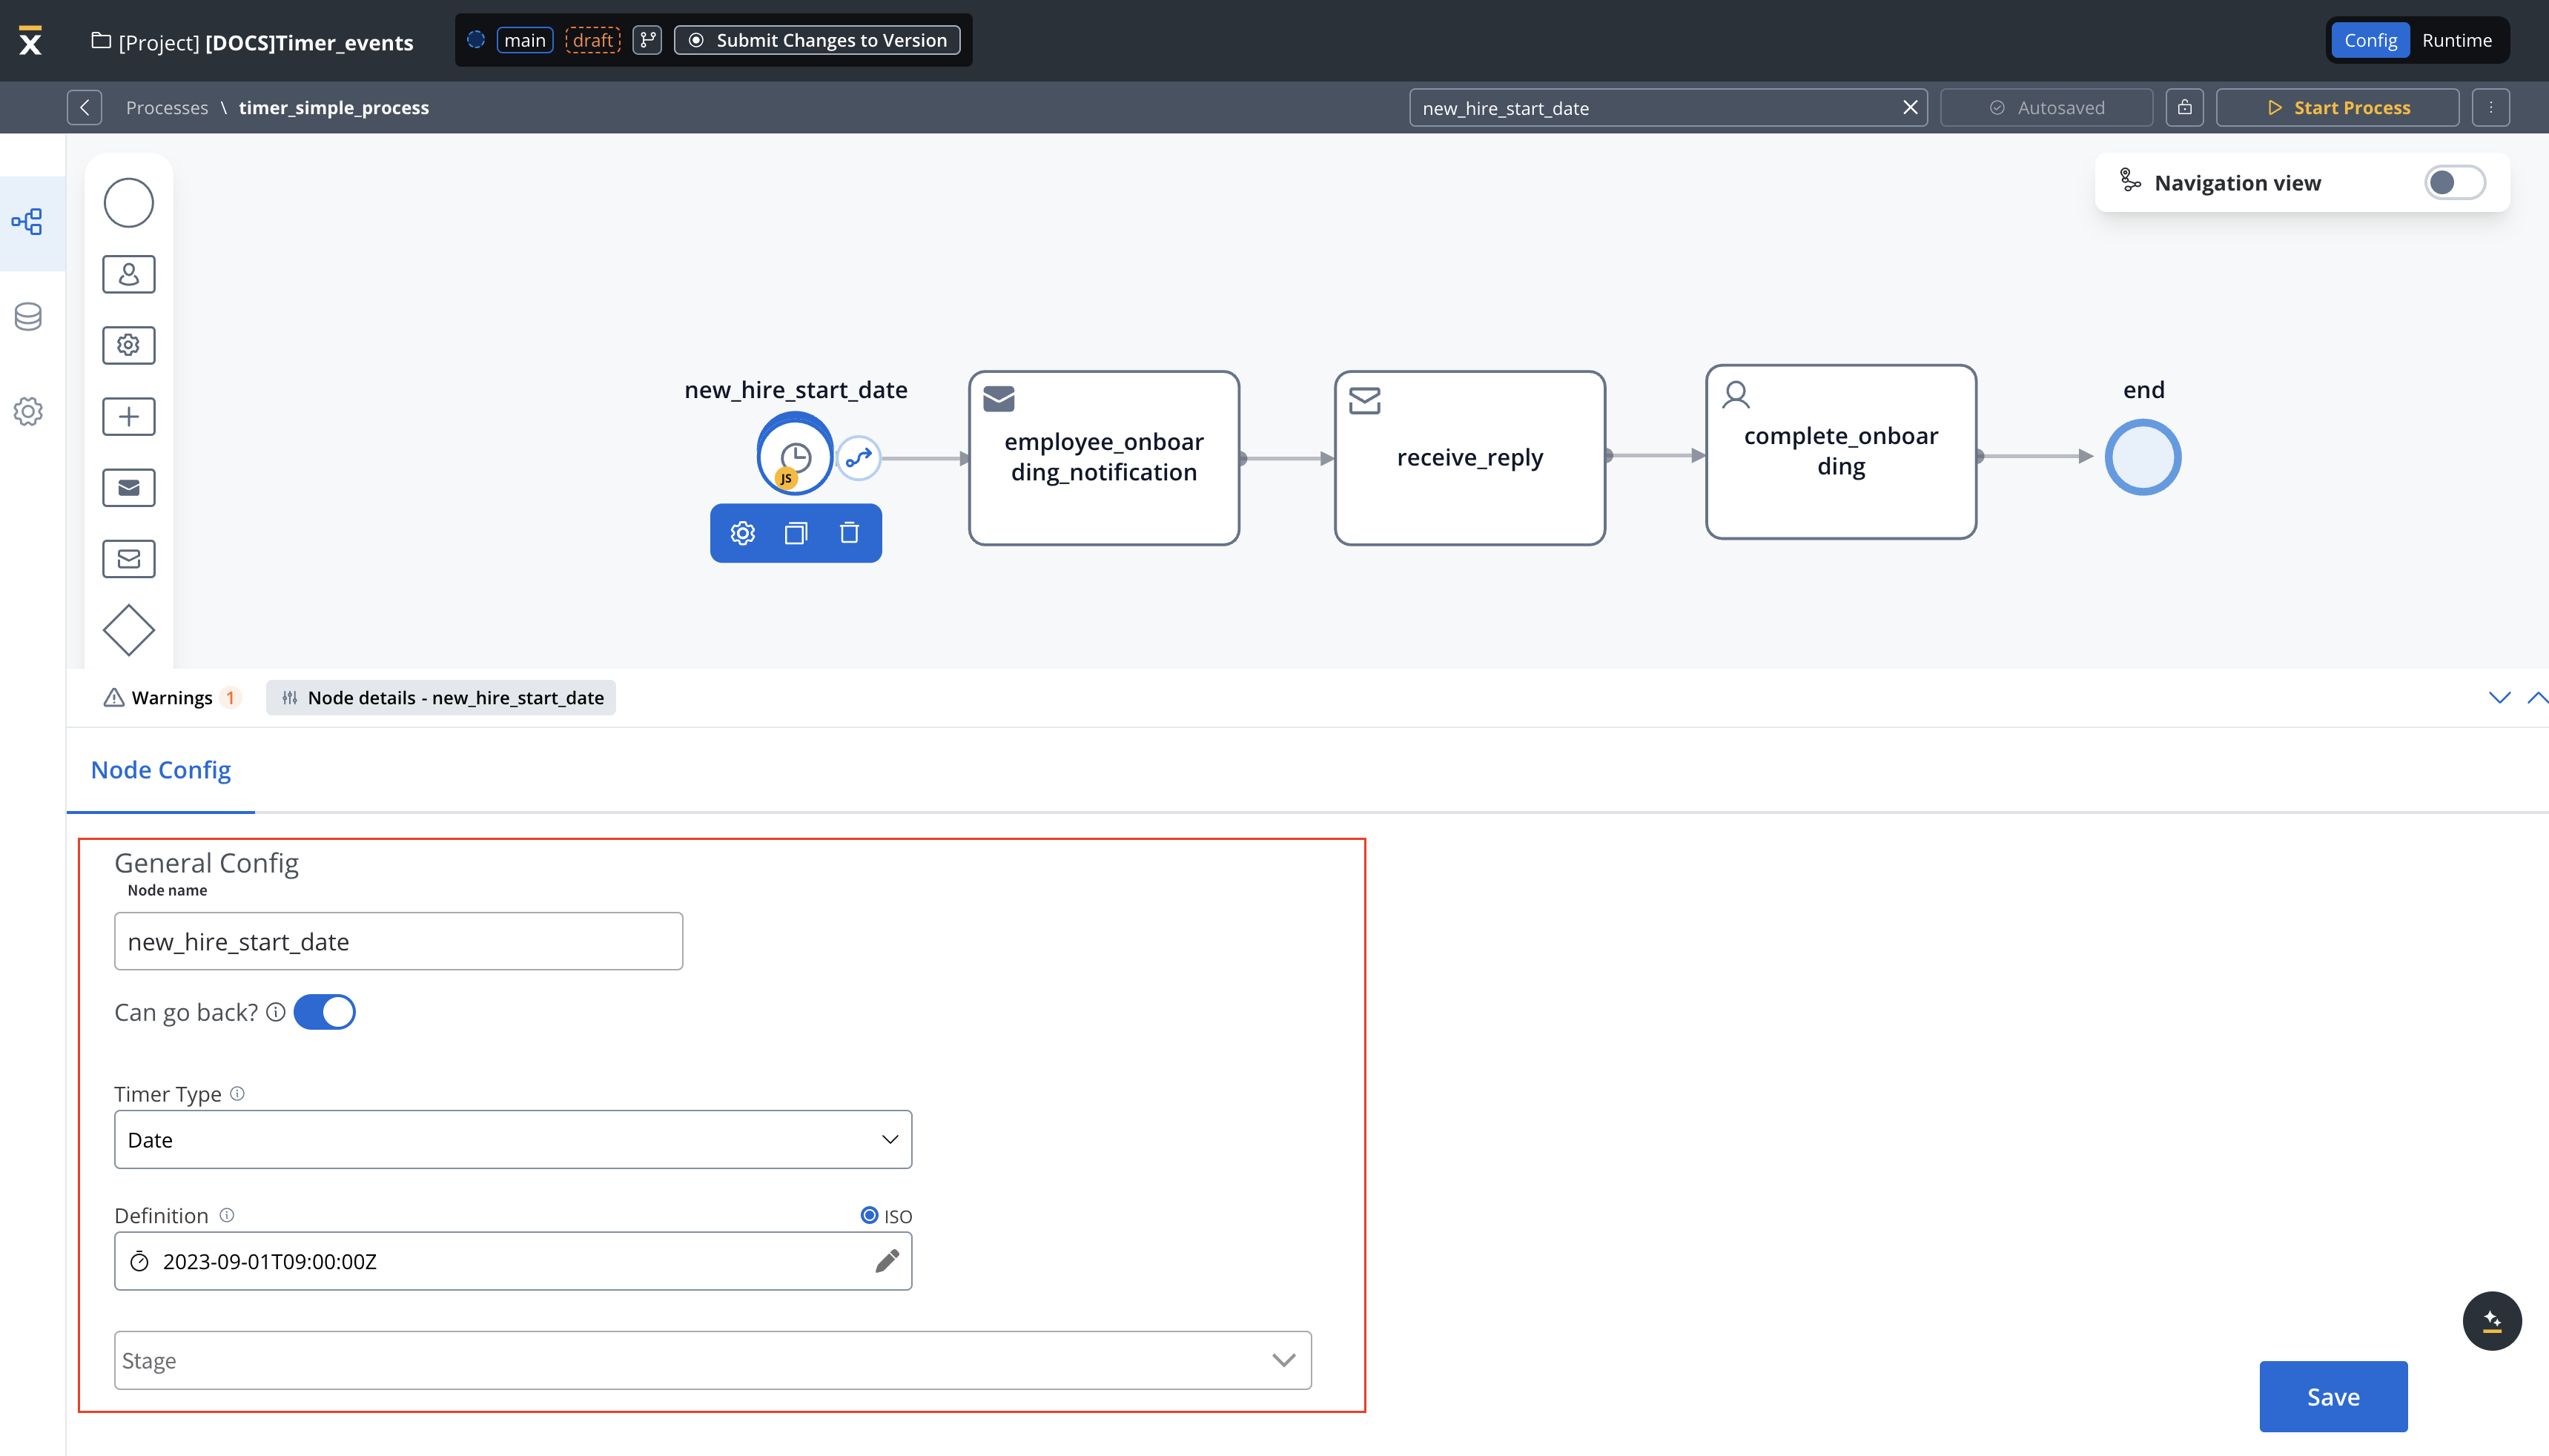
Date timer example: Employee Onboarding Reminder
In this scenario, the Timer Start Event triggers an employee onboarding process at a specific date and time.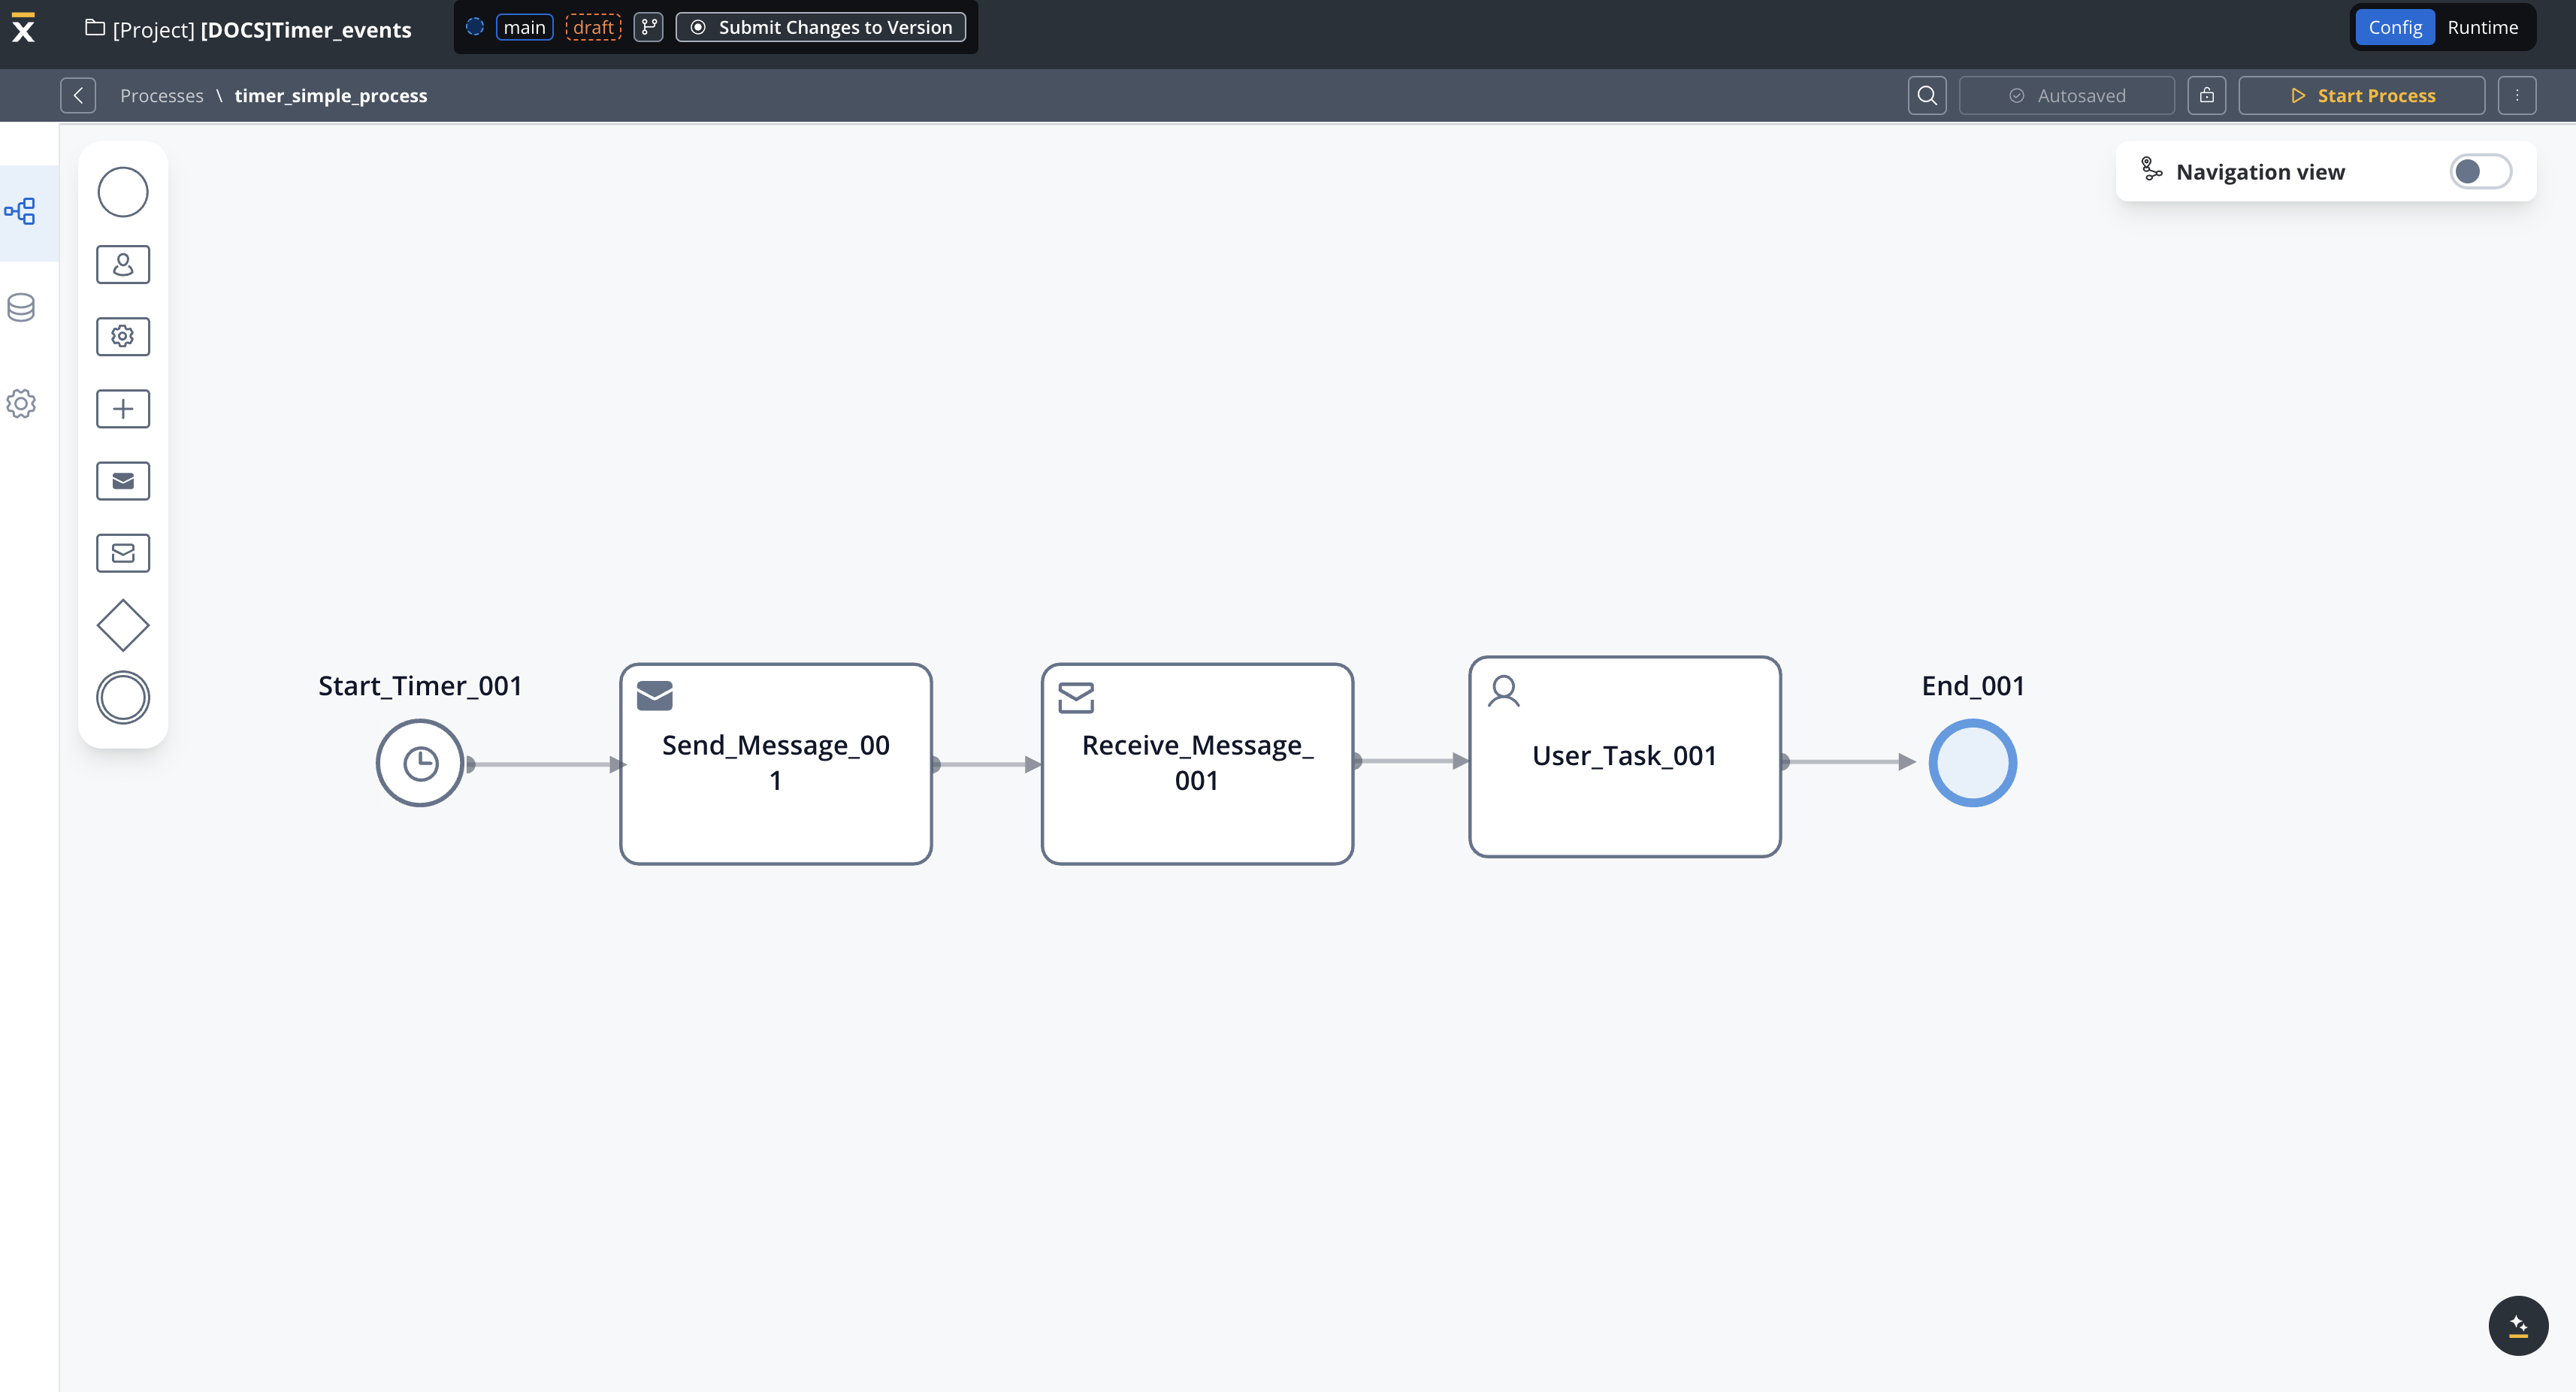
- Start Event (Timer Start Event) - New Hire Start Date
- Timer Definition: 2023-09-01T09:00:00Z (ISO 8601 format) → This means the process will initiate automatically at the specified date and time.
- This event serves as the trigger for the entire process.
- Transition → Employee Onboarding Notification
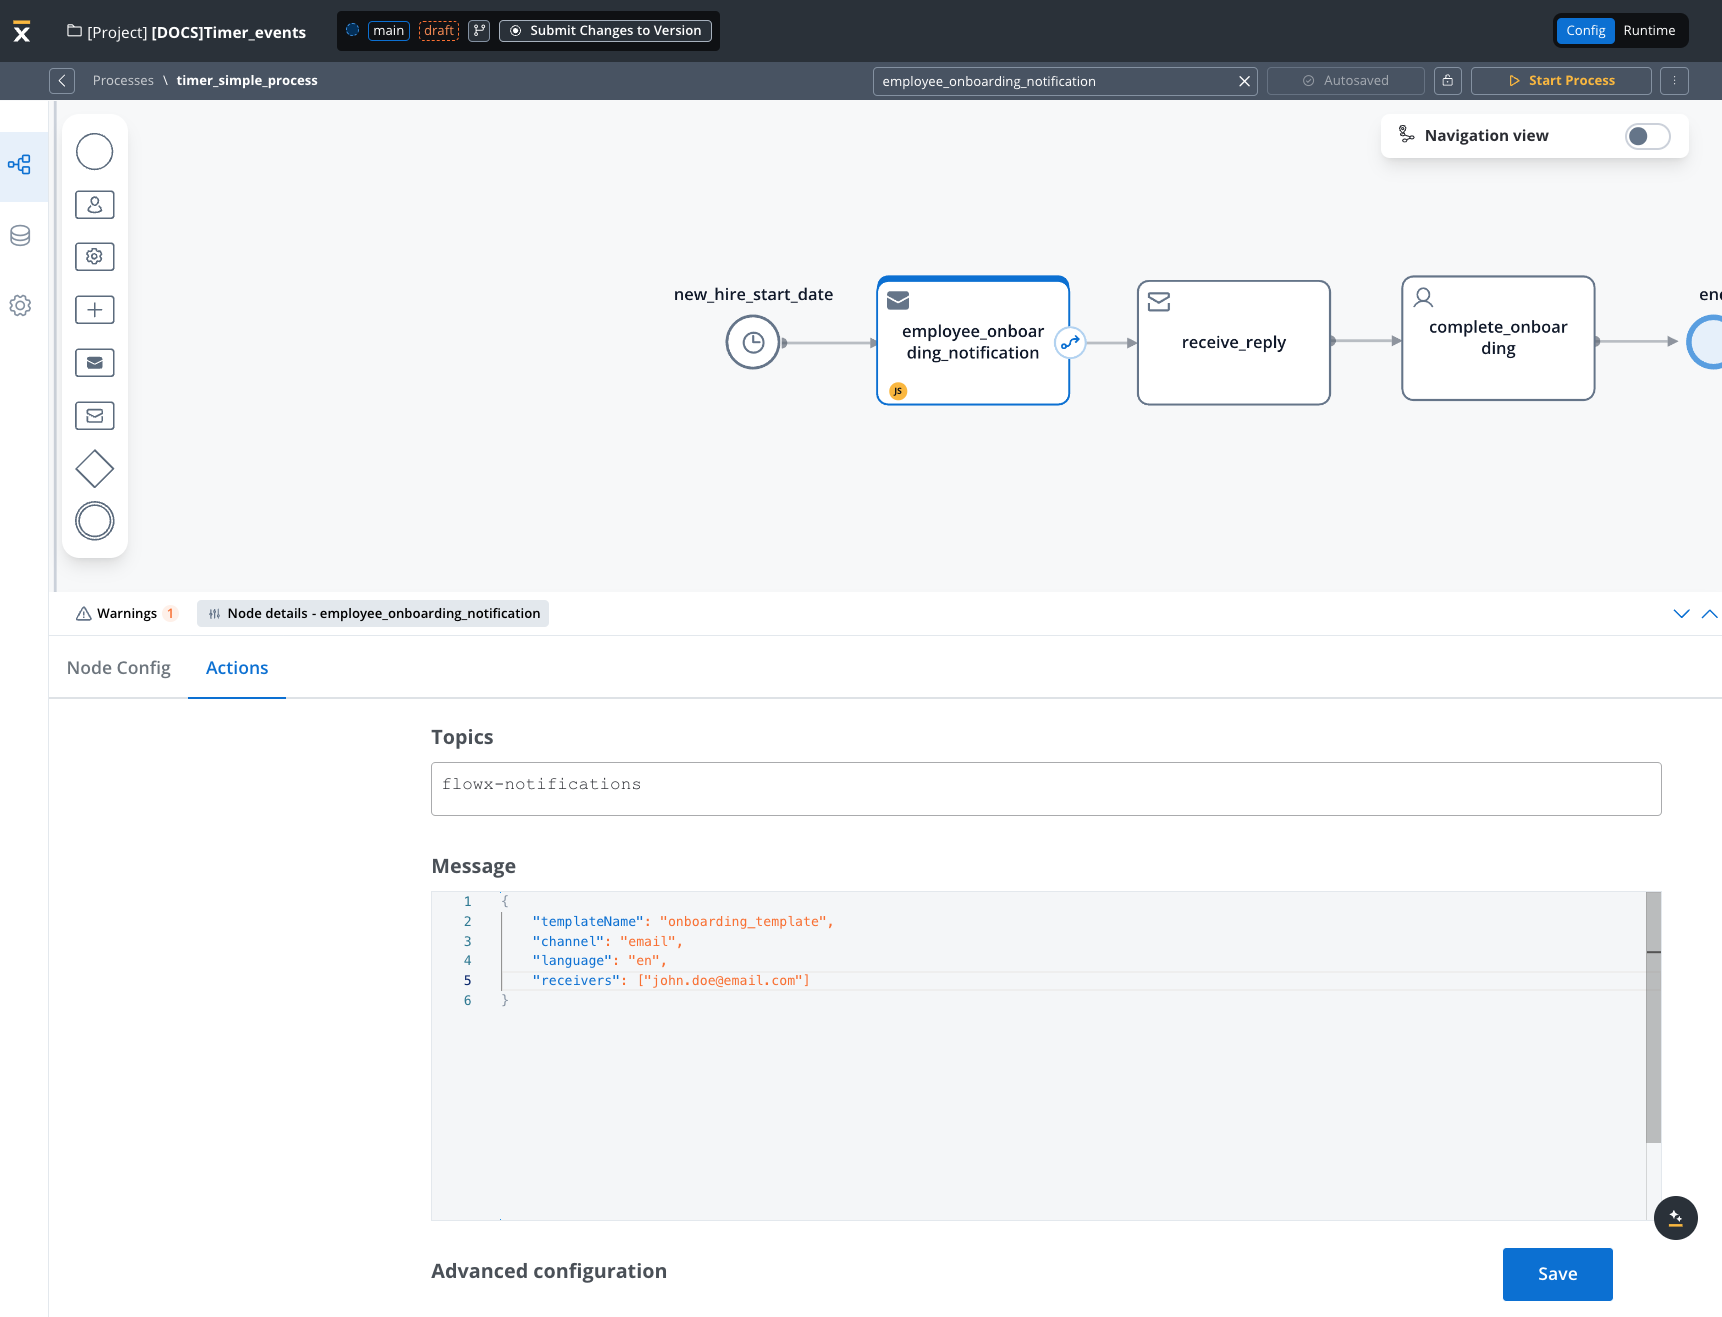
- Employee Onboarding Notification
- Notify new employee about onboarding requirements by sending an email notification with a template called “Important Onboarding Information”
- Actions: The HR team or automated system sends out necessary email information/documents, and instructions to the new employee.
- After the notification is sent, the process transitions to the Complete Onboarding node.
- Complete Onboarding
- Employee onboarding completed
- At this point, the employee’s onboarding process is considered complete.
- Actions: The employee may have completed required tasks, paperwork, or orientation sessions.
General rules
- Schedulers are generated only for builds that are part of the active policy.
- If you change the active policy, processes with Timer Start Event nodes might appear or disappear from the scheduled processes list if they aren’t part of the active build.
- You can view scheduled processes in the Runtime section under “Scheduled Processes”.
- When a build in the active policy is updated with new Timer Start Event settings:
- The scheduler is updated based on the new settings.
- The scheduler state (active or suspended) remains the same as before.