

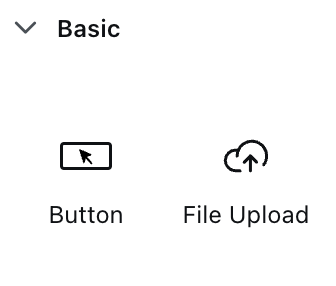
Button types overview
Choose the right button type for your specific use case:Basic Button
Trigger actions like process advancement, sending notifications, or opening new content
File Upload Button
Enable file selection with built-in validation for file types and sizes
Basic button
Basic buttons serve as the primary interaction mechanism for users to perform actions within your application. They can trigger process flows, send notifications, navigate to different sections, or execute business logic.Configuration overview
Properties
Labels and basic settings
Event Handlers
Event handling and action types
Styling
Visual appearance and icons
Basic button properties
Label configuration
Label configuration
Purpose: Define the text displayed on the button. A new button starts with the label “Button” and the Fill type.Features:
- Dynamic text from process data
- Localization support for multi-language applications
- Use action-oriented language (“Submit”, “Continue”, “Send”)
- Keep labels concise but descriptive
- Consider button context and user expectations
- Use consistent terminology across the application
Hide and disable conditions, platform overrides
Hide and disable conditions, platform overrides
- Hide condition: under Expressions, add a condition that hides the button when it evaluates to true.
- Disable condition: under Expressions, add a condition that disables the button when it evaluates to true. File upload buttons support it too.
- Platform overrides: in the Web overrides section (and its iOS and Android counterparts), you can override the Label and the Hide expression for one platform. No other button property can be overridden per platform.
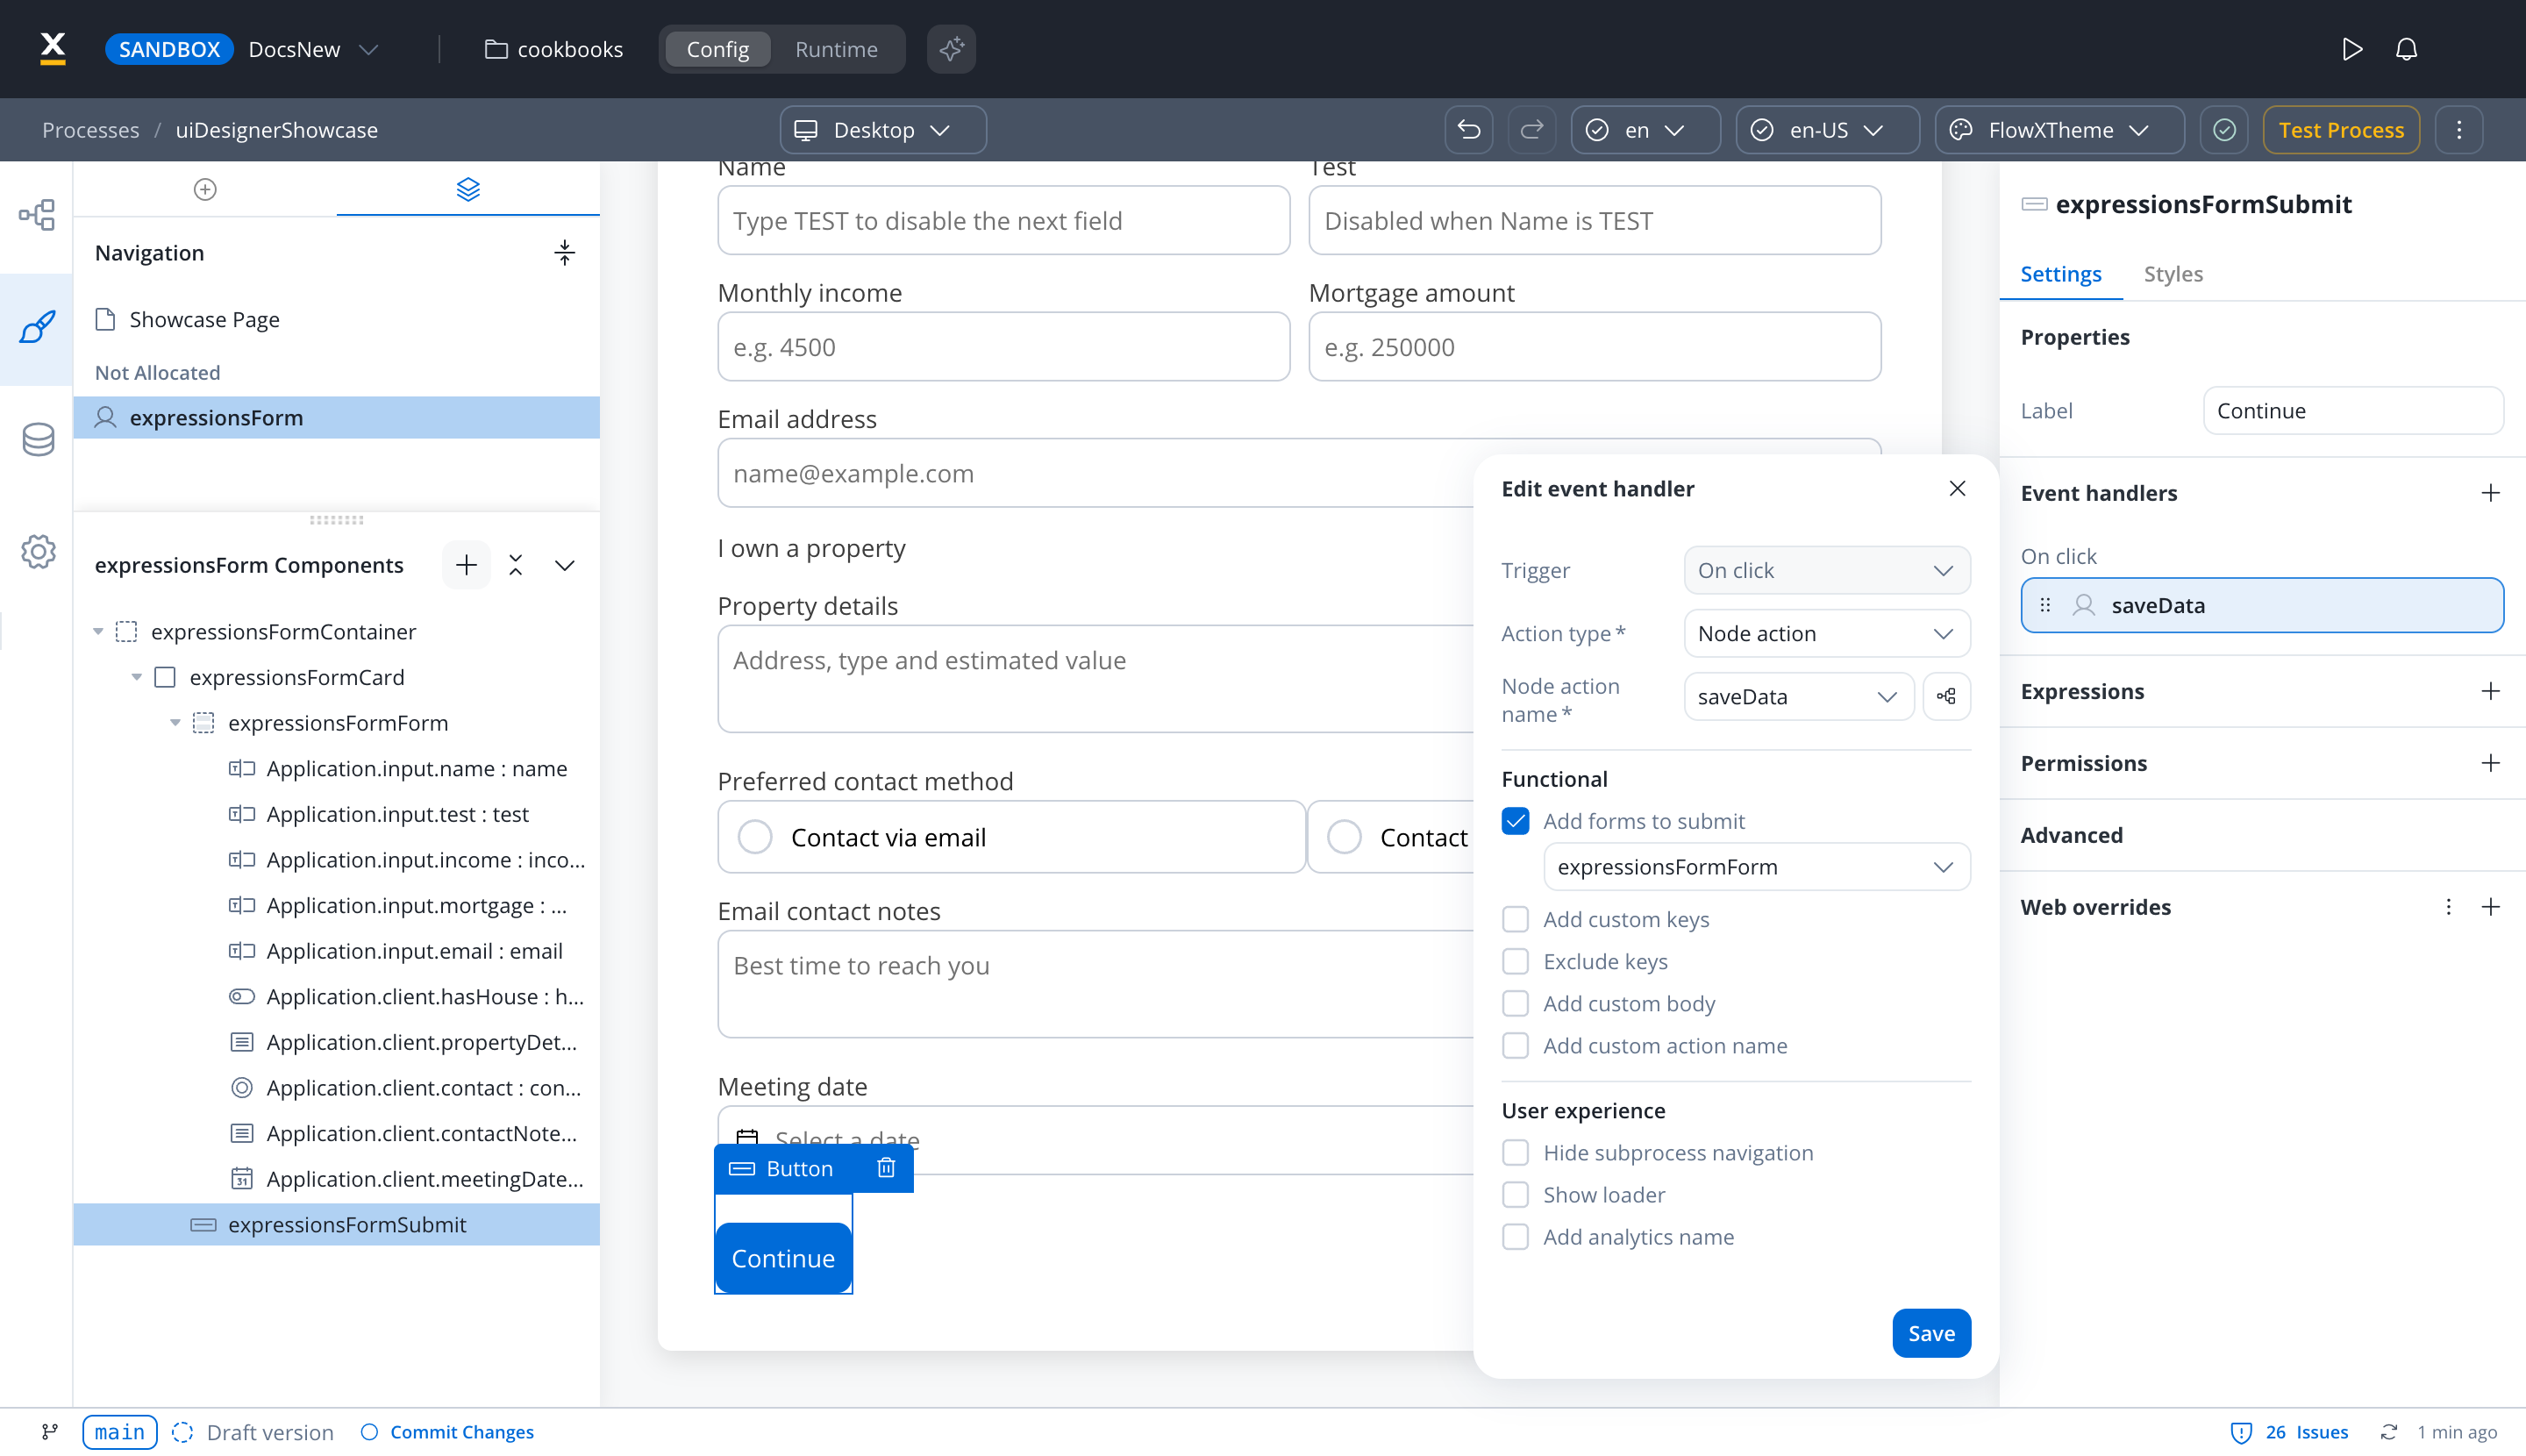
Event handlers configuration
Define the behavior when users interact with your button:- Event types
- Action types
While On click is the only trigger, the action type determines what happens when the event occurs.
Button styling & visual design
The Styles tab groups the button styling into these sections:- Properties: Type and Icon
- Sizing: width and height behavior
- Spacing
- Typography: Align
- Grid child: shown only when the button sits in a grid layout
- Advanced: Custom CSS class
- Theme overrides: per-button overrides of the theme values (see below)
Button types
Set the button’s visual style with the Type property, found on the Styles tab under Properties. Choose from three styles to match your design system:- Fill
- Ghost
- Text
Appearance: Solid backgroundPurpose: Main call-to-action buttonsCharacteristics:
- High contrast, prominent appearance
- Usually one per screen/section
- Draws immediate attention
Icon integration
Enhance your buttons with meaningful icons:Icon configuration
Icon configuration
On the Styles tab, under Properties, turn on Icon, then set:
- Icon key: select Set value (or Change) to pick an icon from the Media Library
- Icon position: Left, Right or Center. You can choose a position after an icon is set.
An icon color override changes the whole icon fill. Avoid it on multicolor icons to prevent visual distortion.
Icon positioning
Icon positioning
Available Positions: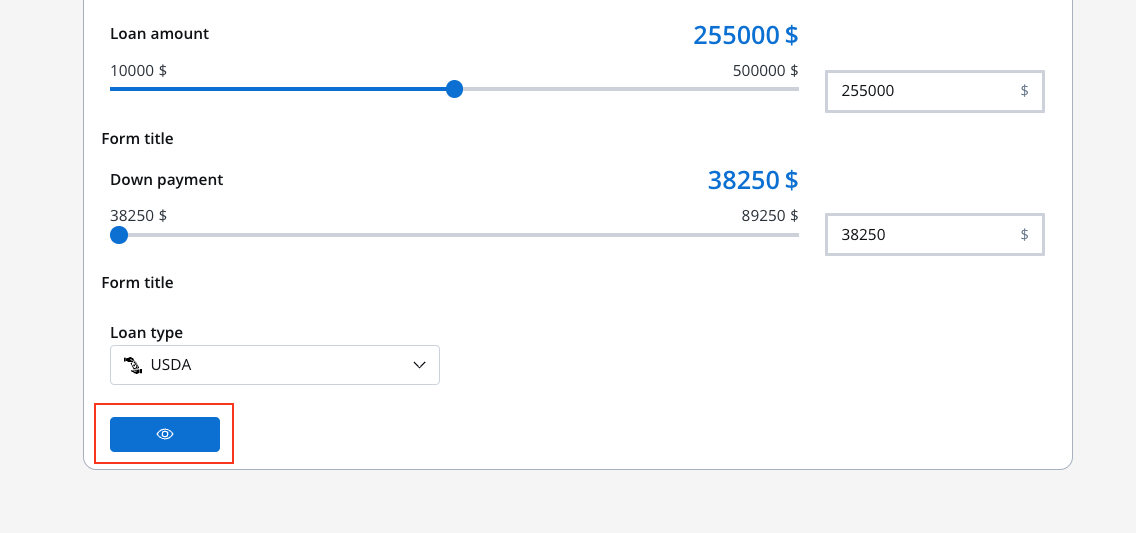
Theme overrides
Theme overrides
In Theme overrides, you can override the theme values for a single button:
- Common Properties: Border radius, Border width, Font, and Shadow (Fill and Ghost types only)
- Default state: Text, Icon, Border and Background. The Text type has no Border or Background items.
- Hover state and Pressed state: web only
- Disabled state: web and Android
File upload button
File upload buttons provide a specialized interface for file selection with built-in validation and user feedback. They’re essential for document submission, image uploads, and data import workflows.Configuration overview
File upload buttons share many properties with basic buttons but include specialized file handling features:File Properties
File type restrictions and validation
Validation
Size limits and error handling
User Experience
Optional overlay loader and success or error toasts
File upload properties
Label, Accepted file types, Invalid file message, Max file size (in bytes) and File size error message are required. A new File Upload starts with the label “Upload” and the Ghost type.
Label Configuration
Label Configuration
Purpose: Clearly indicate the upload purposeExamples:
- “Upload Document”
- “Select Profile Picture”
- “Import Data File”
- “Attach Receipt”
- Specify what type of file is expected
- Include file requirements in the label if space allows
- Use progressive disclosure for complex requirements
File type restrictions
File type restrictions
Purpose: Control which file types users can select, with the Accepted file types fieldConfiguration Options:
You can also enter extensions without the dot:
png, jpg is treated as .png,.jpg.Common Combinations:File Size Management
File Size Management
Max file size (in bytes): Enter the limit in bytes, for example
10485760 for 10 MB. Set appropriate limits based on:- Server capacity and processing power
- Network bandwidth considerations
- Storage limitations
- User experience expectations
- Images: 5-10 MB for high quality
- Documents: 25-50 MB for complex files
- Data Files: Based on processing requirements
- Media Files: 100+ MB for videos
- “File size must be under 10 MB”
- “Please compress your image and try again”
- “Large files may take longer to process”
Validation & Error Handling
Validation & Error Handling
Invalid file message: Custom messages for unsupported formats
- Explain what formats are accepted
- Provide guidance on file conversion
- Link to help resources if needed
- Display the exact limit
- Suggest file compression tools
- Offer alternative upload methods for large files
Runtime feedback
File upload buttons can show a loading overlay and success or error toasts, so users know whether the upload finished without needing a File Preview component or an image link.Loading Overlay
Optional overlay loader during file upload for both web and mobile
Toast Messages
Success and error messages displayed as toasts at runtime, informing users about upload status
Dynamic Messages
Display dynamic values in toast and loading messages for context-aware feedback
Configuration properties
The following properties are available in the File Upload button configuration panel:Configuring upload feedback
Loading behavior
Loading behavior
Configure how loading indicators appear during file uploads:
Loading Message Configuration:
- Configure custom messages using substitution tags or dynamic values
- Works consistently across web and mobile platforms
- When you choose Overlay and the message is empty, it’s pre-filled with “The file is being uploaded…”
- “Uploading your document…”
Uploading ${application.documentName}...- “Please wait while we upload your file”
Success messages
Success messages
Success Toast: Displayed when the file upload completes successfully
- Enable: Toggle “Toast notification on success” to show the toast. An empty message is pre-filled with “File successfully uploaded”.
- Custom message: Set a personalized success message with dynamic values
- Auto-dismiss: In web apps, the toast closes automatically after 3 seconds and has no close button
- “File uploaded successfully!”
${application.documentName} has been uploaded- “Your document is ready for processing”
Error messages
Error messages
Error Toast: Displayed when the file upload fails
- Enable: Toggle “Toast notification on error” to show the toast. An empty message is pre-filled with “There was an error with the upload”.
- Custom message: Set a personalized error message with dynamic values
- Auto-dismiss: In web apps, the toast closes automatically after 3 seconds and has no close button
- “Upload failed. Please try again.”
Unable to upload ${application.documentName}. Check your connection.- “File upload error. Please select a different file.”
Theming
The loader and toast components inherit styling from your theme configuration:- Loader Styling
- Toast Styling
Custom loader API (SDK)
For advanced customization, developers can provide custom loader components through the SDK. ThecustomLoader object supports file upload loaders alongside existing process loaders:
- If a named action loader exists (
customLoader.actions?.[actionName]), use it - Otherwise, if
defaultActionordefaultUploadis defined, use that - Fall back to the internal SDK loader
Custom loaders allow you to maintain consistent branding and UX patterns across your application while using the FlowX upload infrastructure.
File upload example
Example configuration for an image upload button: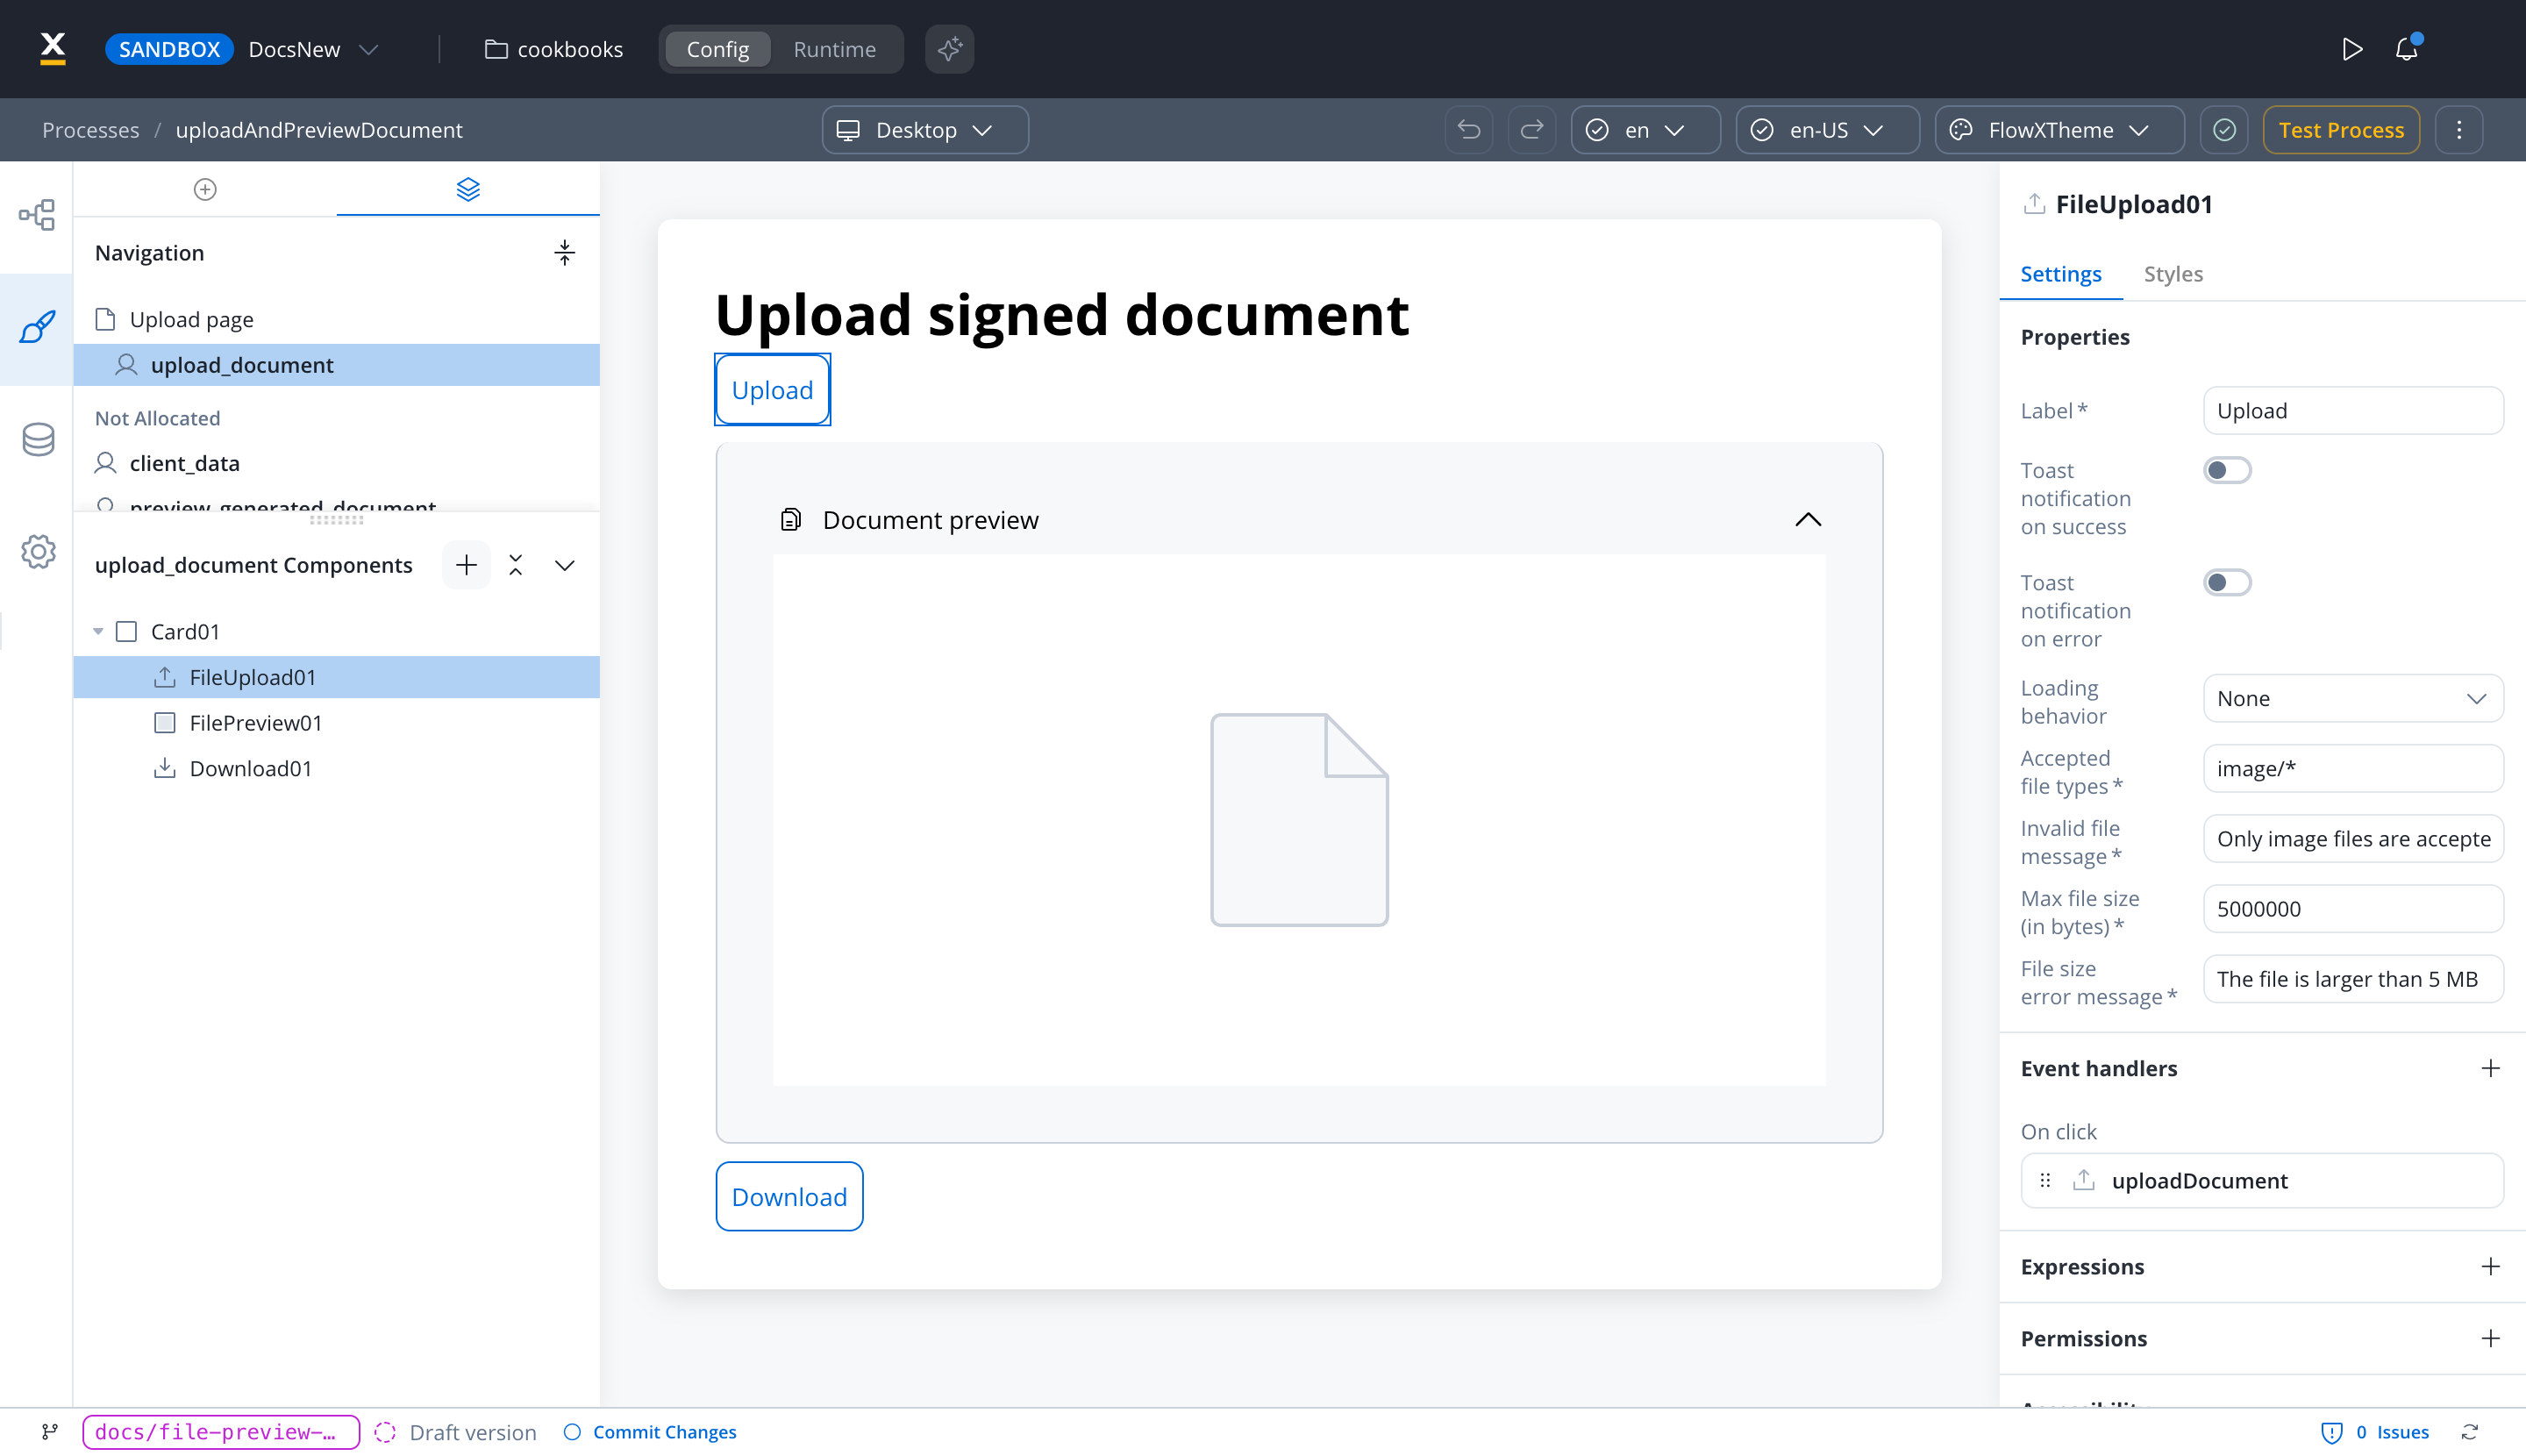
- Accepted Types:
image/*(all image formats) - Max Size: 5 MB
- Error Handling: Custom messages for type and size violations
- UI feedback: Optional overlay loader and success or error toasts
File upload actions
In a process, the File Upload event handler offers the Upload action type, plus Run local script. In a UI Flow, it also offers Start process, Start workflow, External, Navigate to and Dismiss, and Conversation reply trigger when a Chat component is in scope. The File Upload handles one file at a time; for multi-file uploads, see the Multiple File Upload component.
Event configuration
Event configuration
Trigger: On click (same as basic buttons)Action type: select Upload to upload the file the user picks.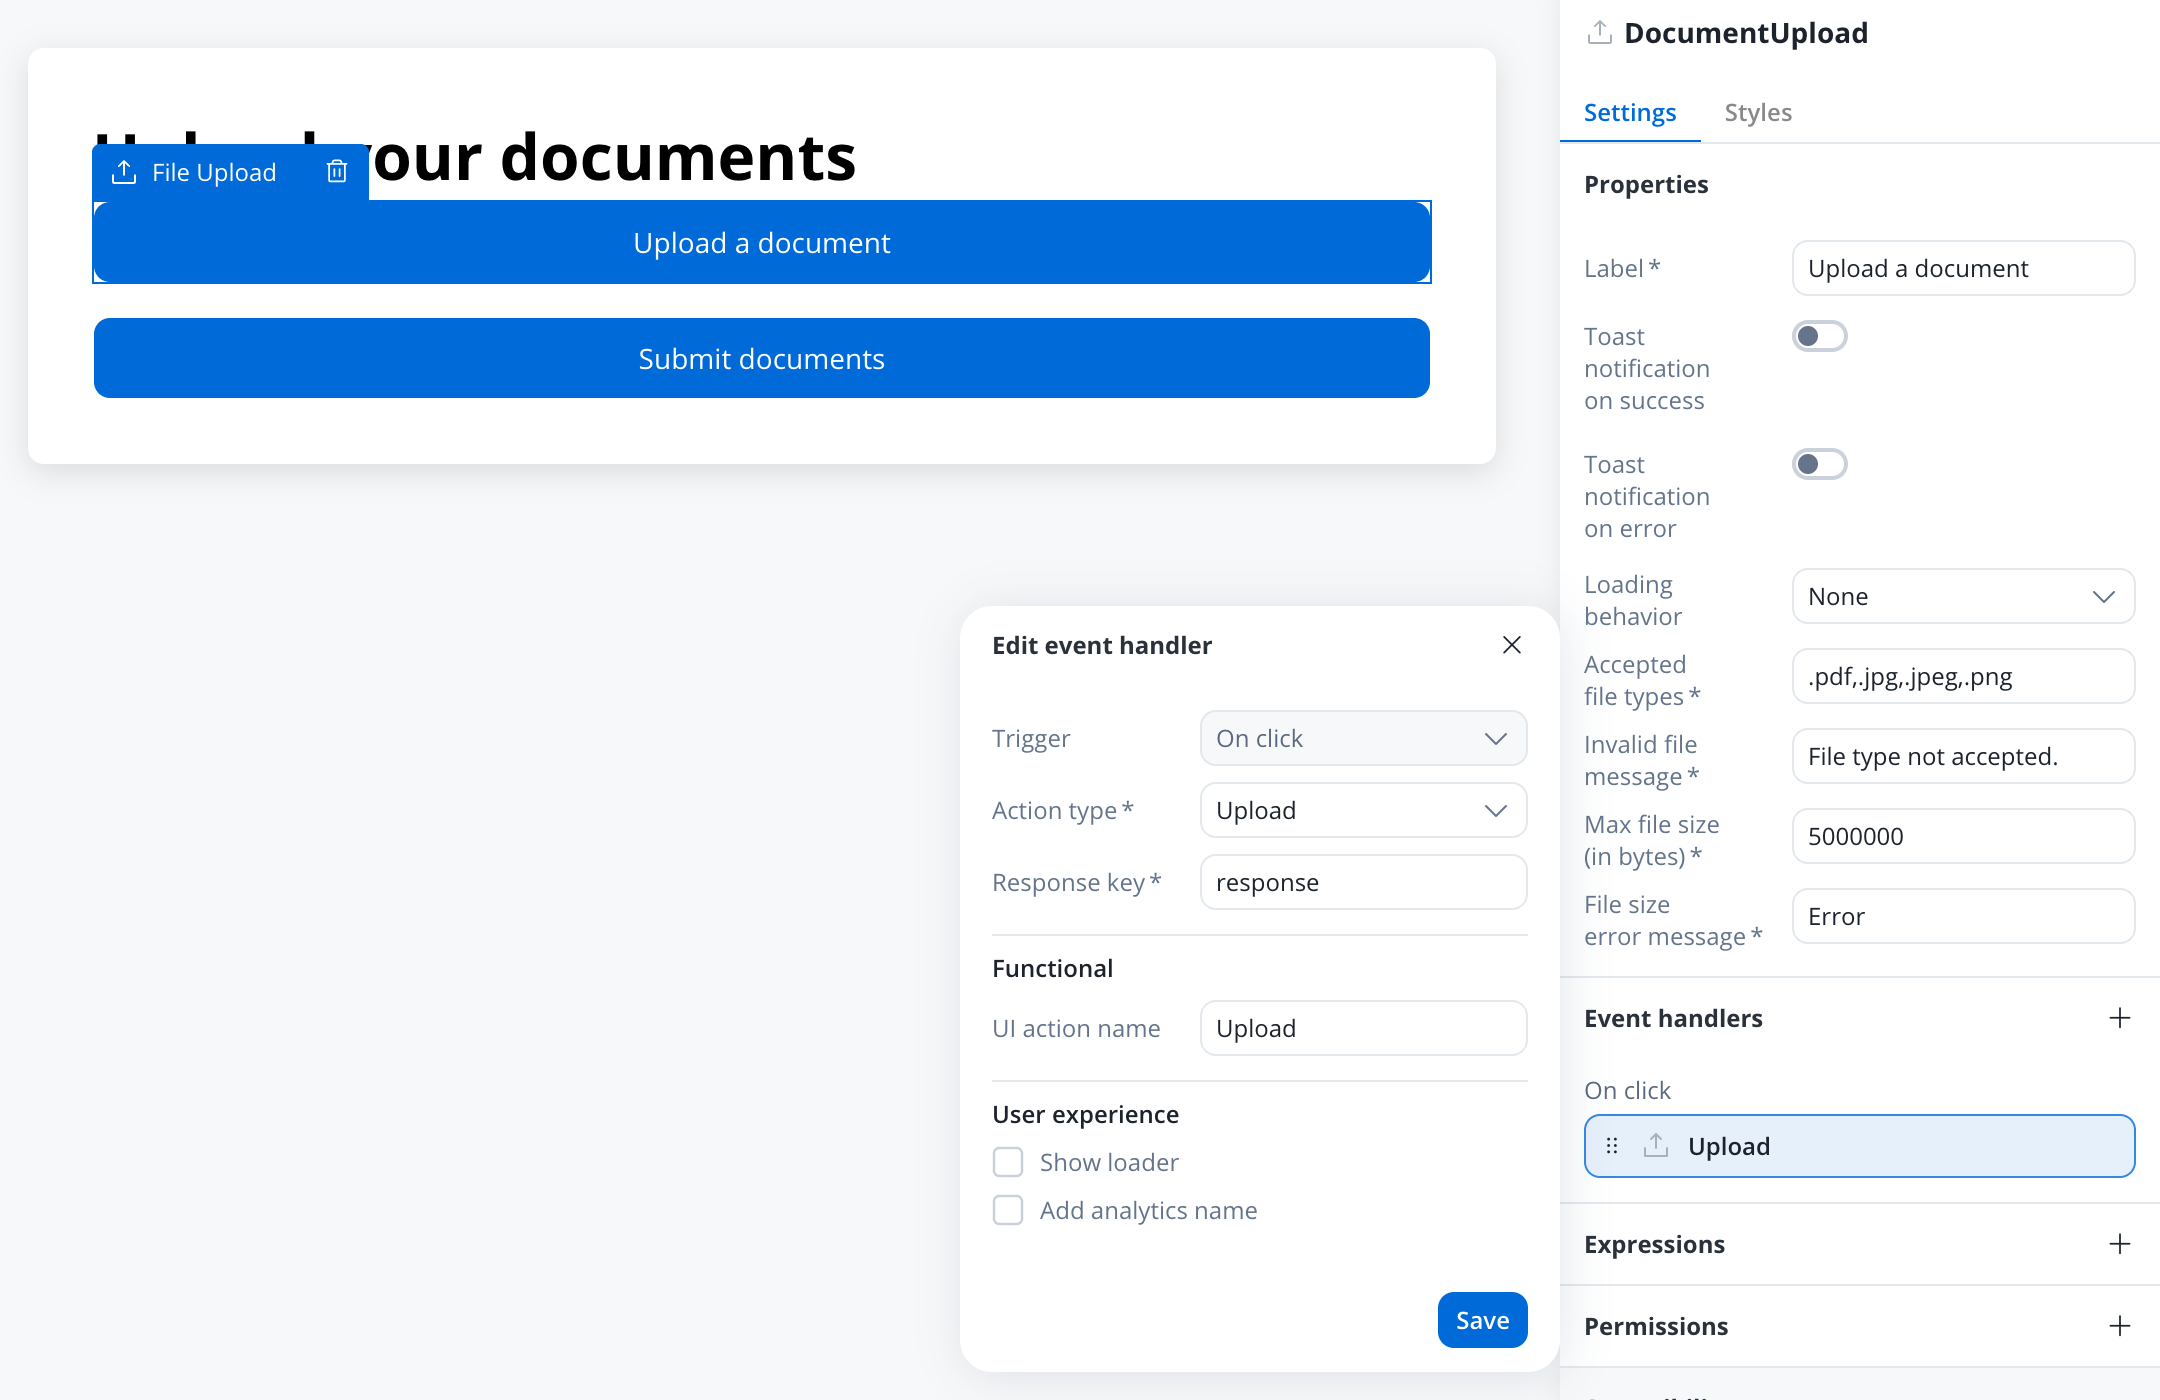
Multi-file uploads
Multi-file uploads
The File Upload Button handles single-file uploads only. For batch uploads with drag-and-drop, file validation, and progress tracking, use the dedicated Multiple File Upload component.
File upload styling
File upload buttons use the same Styles sections (Properties, Sizing, Spacing, Typography, Grid child) and the same Theme overrides items as basic buttons:- Icon and layout
- Responsive Sizing
Best practices
Accessibility
- Use descriptive labels that explain the button’s purpose
- Ensure sufficient color contrast for all button states
- For icon-only buttons (icon position Center), fill in the Accessibility label field in the button’s Accessibility section
User Experience
- Place primary actions prominently and consistently
- Use loading states for actions that take time
- Provide clear feedback for successful/failed actions
- Group related buttons logically
- Avoid too many competing call-to-action buttons
- Consider touch targets for mobile users (minimum 44px)
Visual Design
- Maintain consistent button styling across the application
- Use button hierarchy to guide user attention
- Choose icons that are universally understood
- Test button visibility in different lighting conditions
- Consider color-blind users when relying on color alone
- Ensure buttons look clickable and interactive
Performance
- Optimize file upload handling for large files
- Implement proper error handling and retry mechanisms
- Provide progress feedback for long-running actions
- Cache frequently used icons and styling
- Test button responsiveness under load
- Consider offline scenarios for critical actions
Common use cases
Basic button scenarios
File upload scenarios
Platform considerations
- Web apps
- Mobile apps
- Cross-platform
- The File Upload opens the browser file picker and accepts one file at a time
- For drag and drop or several files, use the Multiple File Upload component
- Hover state and Pressed state theme overrides are available only on web