

Purpose
The FlowX.AI UI Designer is the visual editor for building user interfaces in FlowX.AI. You add, arrange, and configure UI components on a canvas, then adjust their properties and styles for Web, iOS, and Android. The same editor builds the screens of process user tasks, UI Flows, and reusable UI templates.Key capabilities
Multi-Platform Support
Create interfaces with platform-specific configuration and styling across Web, iOS, and Android
Visual Interface Design
Use a drag-and-drop environment to design diverse UI templates with various elements and components
Real-Time Preview
Preview your designs across different platforms and themes with live feedback
Component Library
Access ready-to-use UI components including form elements, containers, and specialized components
In a BPMN process, the UI Designer is available for User Task nodes and Navigation Areas.
UI Designer interface
The UI Designer provides a comprehensive interface for creating and configuring user interfaces within your FlowX.AI processes.Platform selection
The UI Designer supports multi-platform design with dedicated configuration tabs:- Web Platform
- iOS Platform
- Android Platform
Full Feature Support: Complete UI Designer functionality with all component types and navigation features
- All UI component types supported
- Full navigation area capabilities
- Zones with headers and footers
- Single page and wizard navigation types
Configuration panels
The UI Designer interface consists of configuration sections for comprehensive component setup:Settings Tab
Settings Tab
Generic Configuration: Properties available cross-platform (Web, Android and iOS)Platform-Specific Settings: Override generic properties for specific platforms
- Property overrides (Title, Subtitle, Helper text)
- Expression overrides (Hide conditions)
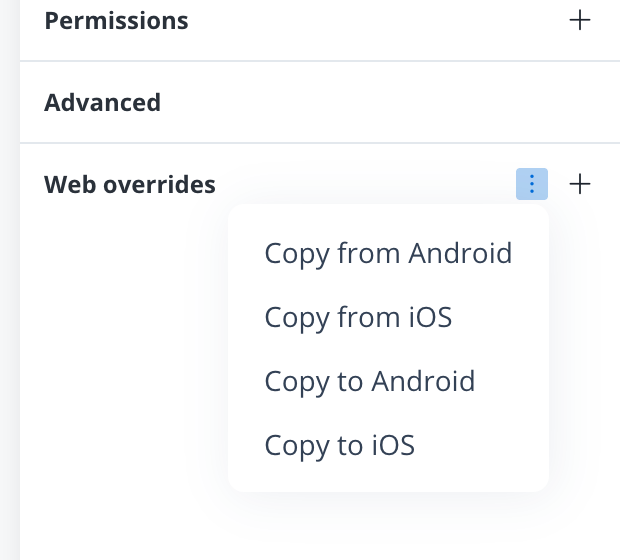
- Copy overrides between platforms (Copy from <platform>, Copy to <platform>)
Styles Tab
Styles Tab
Theme Integration: Components inherit styling from the active theme by defaultTheme Overrides: Customize component appearance beyond theme settings
- Platform-specific styling
- Conditional styling (for Text, Link, Image, Container, Card, Form, Collection and Collection prototype elements)
- Copy theme overrides between platforms (Copy from <platform>, Copy to <platform>)
Preview
Preview
Multi-Platform Preview: Switch between platforms to preview designs
- Real-time platform switching
- Theme selection for preview
- Visual estimation for mobile platforms
iOS and Android previews are estimates to help visualize mobile views.
UI components available
The FlowX.AI platform offers a variety of ready-to-use UI components. The groupings below follow the navigation order:Root components
Root components
Layout foundation elements, the framework for arranging everything else:
- Root components overview: How root components structure a screen
- Container: Flexible grouping and layout control
- Card: Content cards with built-in styling
- Custom: Advanced custom component integration
- Global header and footer: Top and bottom areas shared across every page of a UI Flow
Form elements
Form elements
Data collection components, for capturing user input:
- Input: Text input fields
- Textarea: Multi-line text input
- Select: Dropdown menus
- Multi select: Choose several options from one list
- Checkbox: Multiple selection options
- Radio: Single selection from options
- Switch: Toggle controls
- Datepicker: Date and time selection
- Slider: Range and numeric input
- Segmented button: Multi-option selection
Action, file and display elements
Action, file and display elements
Interactive and display components:
- Buttons: Action triggers and navigation, including the File Upload Button for uploading one file at a time
- Multiple file upload: Drag-and-drop area for uploading several files in one action
- File preview: Preview file contents without fully opening the file
- File download: Let end users download a file from a rendered app
- Table: Structured data presentation
- Image: Media display
- Typography: Text and links
- Indicators: Status and message display
Chat and content elements
Chat and content elements
Conversational and formatted content:
- Chat: Interactive AI agent conversations, with sub-components for the header, history, messages, input, suggested prompts and file attachments
- Markdown: Renders Markdown-formatted content on a screen
- Separator: Visual divider for grouping content
- Progress bar: Visualizes progress or completion state
- Tooltip: Shows extra context on hover or focus
Collections
Collections
Dynamic content components, for repeated content and dynamic data:
- Collection: Dynamic lists of data
- Collection prototype: Templates for collection items
Component configuration
After adding a UI component, the right-side menu displays configuration options:- Settings Tab: Configure component properties and behavior
- Styles Tab: Customize appearance and apply theme overrides
- Platform Overrides: Adapt components for specific platforms
Navigation areas integration
Navigation areas can be configured through the UI Designer, providing:- Hierarchical navigation structure
- Platform-specific navigation capabilities
- Copy/paste functionality for consistency across platforms
Using the UI designer
To open the UI Designer for a process:1
Open the process
In your project, go to Processes and select the process you want to design.
2
Switch to the UI Designer
Select the UI Designer (brush) icon in the left rail.
3
Pick a navigation area or user task
In the Navigation section of the left panel, select the navigation area or user task to design. User tasks that are not assigned to a navigation area are listed under Not Allocated. For details, see Navigator in the left panel.
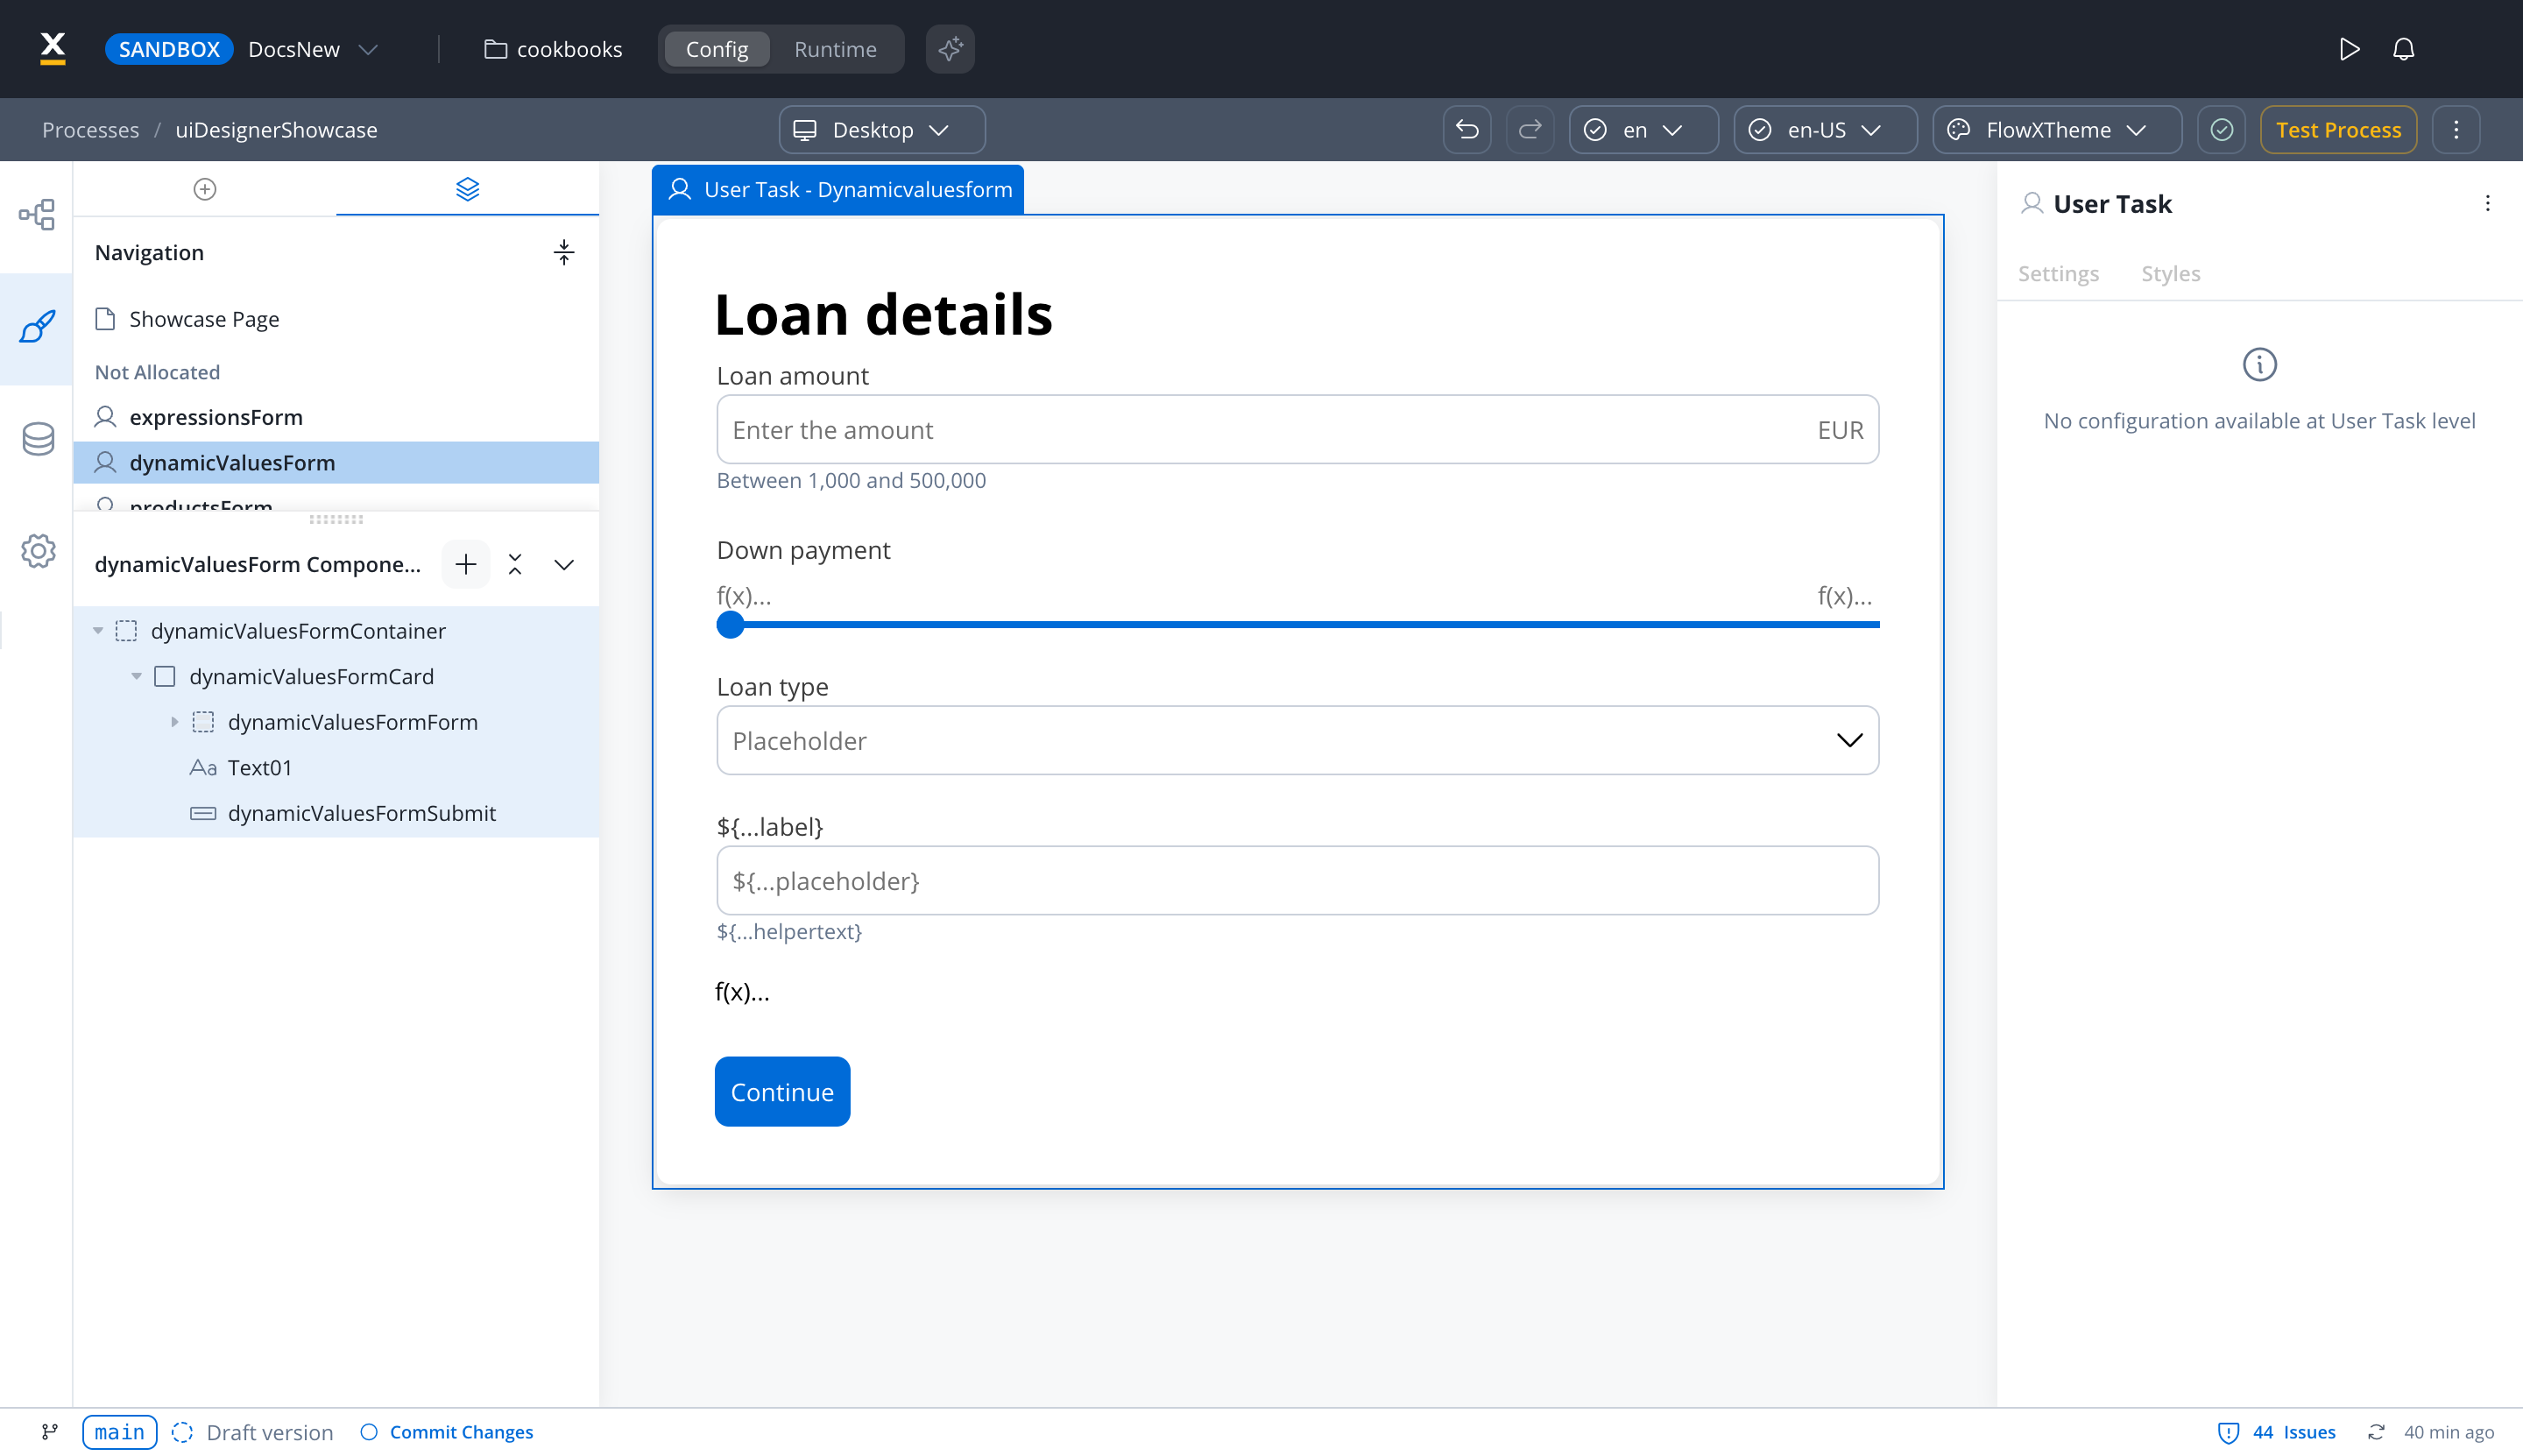
UI Flows and reusable UI templates open in the same editor: open the UI Flow or template from your project to design it.
Comprehensive design guides
Master the UI Designer with our detailed guides covering every aspect of interface creation:Screen Configuration Guide
How to Approach Screen ConfigurationLearn the systematic methodology for creating effective user interfaces:
- User journey definition and analysis
- Navigation pattern selection
- Information architecture planning
- Layout strategy implementation
- Platform-specific adaptations
- Validation and testing approaches
Best Practices
UI Designer Best PracticesEssential guidelines for creating accessible, performant interfaces:
- User-centered design principles
- Information architecture standards
- Component usage excellence
- Accessibility compliance (WCAG 2.1)
- Testing and quality assurance
- Maintenance strategies
Platform Considerations
Platform-Specific GuidelinesComprehensive platform optimization and limitation reference:
- Web, iOS, and Android design patterns
- Performance optimization strategies
- Platform-specific constraints and workarounds
- Security and privacy considerations
- Cross-platform testing protocols
UI components
When you select a UI component, the right panel shows its configuration in two tabs, Settings and Styles. For the full component list, see UI components available. The sections below use a card element, which is a root component, as the example.Settings tab
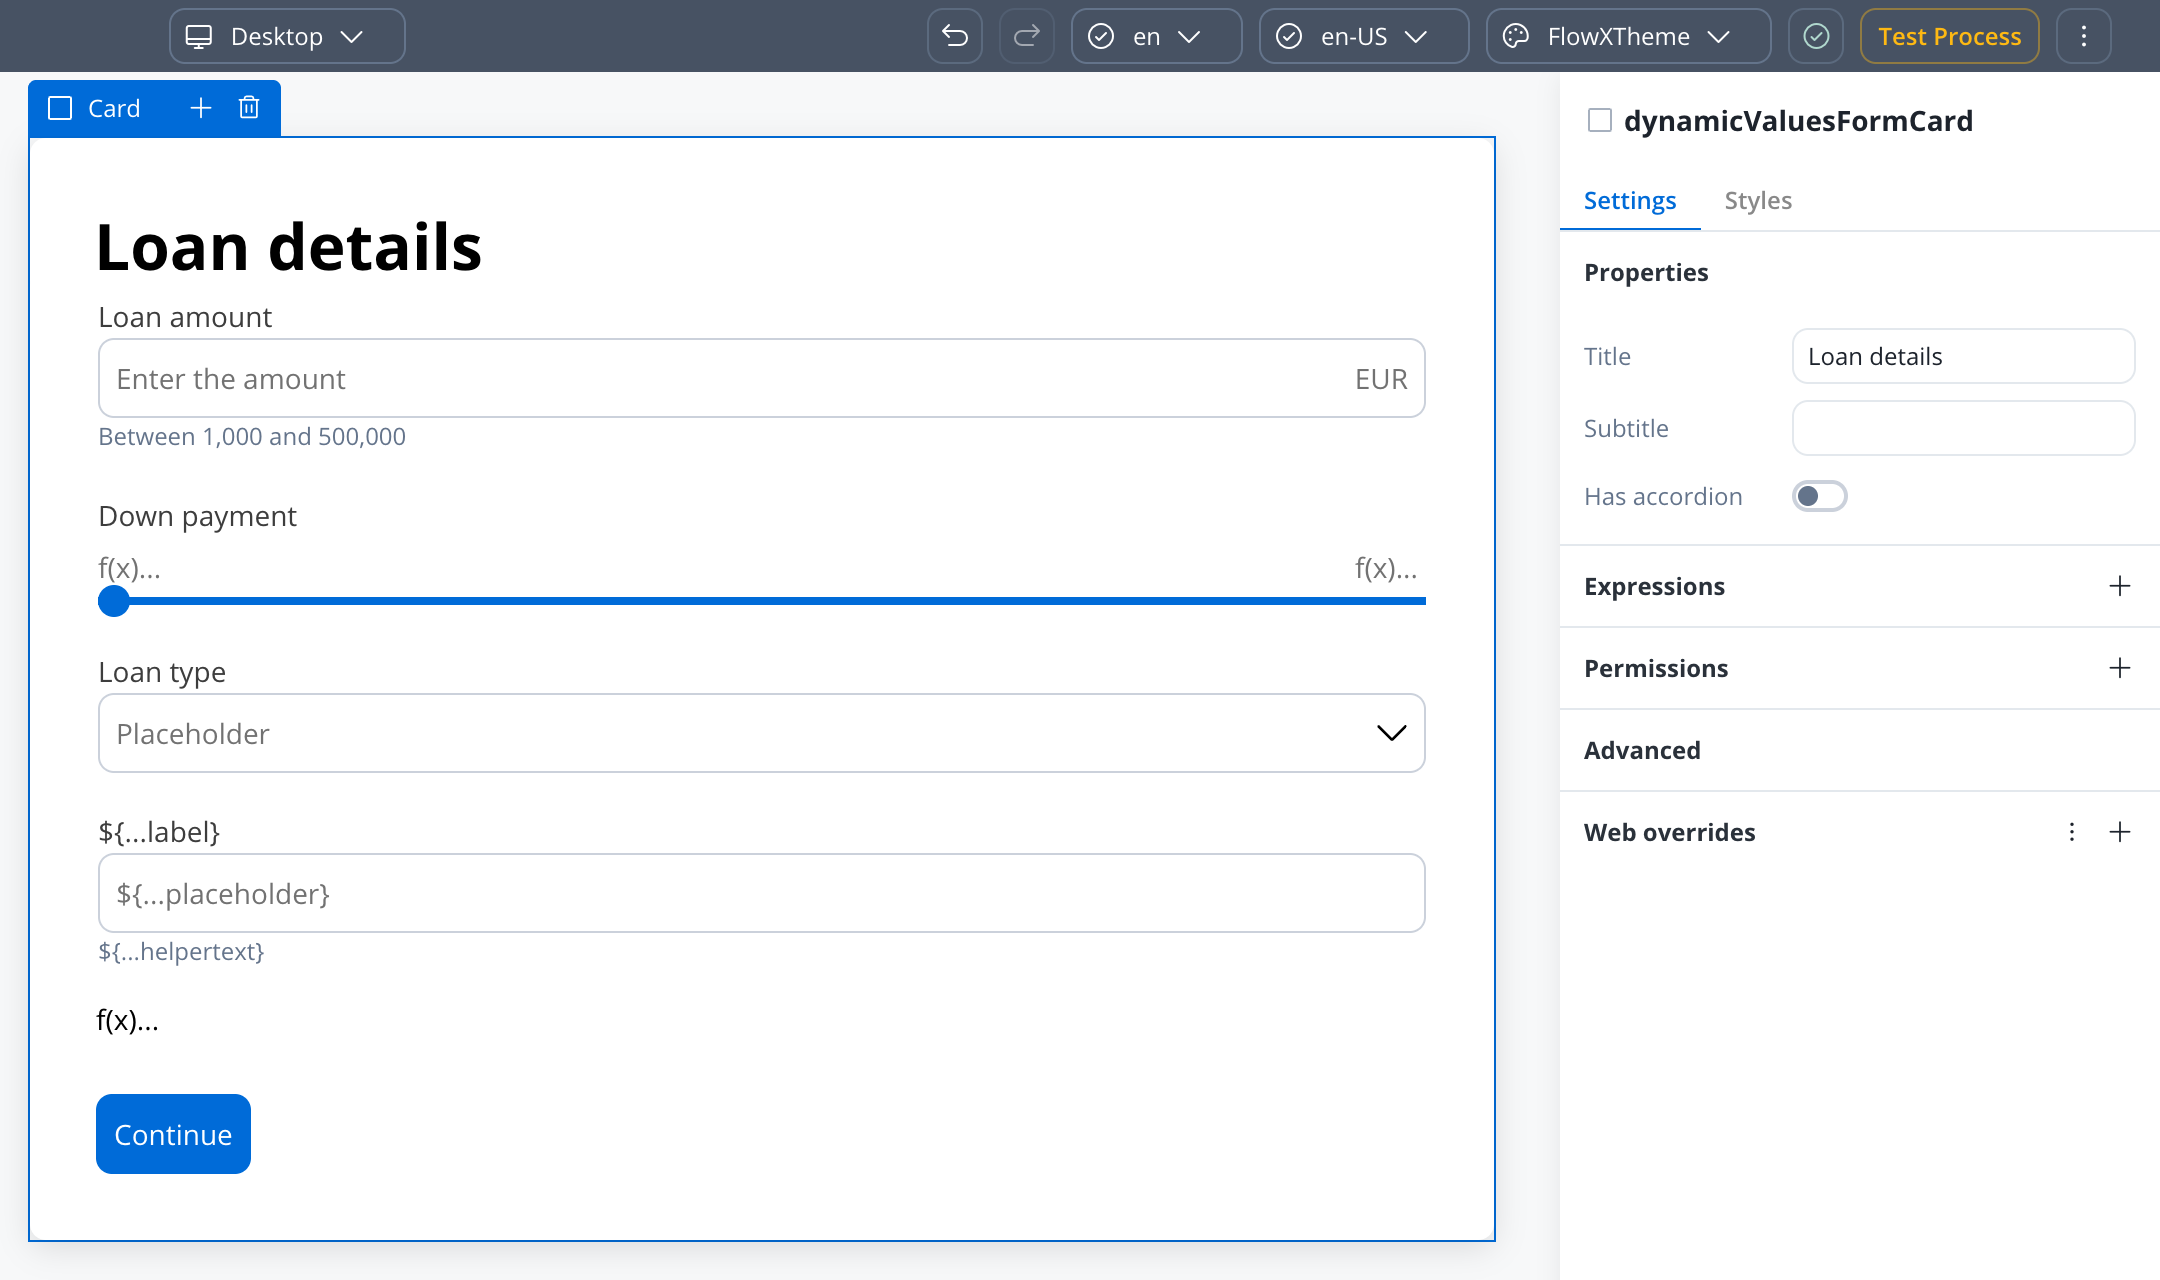
Settings for all platforms
The Settings tab holds the configuration shared by Web, iOS, and Android: the component’s Properties, its Expressions (hide and disable conditions), Permissions, and Advanced settings. Form elements add sections such as Datasource, Validators, and Event handlers.Platform-specific settings
Override a property or an expression for one platform only. For example, on Android you might want a shorter Card title.1
Select the component
In the UI Designer, select a UI element, such as a Card.
2
Pick the platform
Use the platform selector in the toolbar (Desktop, Mobile iOS, or Mobile Android). The Settings tab shows an overrides section for the selected platform, such as Web overrides for Desktop.
3
Add the override
Select + next to the overrides section, then choose Properties to override a property or Expressions to add a hide condition for this platform only. Enter the value for this platform.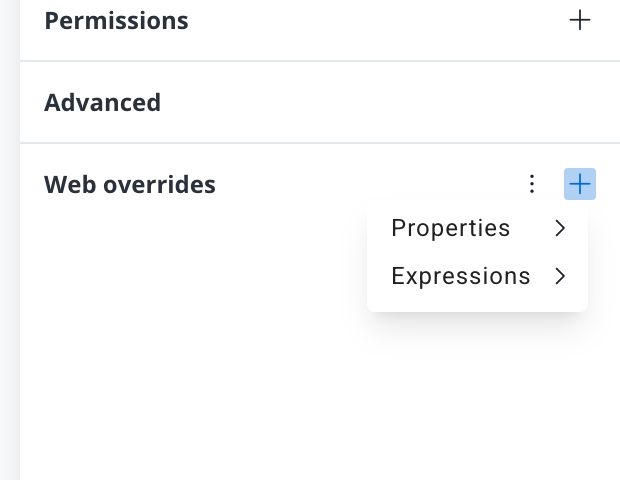
4
Preview your changes
Switch platforms in the platform selector to compare the result on each platform.
Keep in mind that the preview generated in the UI Designer for iOS and Android platforms is an estimate meant to help you visualize how it might look on a mobile view.
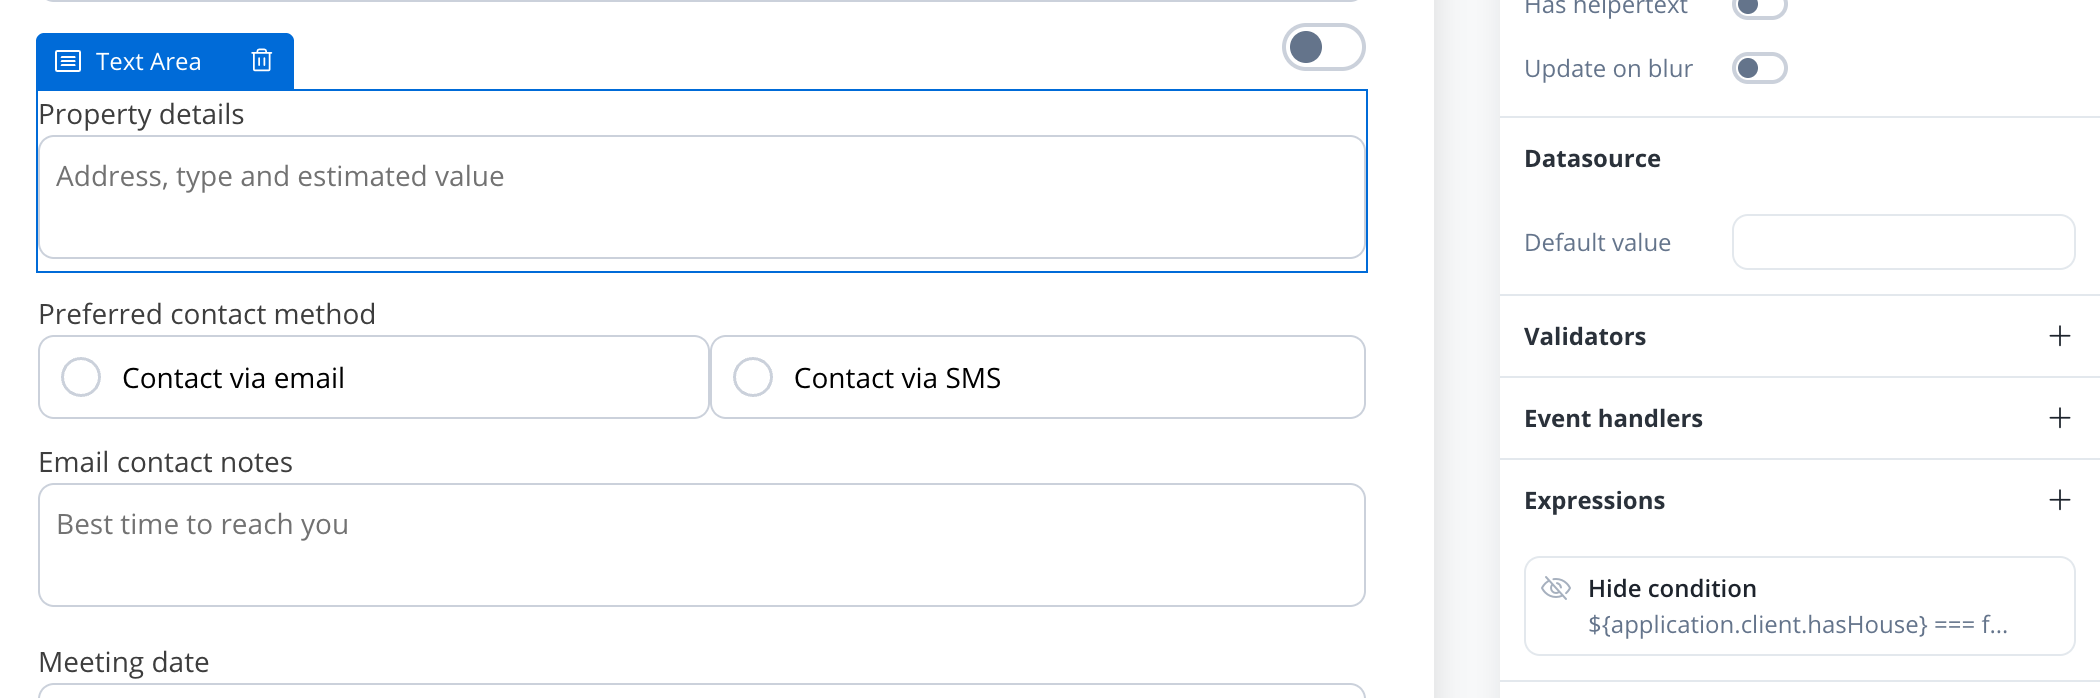
Hide and disabled conditions
Components can be hidden or turned read-only at runtime based on a JavaScript condition. Both are expressions in the Expressions section of a component’s Settings panel:1
Select a UI component in the UI Designer, then open Settings -> Expressions.
2
Select Add new (+). In the popover, pick a Type (Hide or Disable) and write your JavaScript condition in Expression. Select Open in editor for a larger editor.
3
The expression is saved as a card named Hide condition or Disable condition. Select a card to edit its condition, or use its delete button to remove it. Each type can be added once per component.
Permission-based expressions
Control UI element visibility and interaction based on user roles and process data.Permission-based expressions
Complete guide to configuring role-based UI permissions, cross-swimlane references, and collaborative workflows
1
Enable multiple executors
In process settings, enable Allow multiple executors for your swimlane.
2
Select component
In UI Designer, select the component to configure.
3
Add condition
Expand Permissions section and click + to add hide or disable conditions.
4
Configure parameters
Set Type (USERNAME/ROLE), Operator (IN/NOT_IN), Value Type, and Value.
Styles tab
The Styles tab functions independently for three platforms: Web, iOS, and Android. Here, you can customize styles for each UI component on each platform.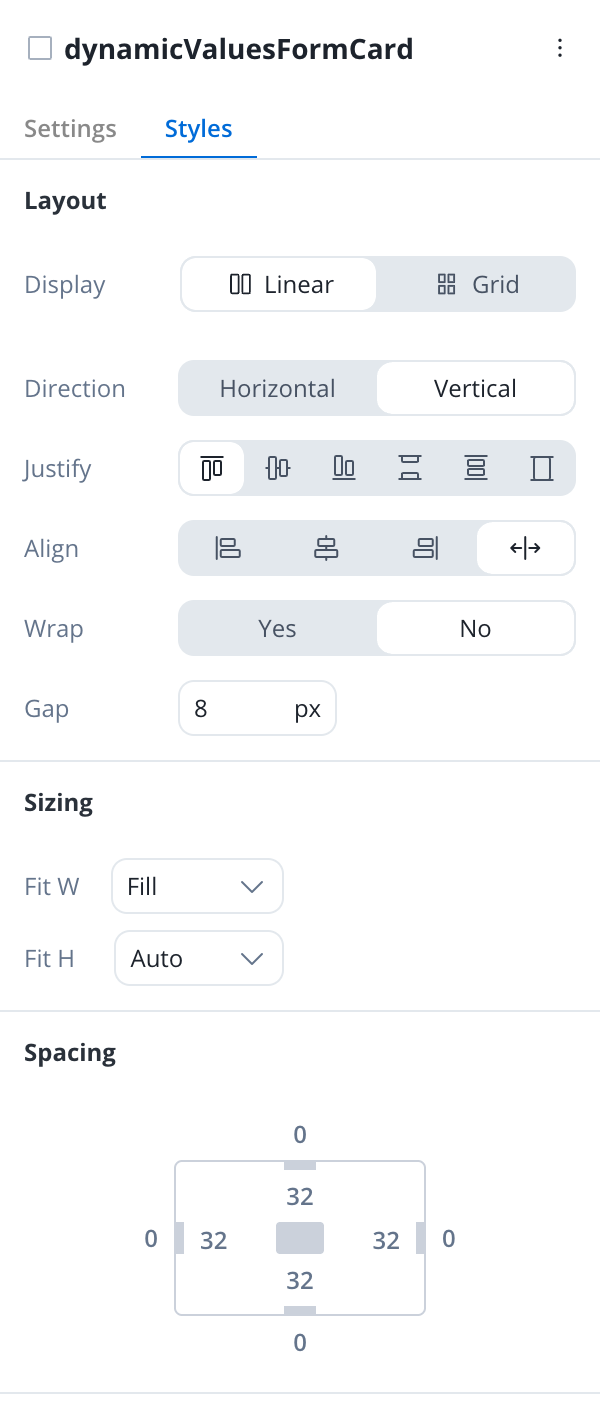
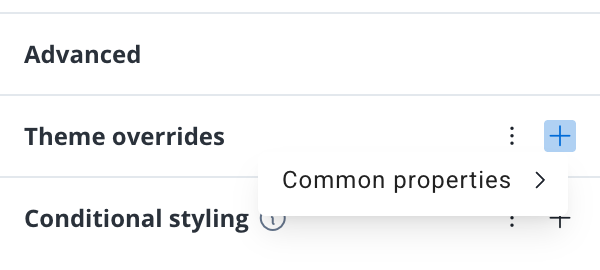
Theme overrides can be copied from one platform to another: open the menu (⋮) next to Theme overrides and select Copy from or Copy to another platform.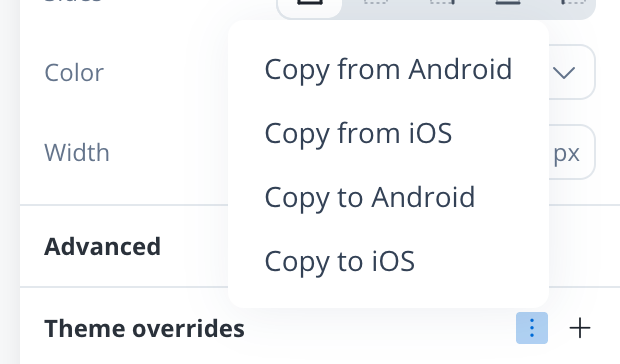
Theme Management
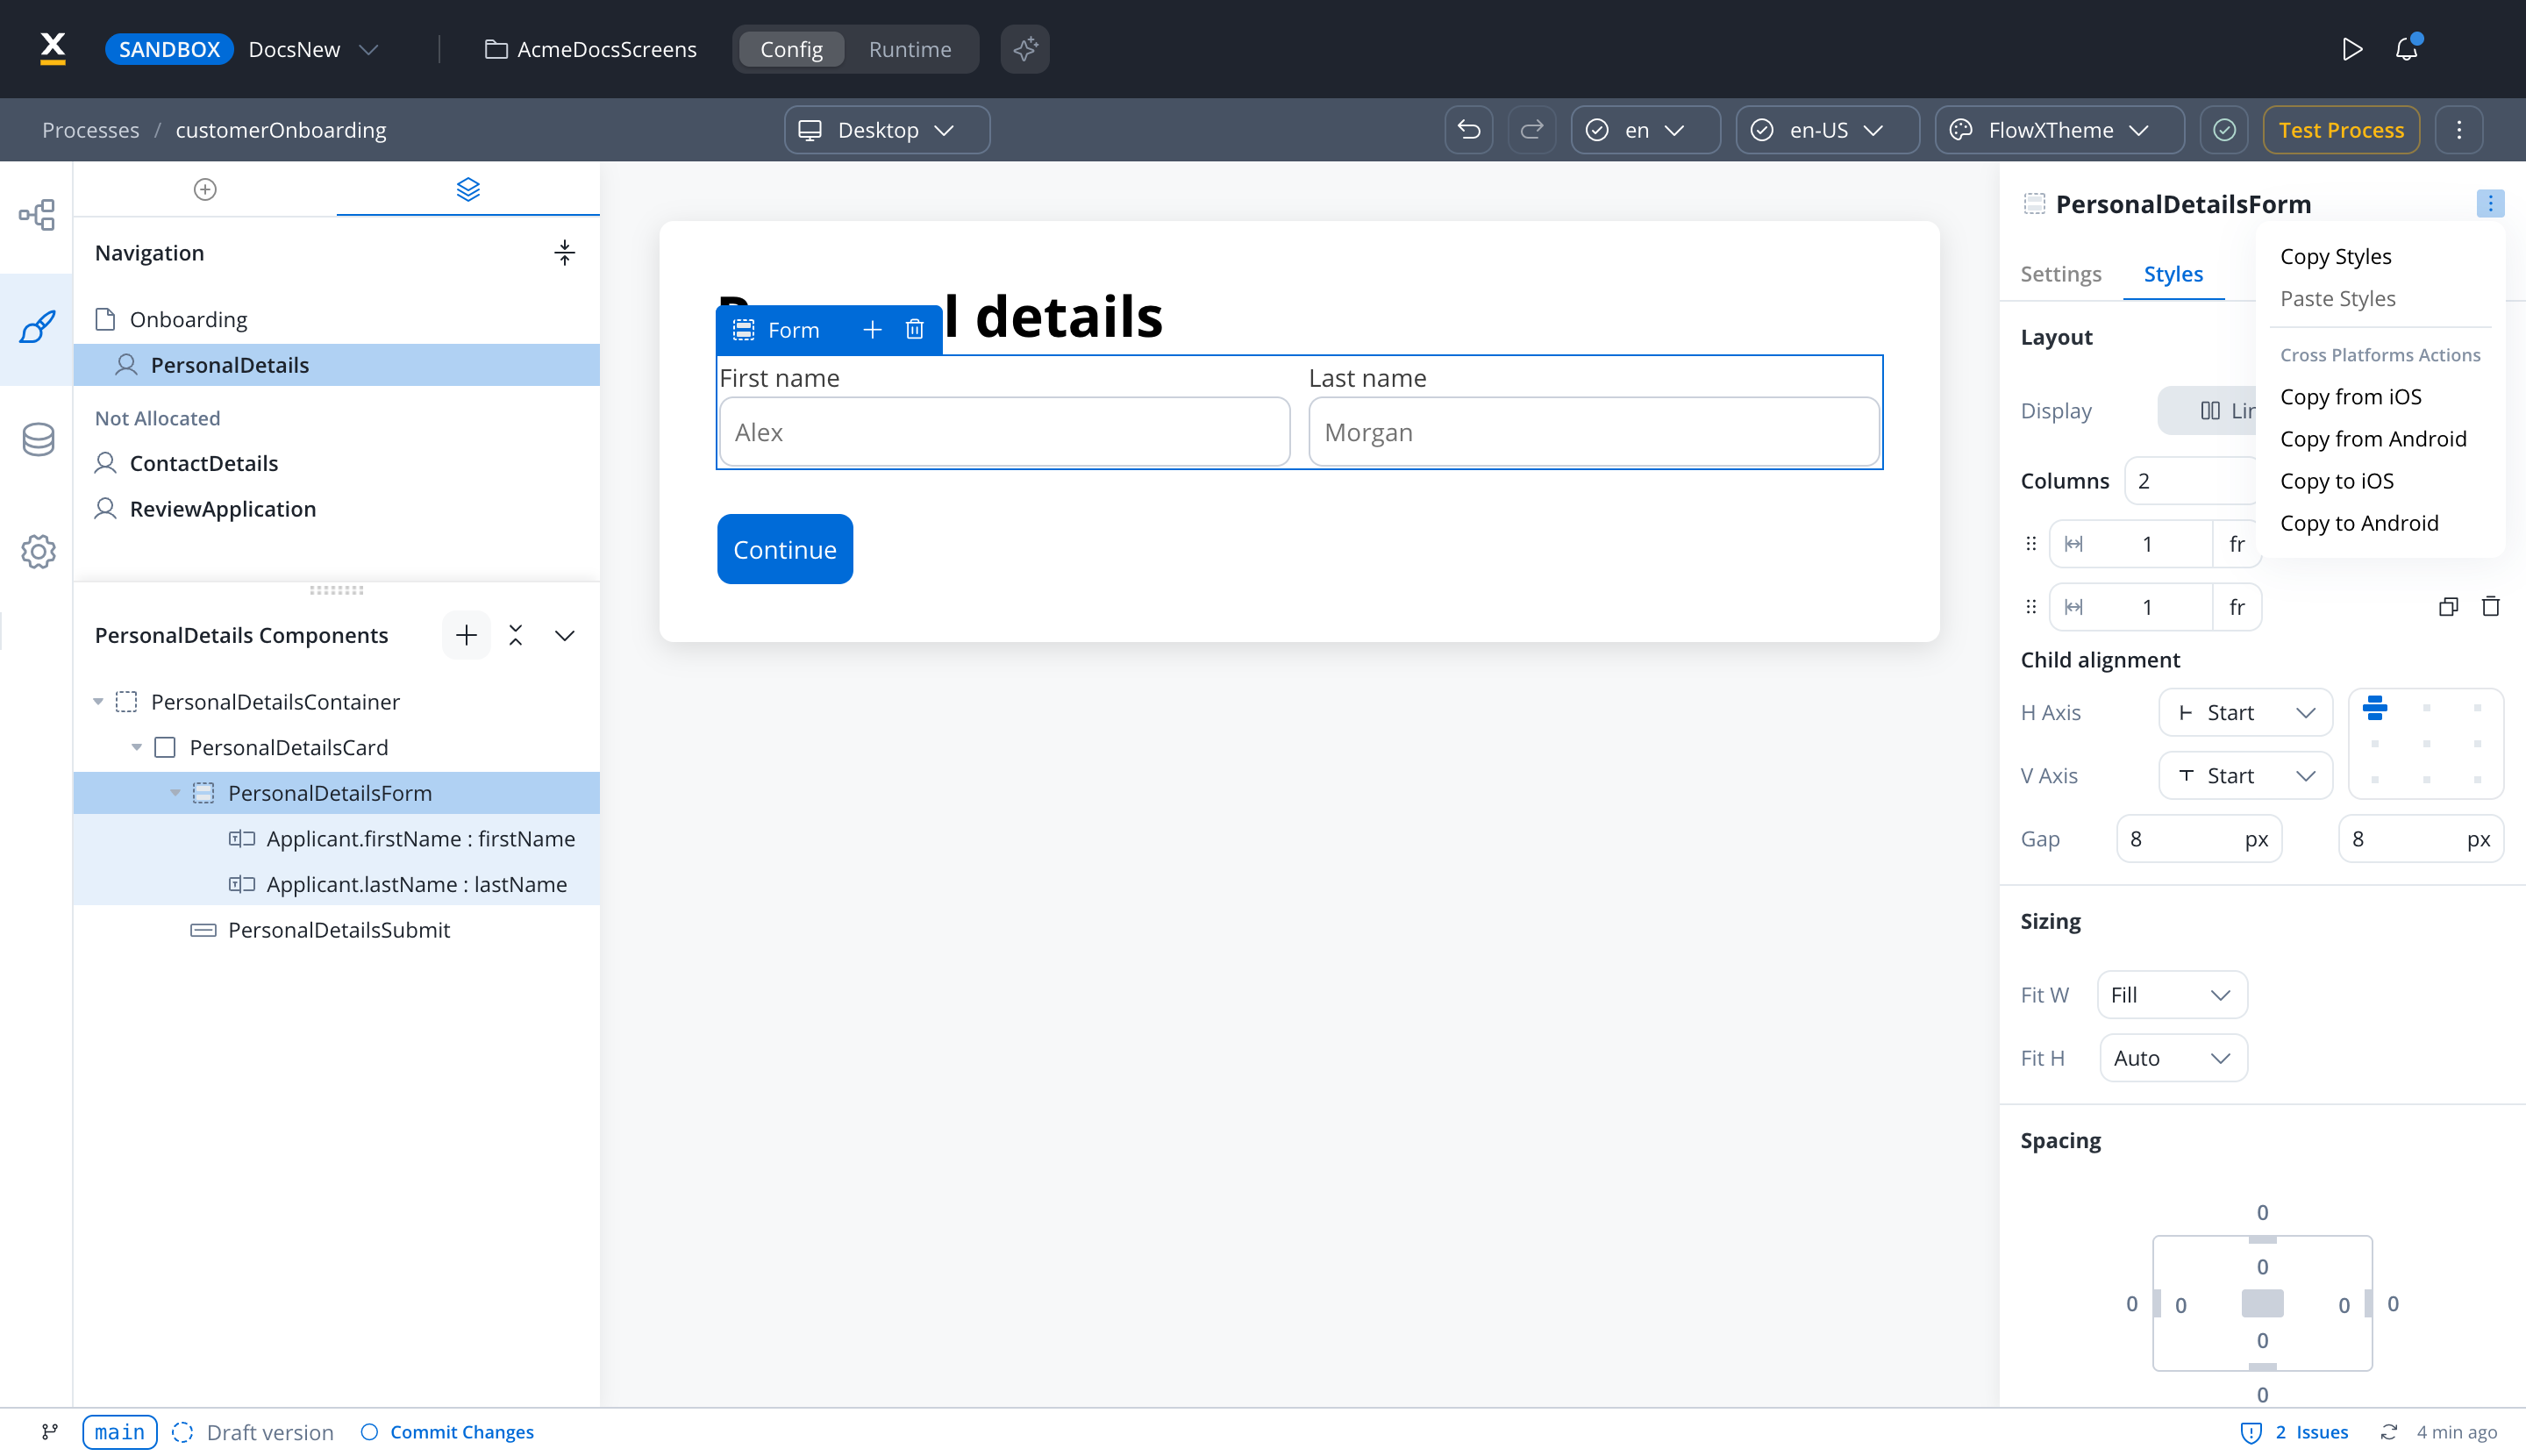
Copy/paste styles
The Copy / Paste Styles entry in the component’s contextual menu groups these actions:- Copy Styles: Copy styling properties between compatible components
- Paste Styles: Apply copied styles to selected components
- Cross Platforms Actions: Copy from or Copy to another platform to share styles across Web, iOS, and Android
- Multiple selection: Apply styles to multiple components simultaneously
- Input-like: Input, Select, Datepicker, Textarea, Multiselect
- Selection: Radio, Checkbox
- Container: Container, Form, Card, Collection, Collection Prototype
- Action: Button, File Upload
Preview
The canvas previews your screen on the platform and with the theme selected in the toolbar. Use the platform selector (Desktop, Mobile iOS, Mobile Android) and the theme selector, which has a search box, to switch the preview.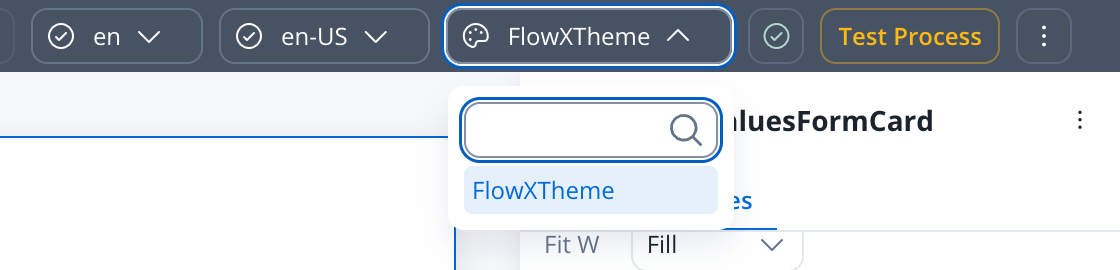
Overrides are completely independent of the theme, regardless of which theme you choose in the preview mode.
Layout
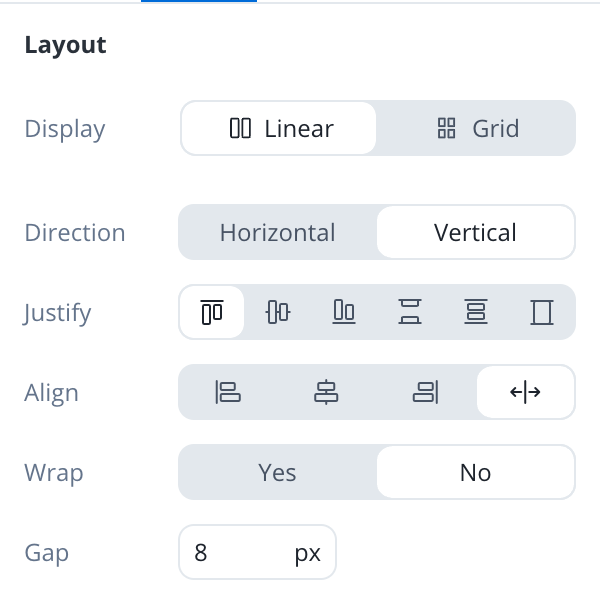
There are two main types of layouts for organizing child elements: Linear and Grid.- Linear Layout: Arranges child elements in a single line, either horizontally or vertically. Ideal for simple, sequential content flow.
- Grid Layout: Organizes elements into a structured grid with multiple columns and rows, useful for more complex, multi-dimensional designs.
- Platform-Specific Layouts: You can customize layout settings per platform (e.g., Grid on web, Linear on mobile) to ensure optimal responsiveness.
Both layouts offer options to customize direction, alignment, spacing, and wrap behavior for flexibility in design.
Layout
Sizing
By setting desired values for these props, you can ensure that all UI elements on the interface are the desired size and perfectly fit with each other. When adjusting the Fit W and Fit H settings, you can control the size and shape of the elements as they appear on your screen:- Fit W: fill, fixed or auto
- Fit H: fixed or auto. The Chat component in Fill display type offers fixed or fill instead.
Spacing
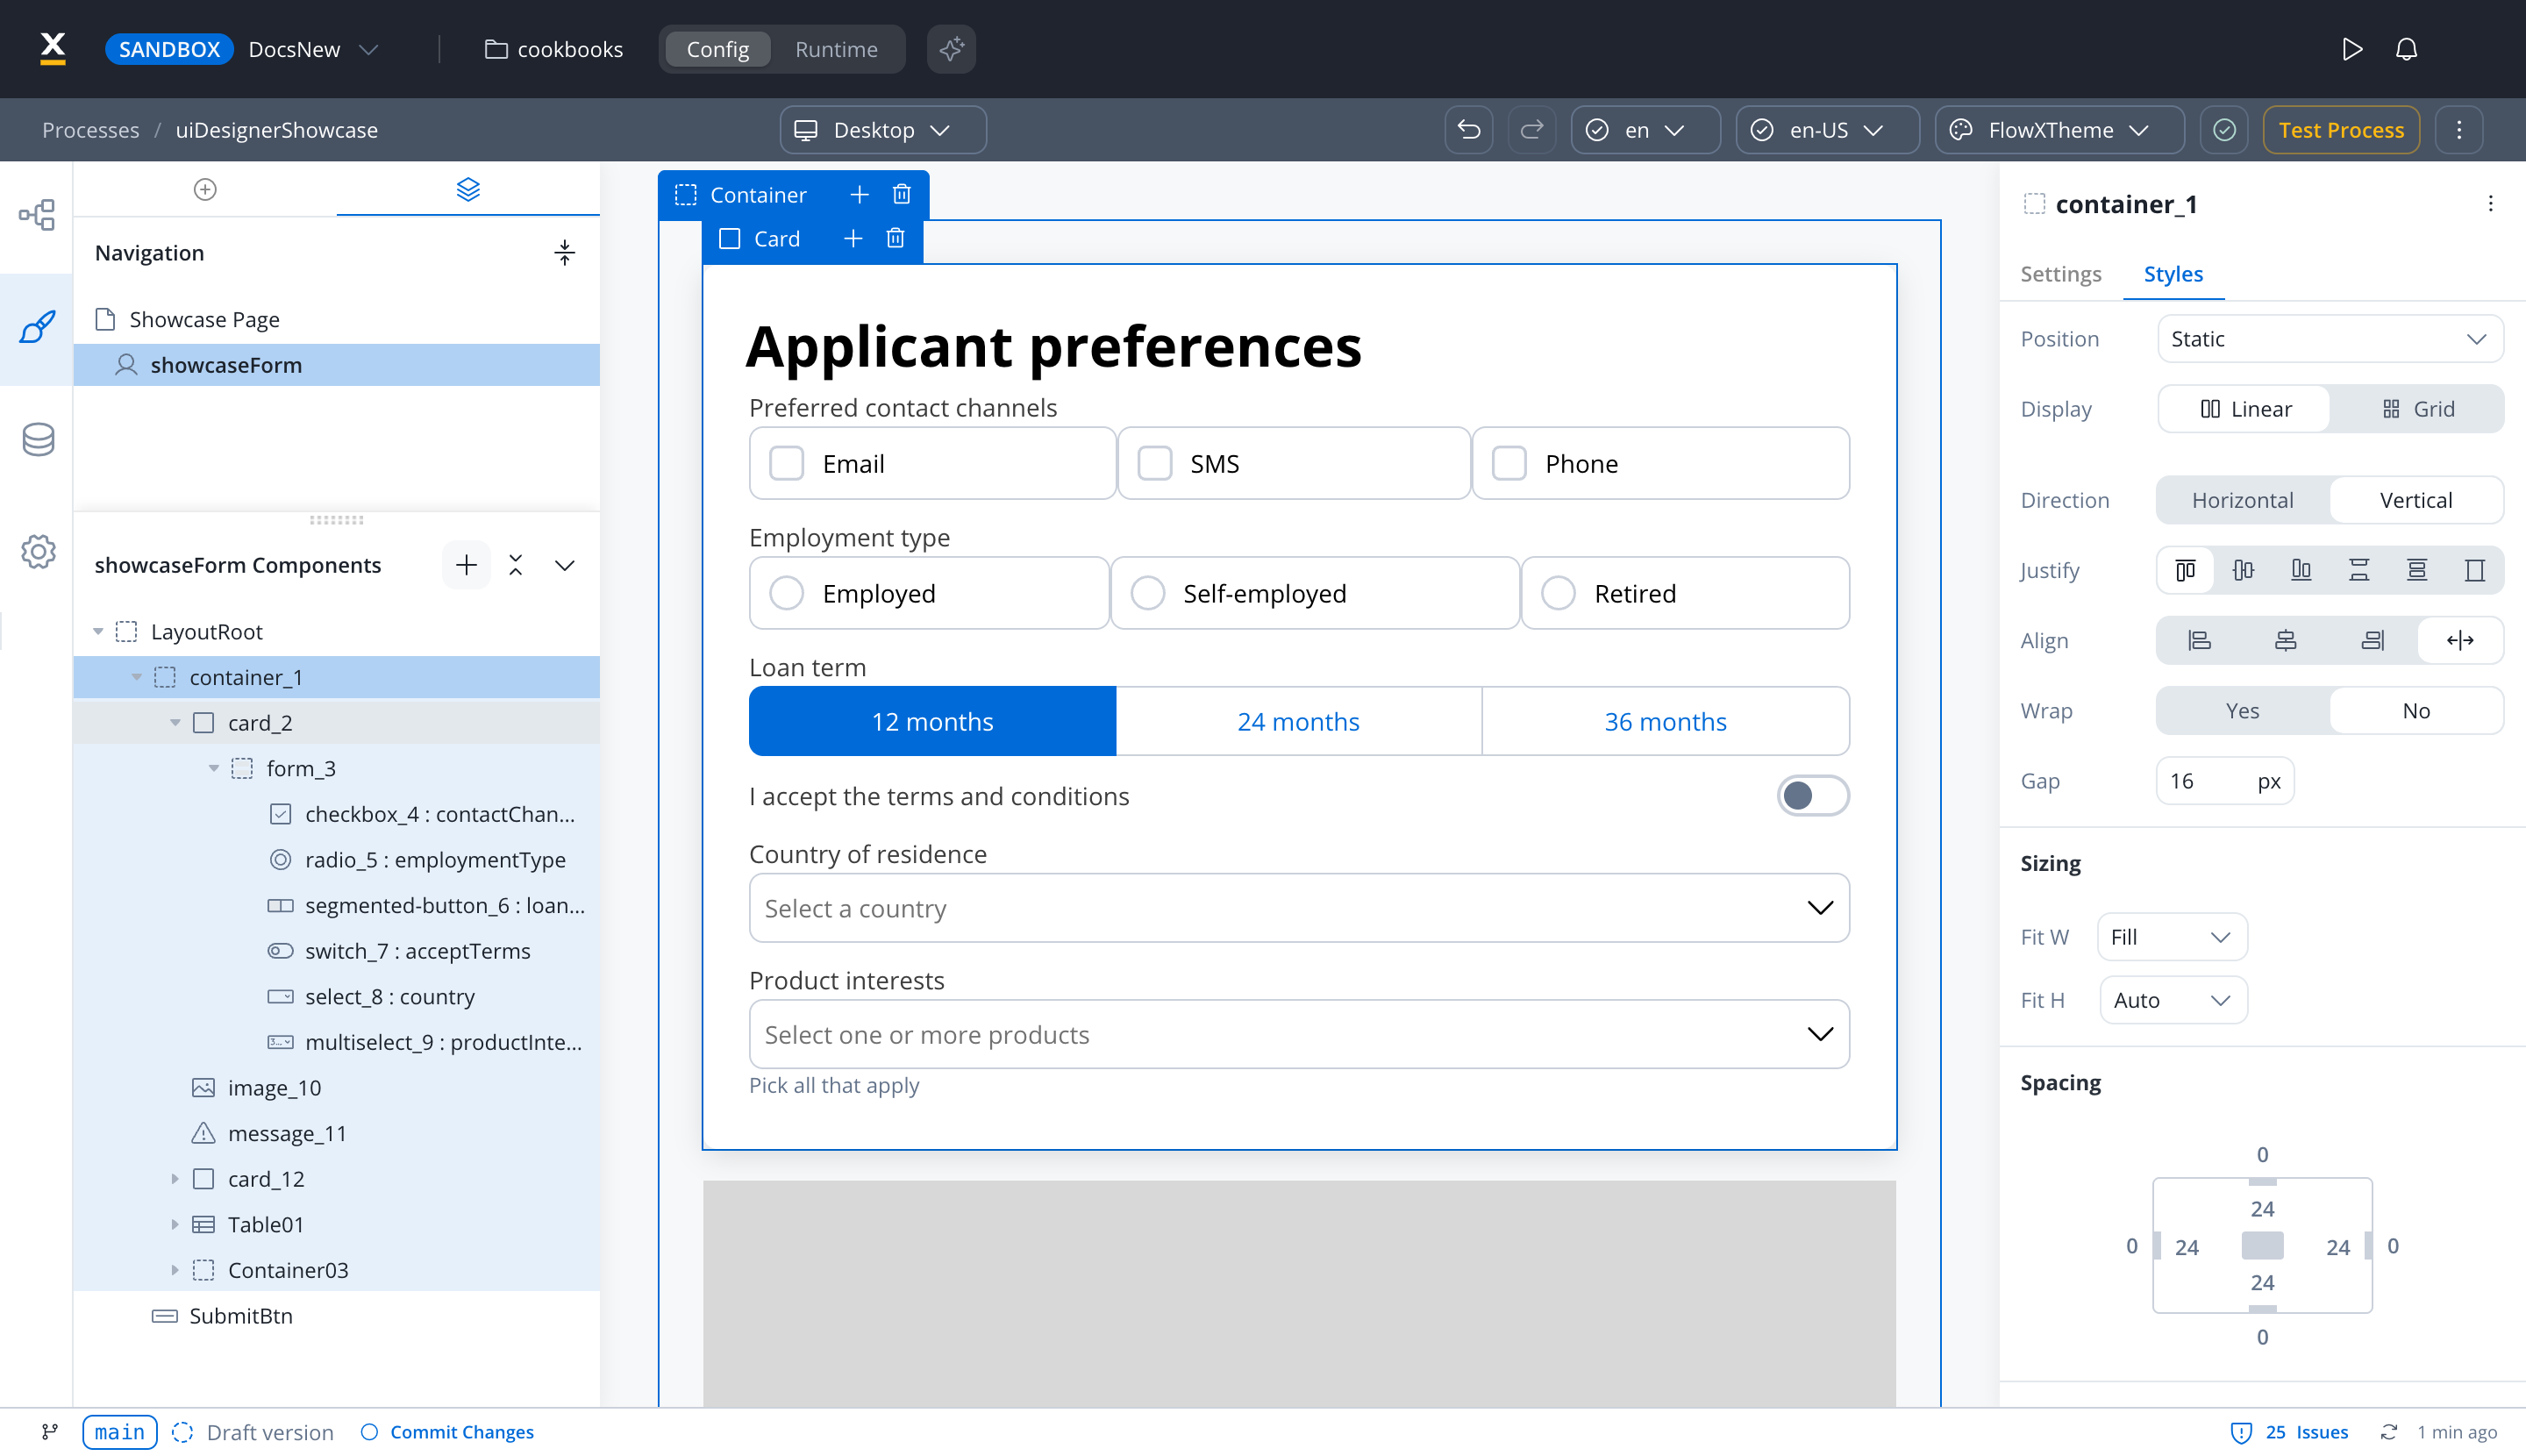
Margin and padding are CSS properties used to create space between elements in a web page:- margin - the space outside an element
- padding - the space inside an element
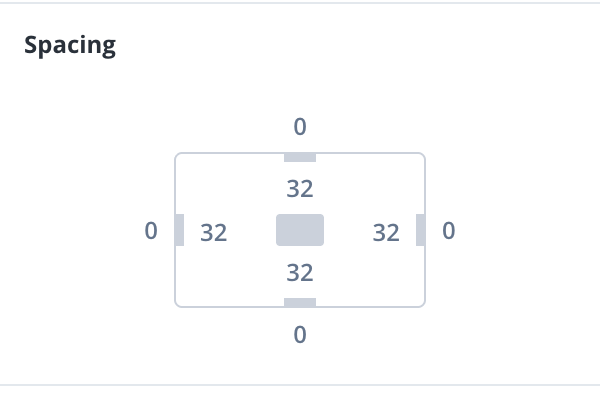
Margin
Padding
Advanced
- Advanced - for advanced customization, you can add CSS classes to pre-defined components, this option is available under the Advanced section
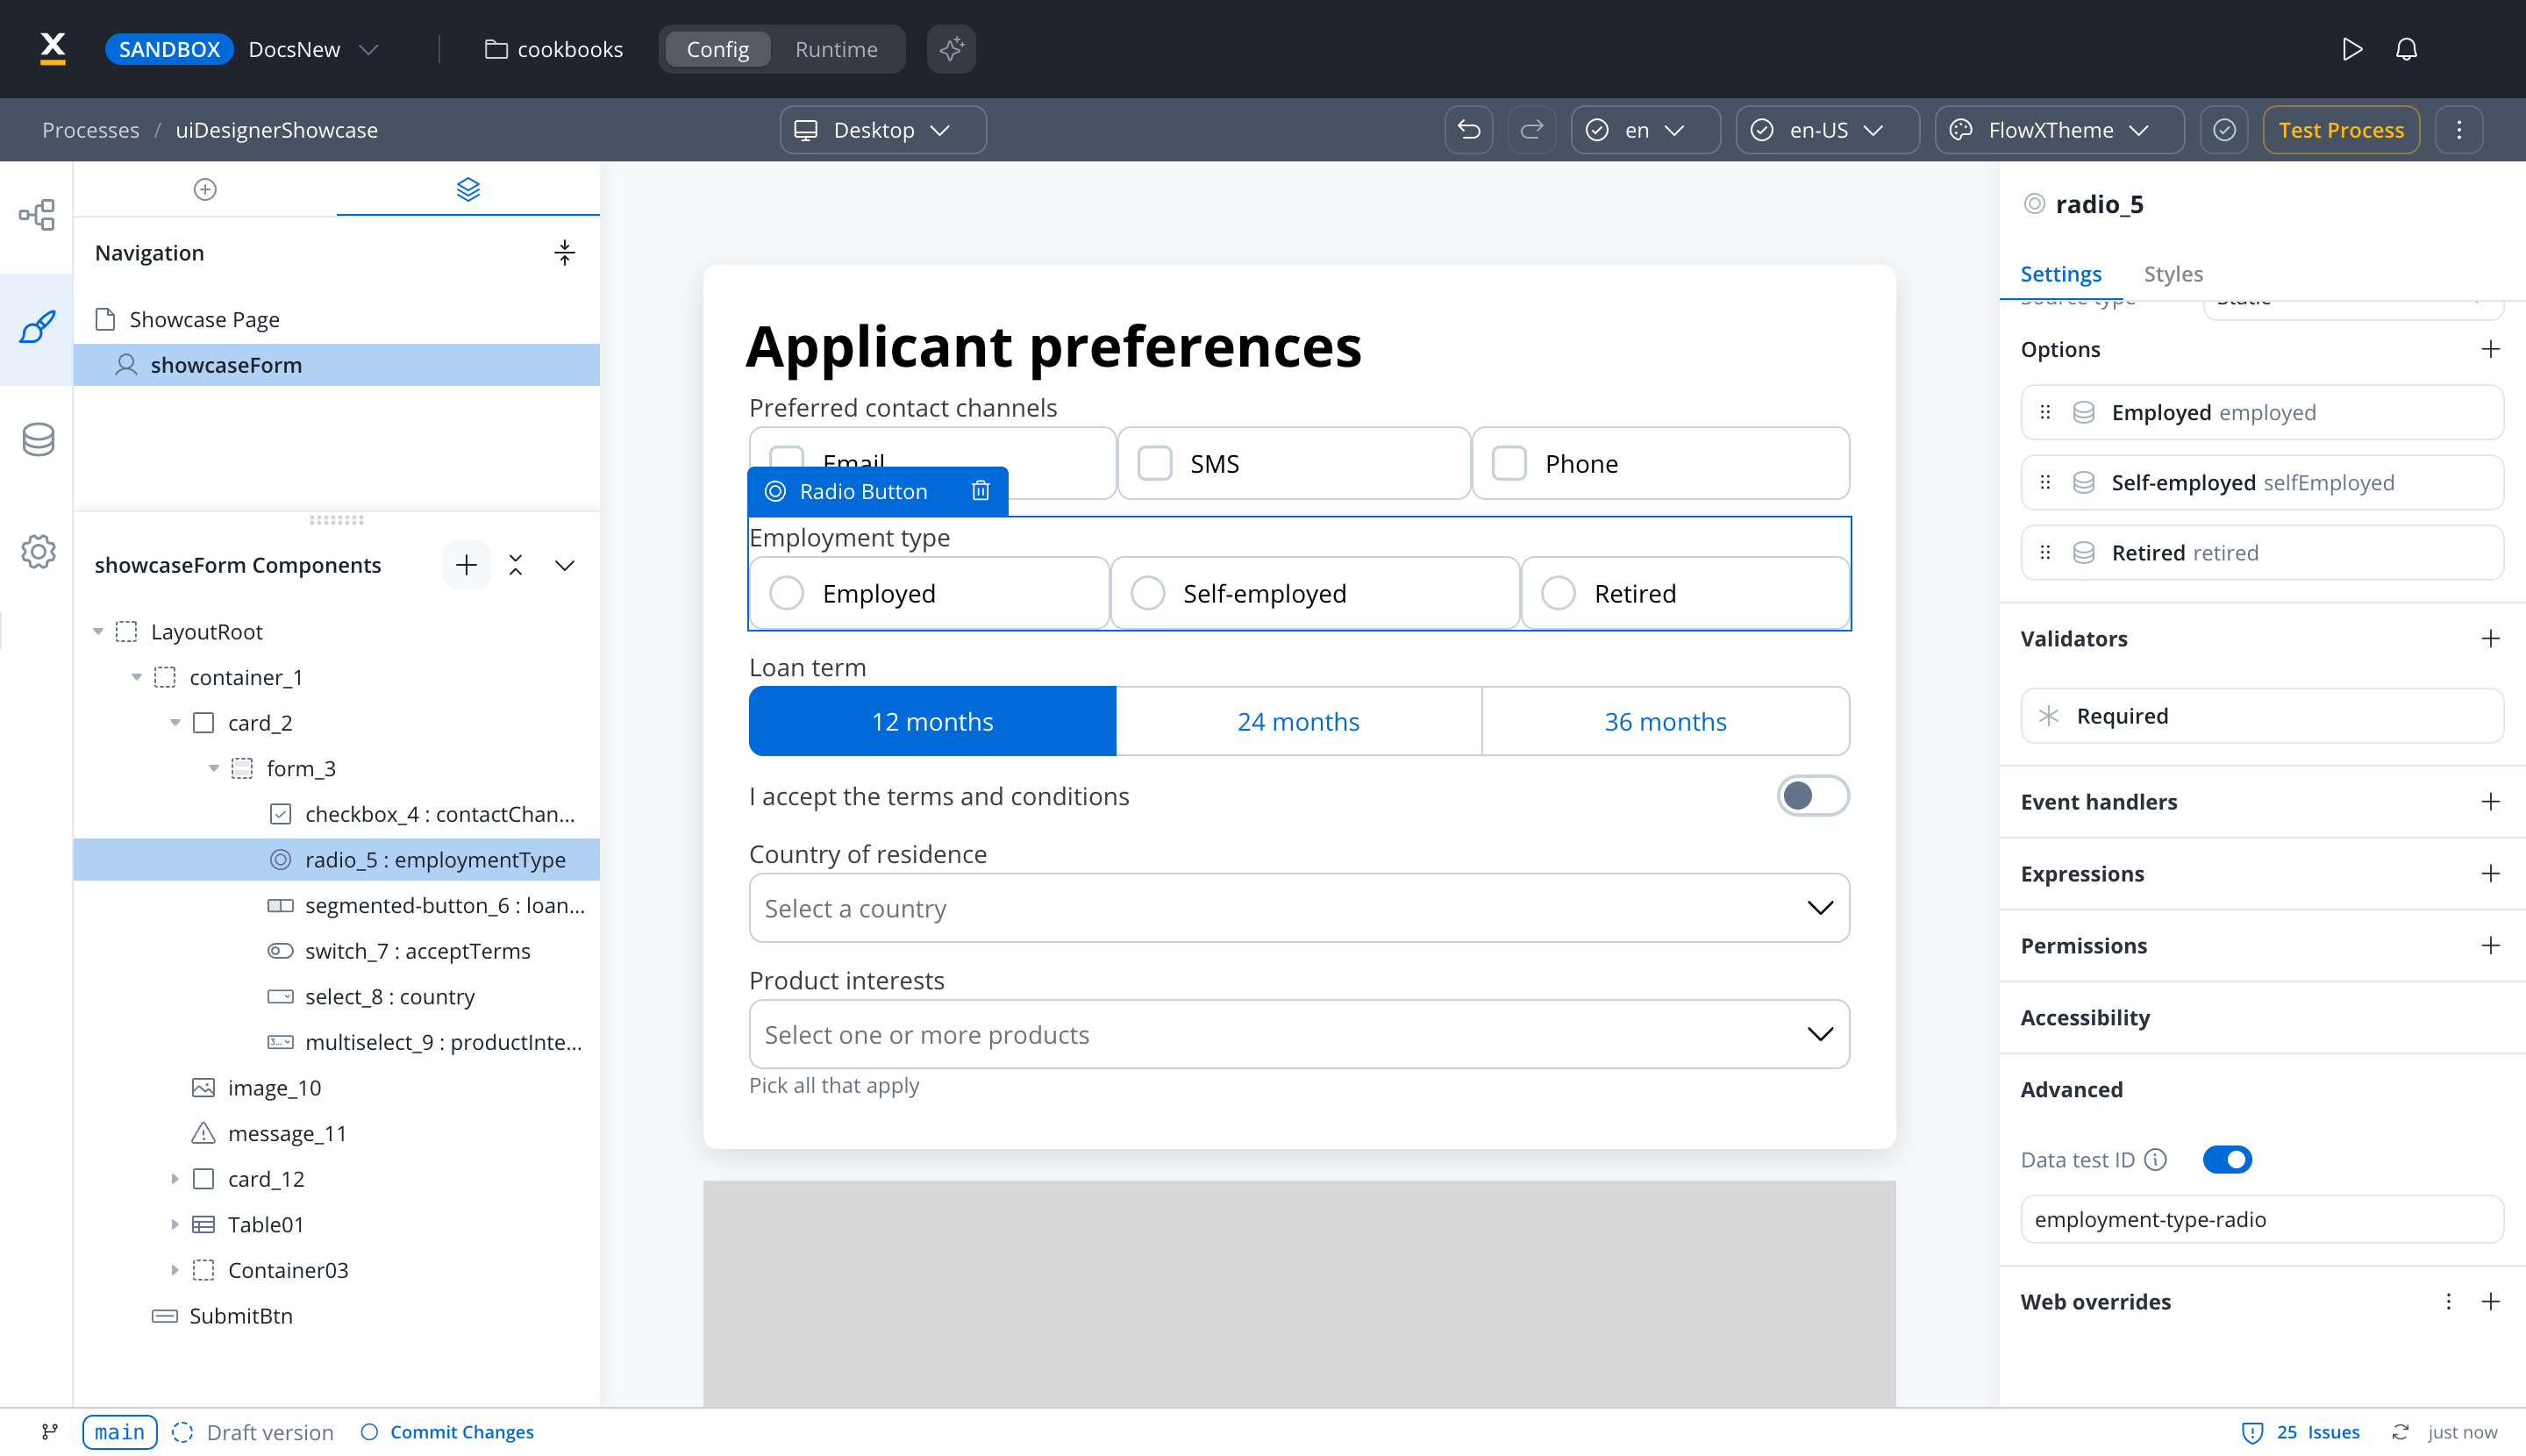
- Data test ID - add custom test identifiers for automated testing and element interaction. This field is in the Settings tab under Advanced, not in the styling options
Data Test ID
The Advanced section of the Settings tab includes a Data test ID field, allowing you to assign custom identifiers to UI components. This feature enhances automated testing by providing meaningful, easily identifiable selectors for UI elements. Key benefits:- Replace auto-generated test IDs with custom, readable identifiers
- Simplify element targeting in test scripts
Tree view
The Tree View panel displays the component hierarchy, allowing you to navigate through the different levels of the interface. Clicking on a specific component in the tree will highlight the selection in the editor, helping you locate and modify it.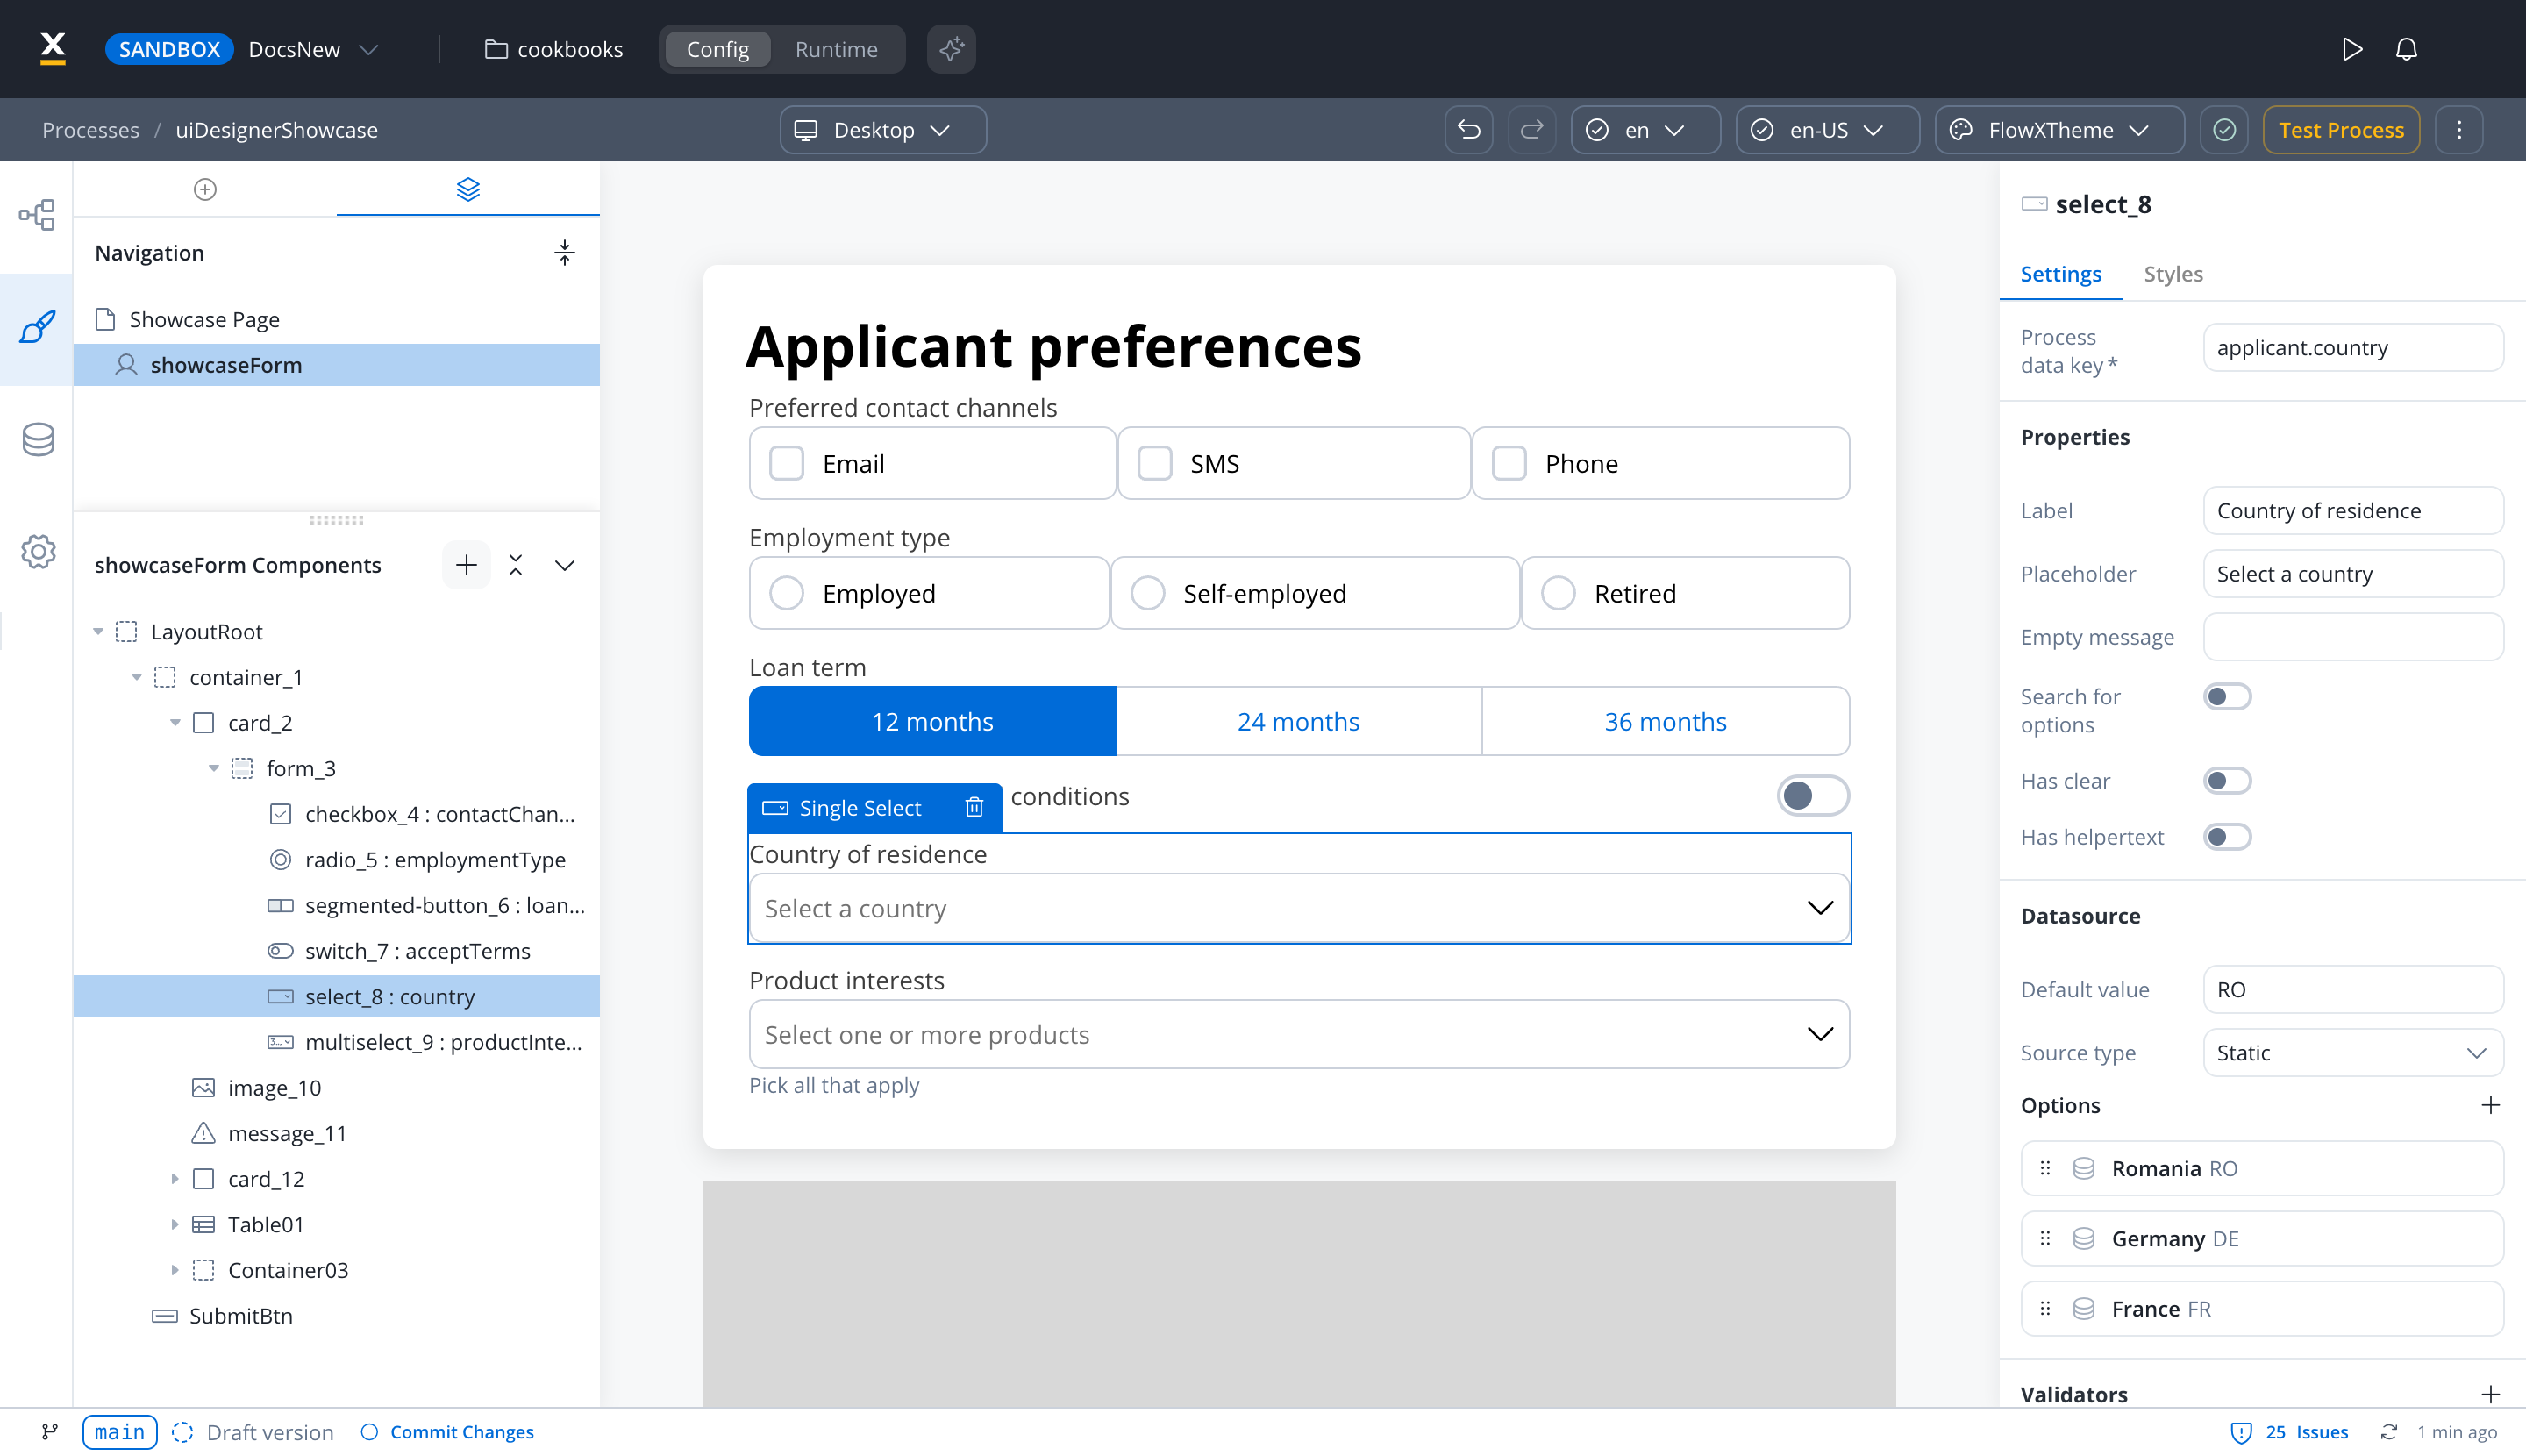
Navigator in the left panel
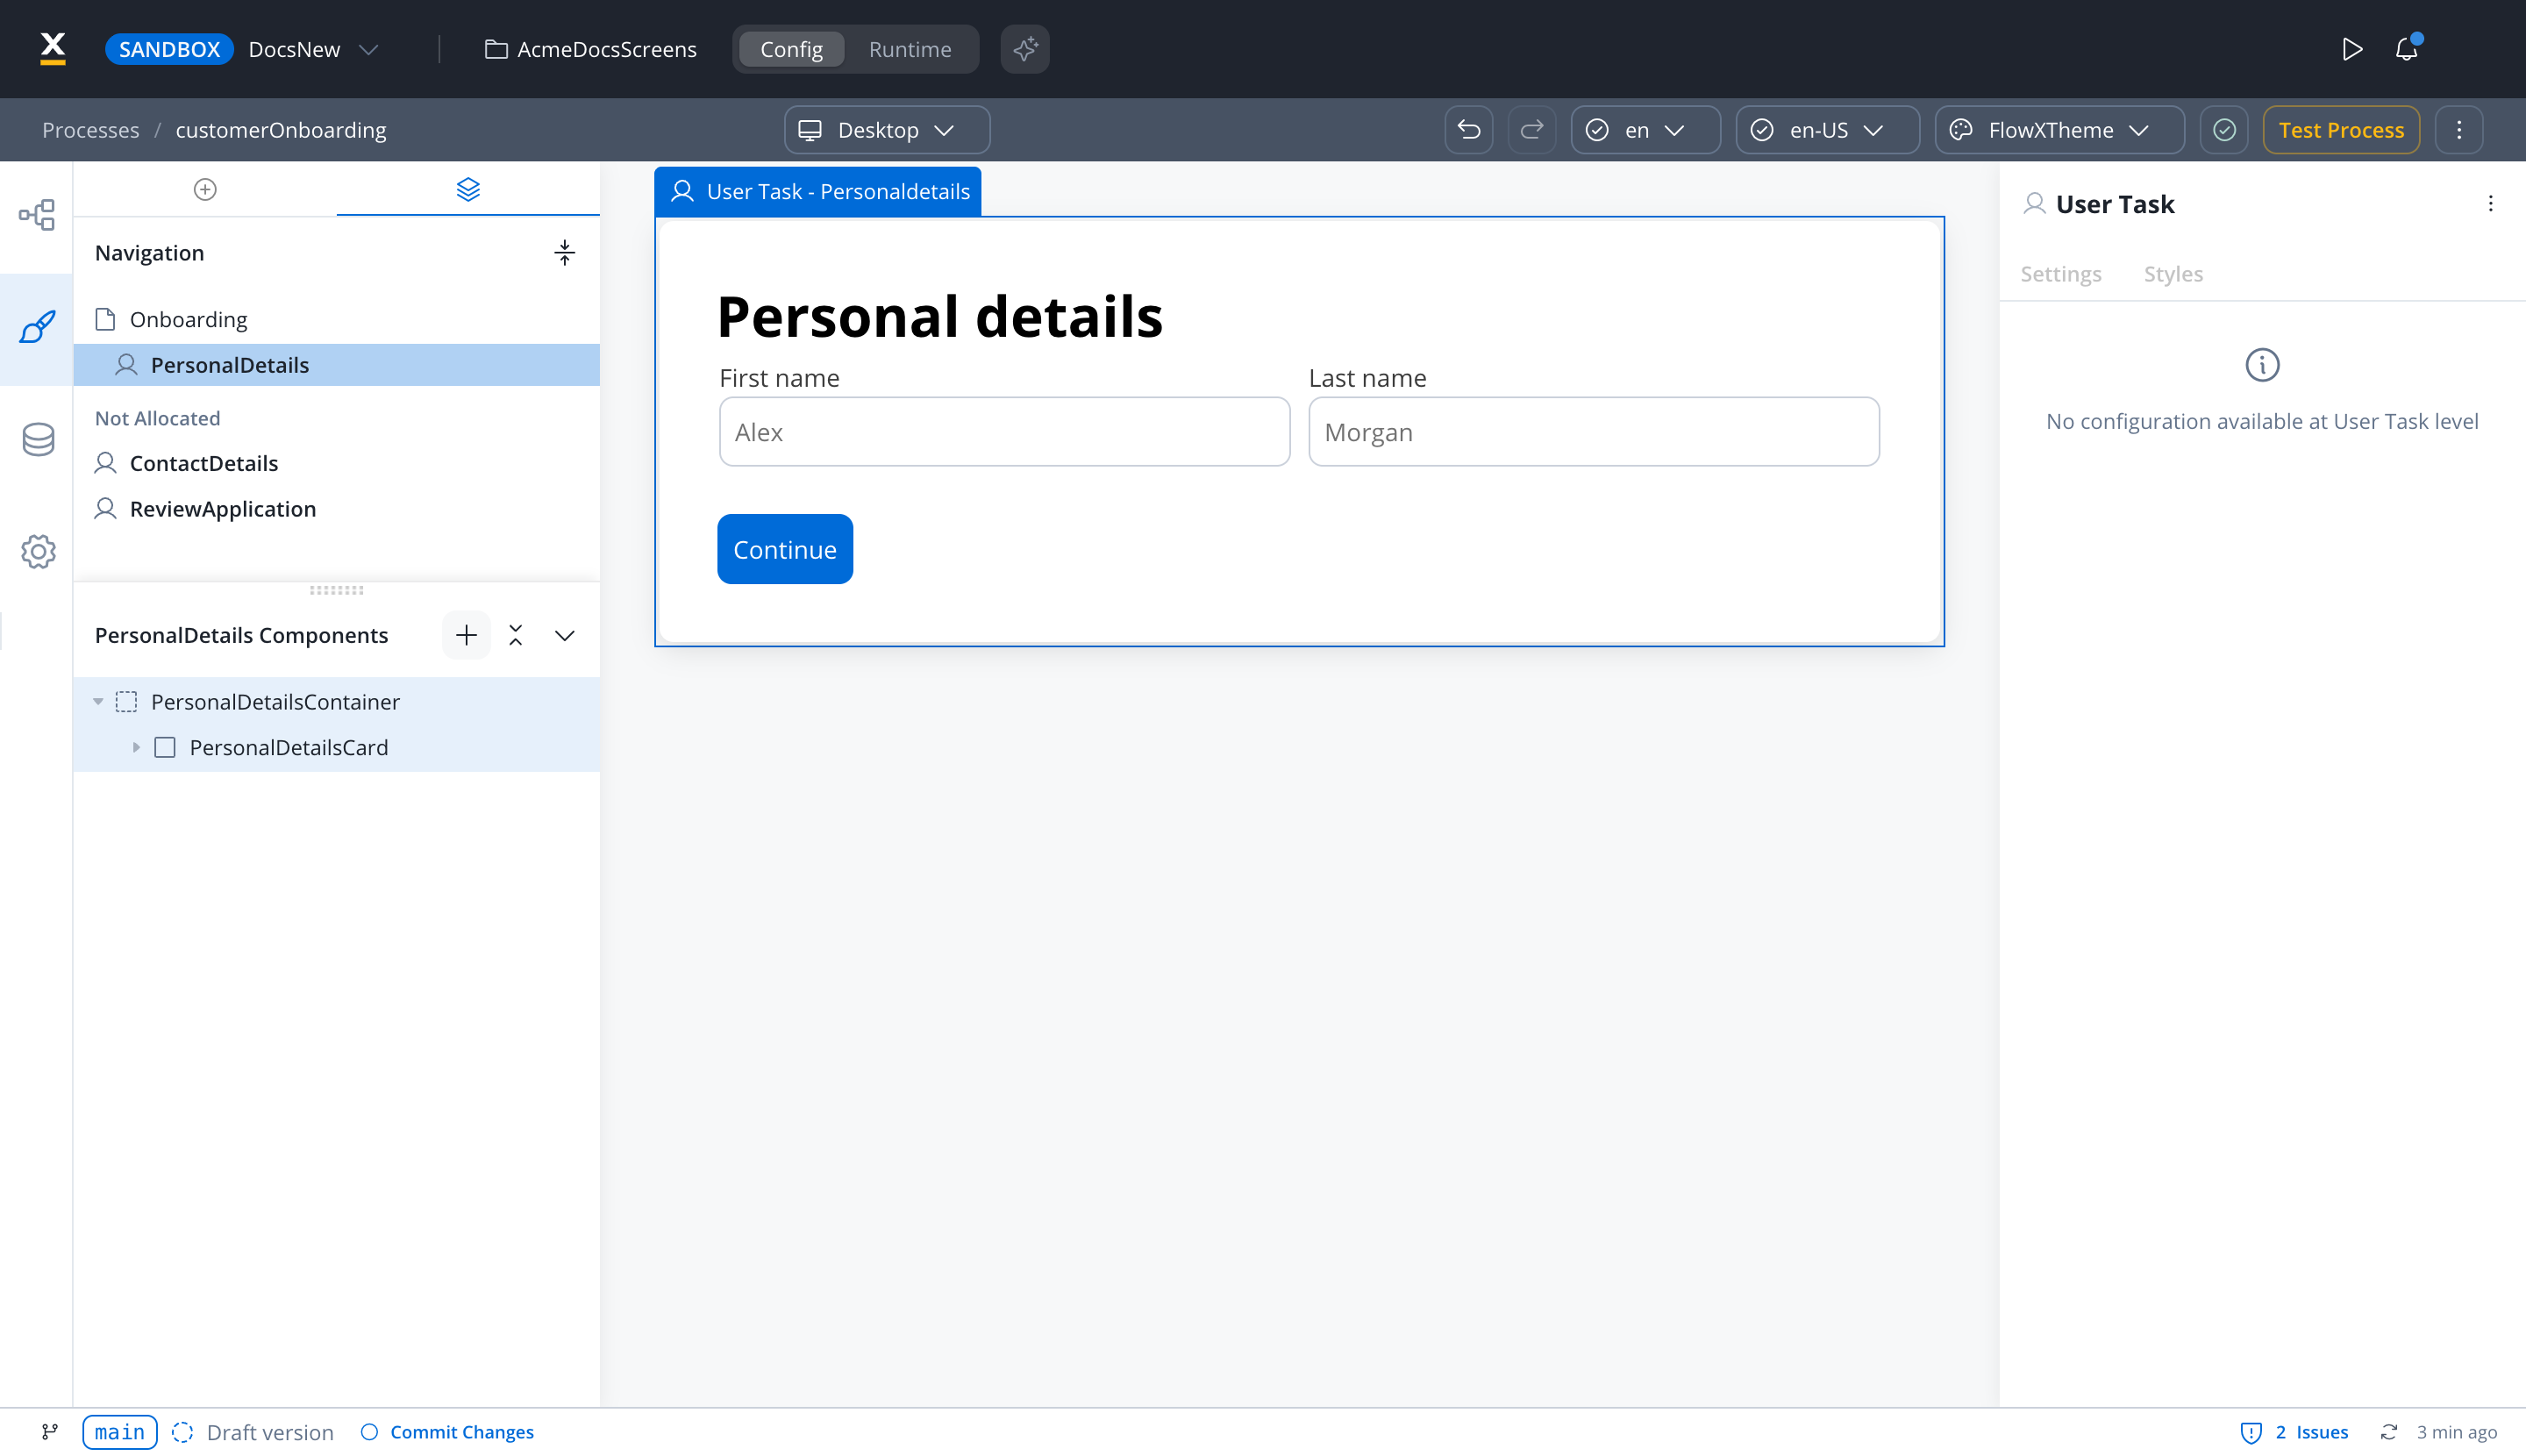
Navigation section
The top section, Navigation, lists the navigation roots of the process for the selected platform. User tasks that are not assigned to any navigation area appear under a Not Allocated heading.- Select a navigation root to open it. The open root expands to show its nested navigation areas, user tasks, and embedded subprocesses.
- On an embedded subprocess row, select Open Subprocess to open that subprocess.
- Use the view toggle (Switch to dropdown view / Switch to list view) to collapse the list into a searchable Select a root dropdown.
- When the process allows read-only mode, a filter button offers Filter Nodes by → Visible in Read-Only Mode or View All. With Visible in Read-Only Mode selected, entries that are not visible in read-only mode are dimmed and marked with a crossed-out eye icon.
Components section
The bottom section,<name> Components, is named after the current selection, such as a navigation area or user task, and shows its UI component tree. Use Add UI Component to add components and Collapse All to fold the tree. A user task holds a single root component, so the add button is turned off once the root exists.
When there is nothing to show, the section explains why:
When a user task, UI Flow, or reusable UI template has no components yet, the canvas shows the same UI Designer empty state in all three, with a shortcut to add the first component or generate the layout with AI, depending on your permissions.
In the reusable UI template designer, the navigator shows only the components section, labeled UI Components, where you add the template’s single root component.
Copy and paste UI components
Right-click a component and select Copy (⌘C on macOS, Ctrl+C elsewhere) to copy it, together with its child components. Then select the parent component you want to paste into, right-click it, and select Paste (⌘V / Ctrl+V). Paste is available only when a single parent is selected.Paste review and cross-context paste
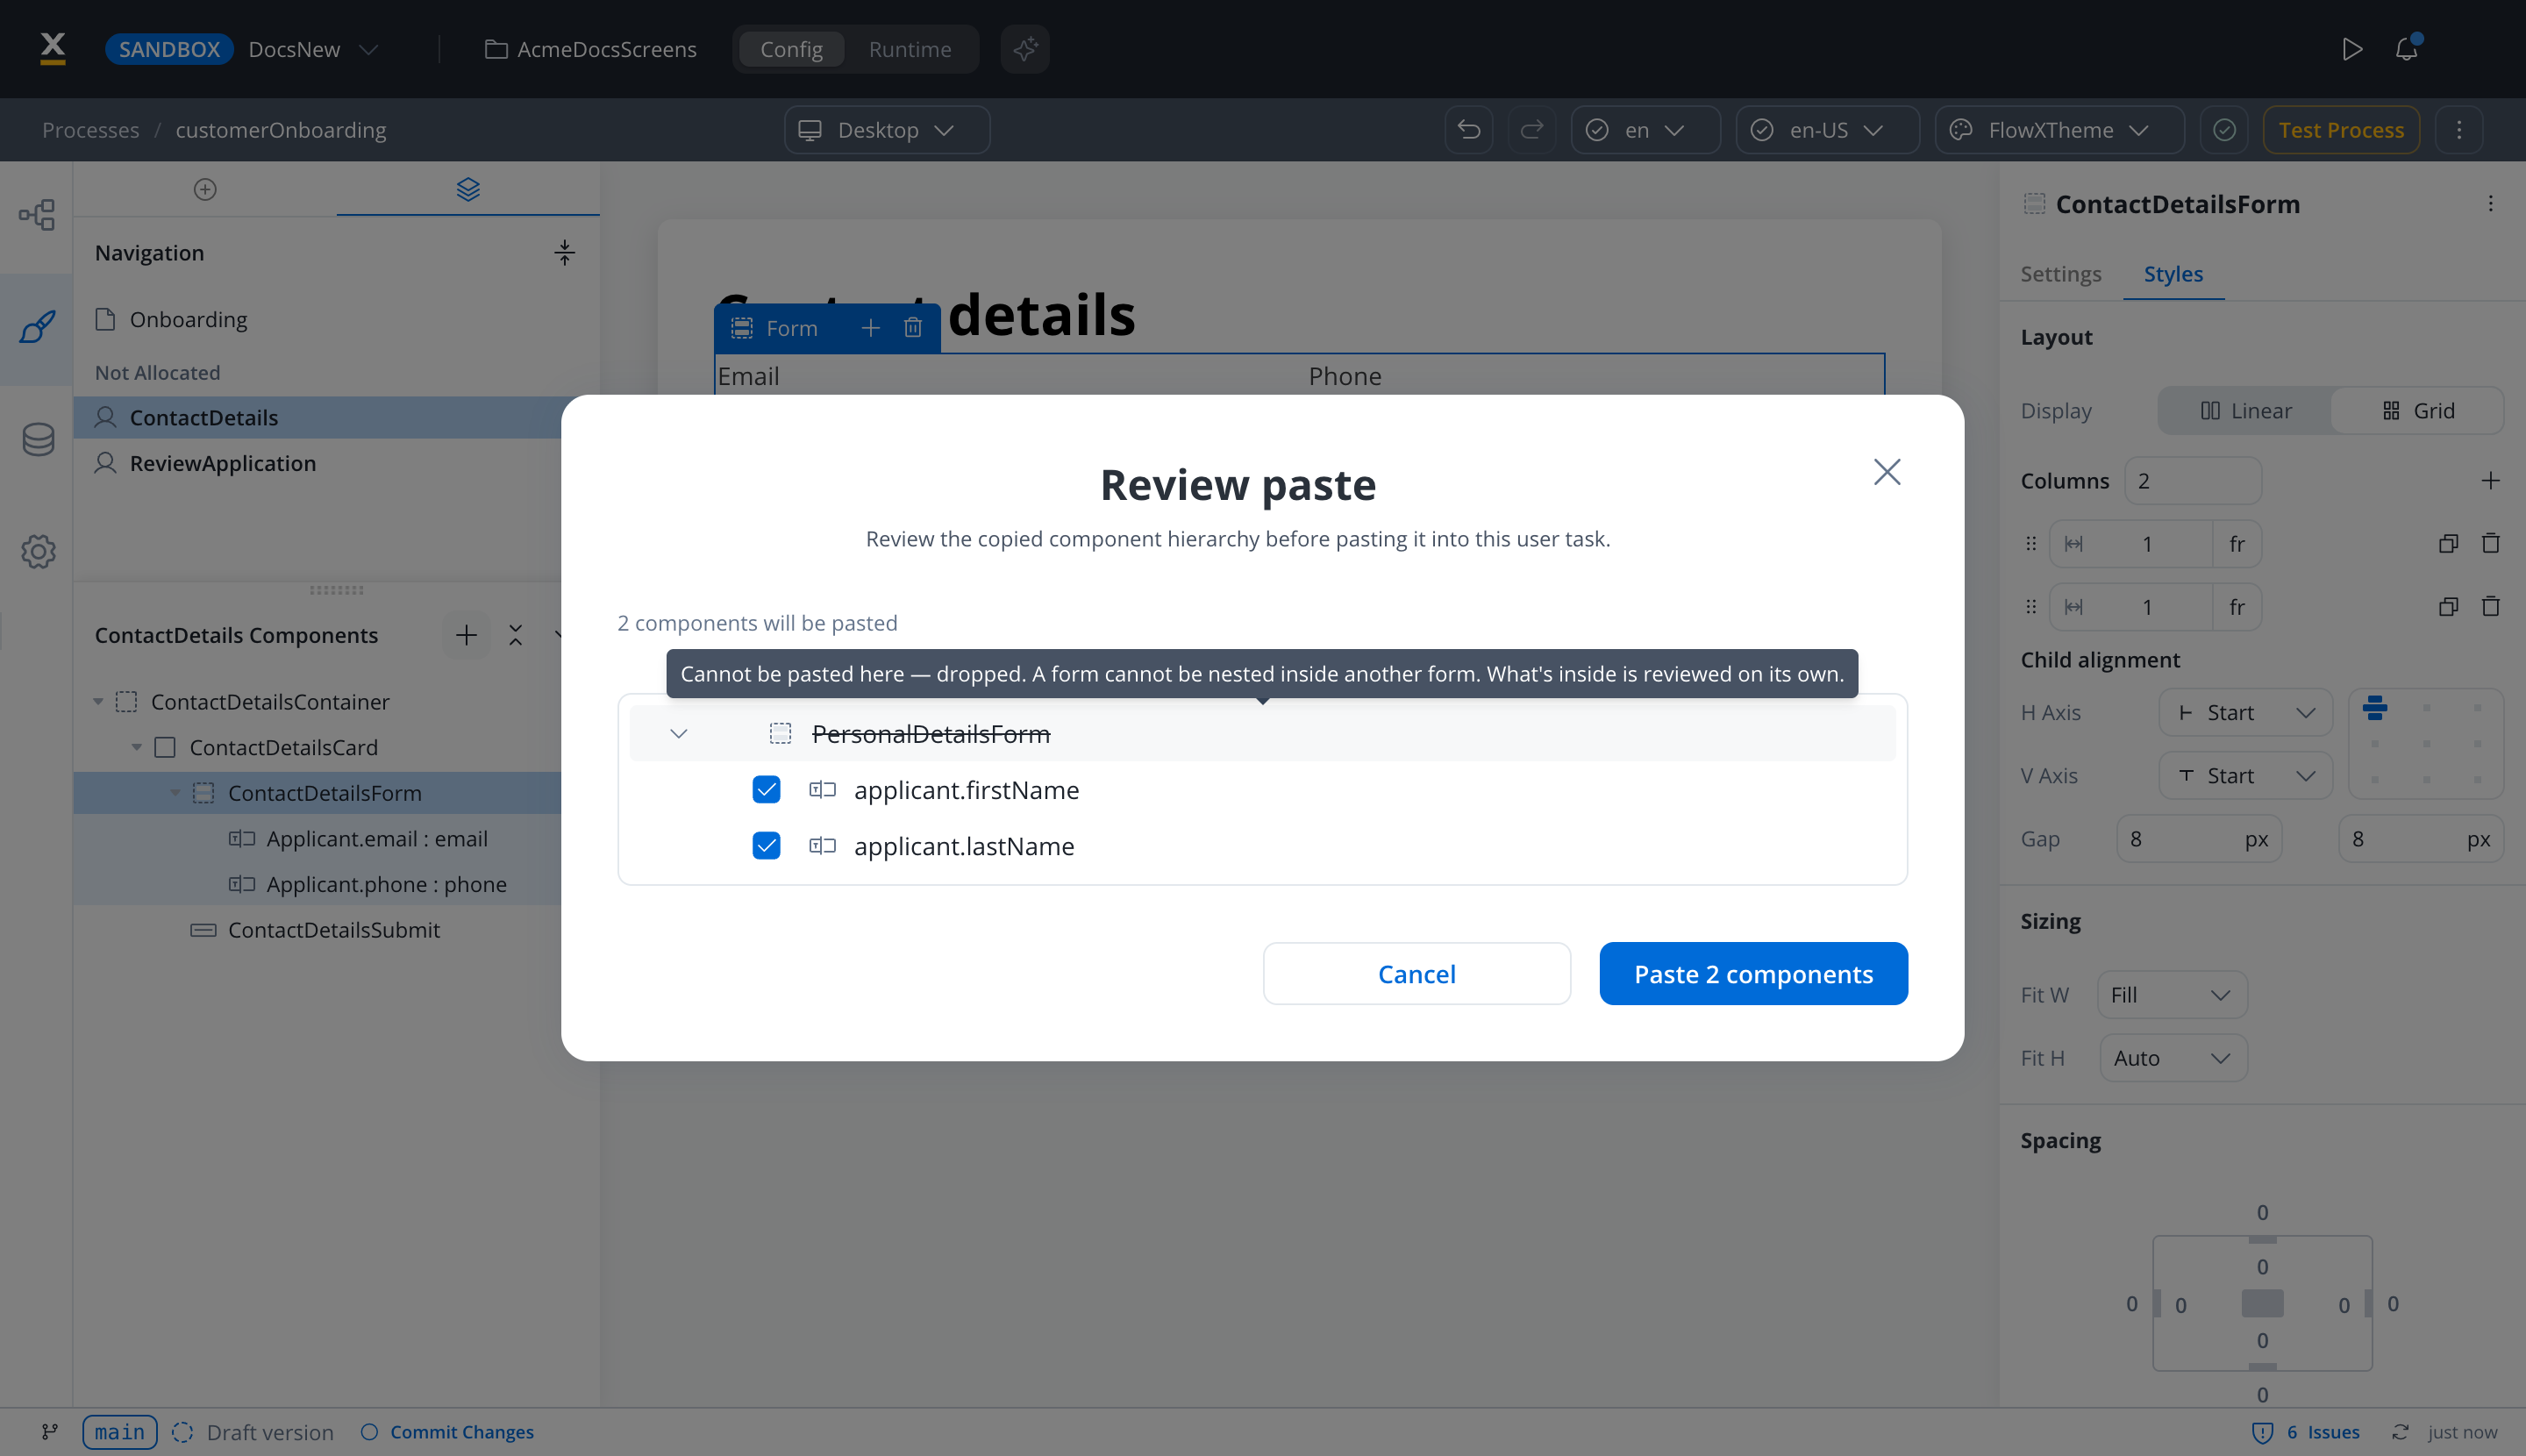
- The modal shows the copied component hierarchy. Components that cannot be placed are struck through. Hover over one to see why, and whether its child components are dropped with it or reviewed on their own.
- Top-level components carry a checkbox, so you can leave out more components before pasting.
- The summary reads N components will be pasted. Select Paste N components to go ahead or Cancel to stop.
- When nothing in the selection can be pasted, the modal is titled Paste blocked and offers only Close.
Pasted components are also fitted to where they land:
- Unique identifiers: a pasted component keeps its Component Identifier when no other component on the target screen uses it. Otherwise it gets a new generated identifier for its type, such as
Button02, that no other component on the screen holds. - Data model: pasted components point to the data model of the target screen.
- Unsupported properties: properties the target cannot use are removed or adjusted in the pasted copy.
If the copied content was made with an earlier clipboard format, for example before a platform update, the paste is refused with The copied content is no longer valid. Copy it again and retry. A component also cannot be pasted into one of its own child components.